Welcome Get started
Login page
The login page enables a simplified and secure login process, supporting Deutsche Telekom’s identity providers.
Users of Telekom Login or Telekom Business Login can use their credentials to log in to T IoT Hub and IoT Store.
Existing T IoT Hub users may continue logging in with their credentials by selecting the T IoT Hub option.

Two main user roles are currently supported in our portal. User role (with a variant of read-only access as well) and Administrator role.
The Administrator role has elevated permissions and more options than the User role.
Based on the role you will be assigned, you will initially receive an email invitation detailing the steps you need to follow in order to log in.
If you do not already have a Telekom Login or Telekom Business Login, you will need to create one. In case of Telekom Business you will also receive an extra email from Telekom Business, which is triggered automatically during your initial account registration/account creation. (You can find more details regarding our invitation process here)
Tenants
A tenant represents a space in the IoT Hub in which customers have access to their own data and services. This means each customer must have its own tenant in the T IoT Hub to access any of the services it offers. The same requirement applies to APIs. The T IoT Hub Tenant can be configured to specify which Carrier IoT Platforms it has access to. The access permissions associated with the user credentials used to log in to the Carrier IoT Platform determine which Products are accessible.
Dashboard
After logging in, the start page of the T IoT Hub is loaded. The standard layout displays all apps and functions your tenant offers.
Operational services
- Connectivity management
- Device Management
- IoT System Performance
- Cloud of Things
Dedicated services
- IoT Creators
- IoT Solution Optimizer
- IoT Hardware
Some services can be grayed out. It means that they are not available yet, but will be added soon.
Navigation
The navigation bar at the top of the screen gives you direct access to IoT Hub inner pages, like the Connectivity Management and Device Management pages (depending on what has been activated for your tenant). Both the tiles and the elements of the navigation bar lead to the same pages within T IoT Hub.
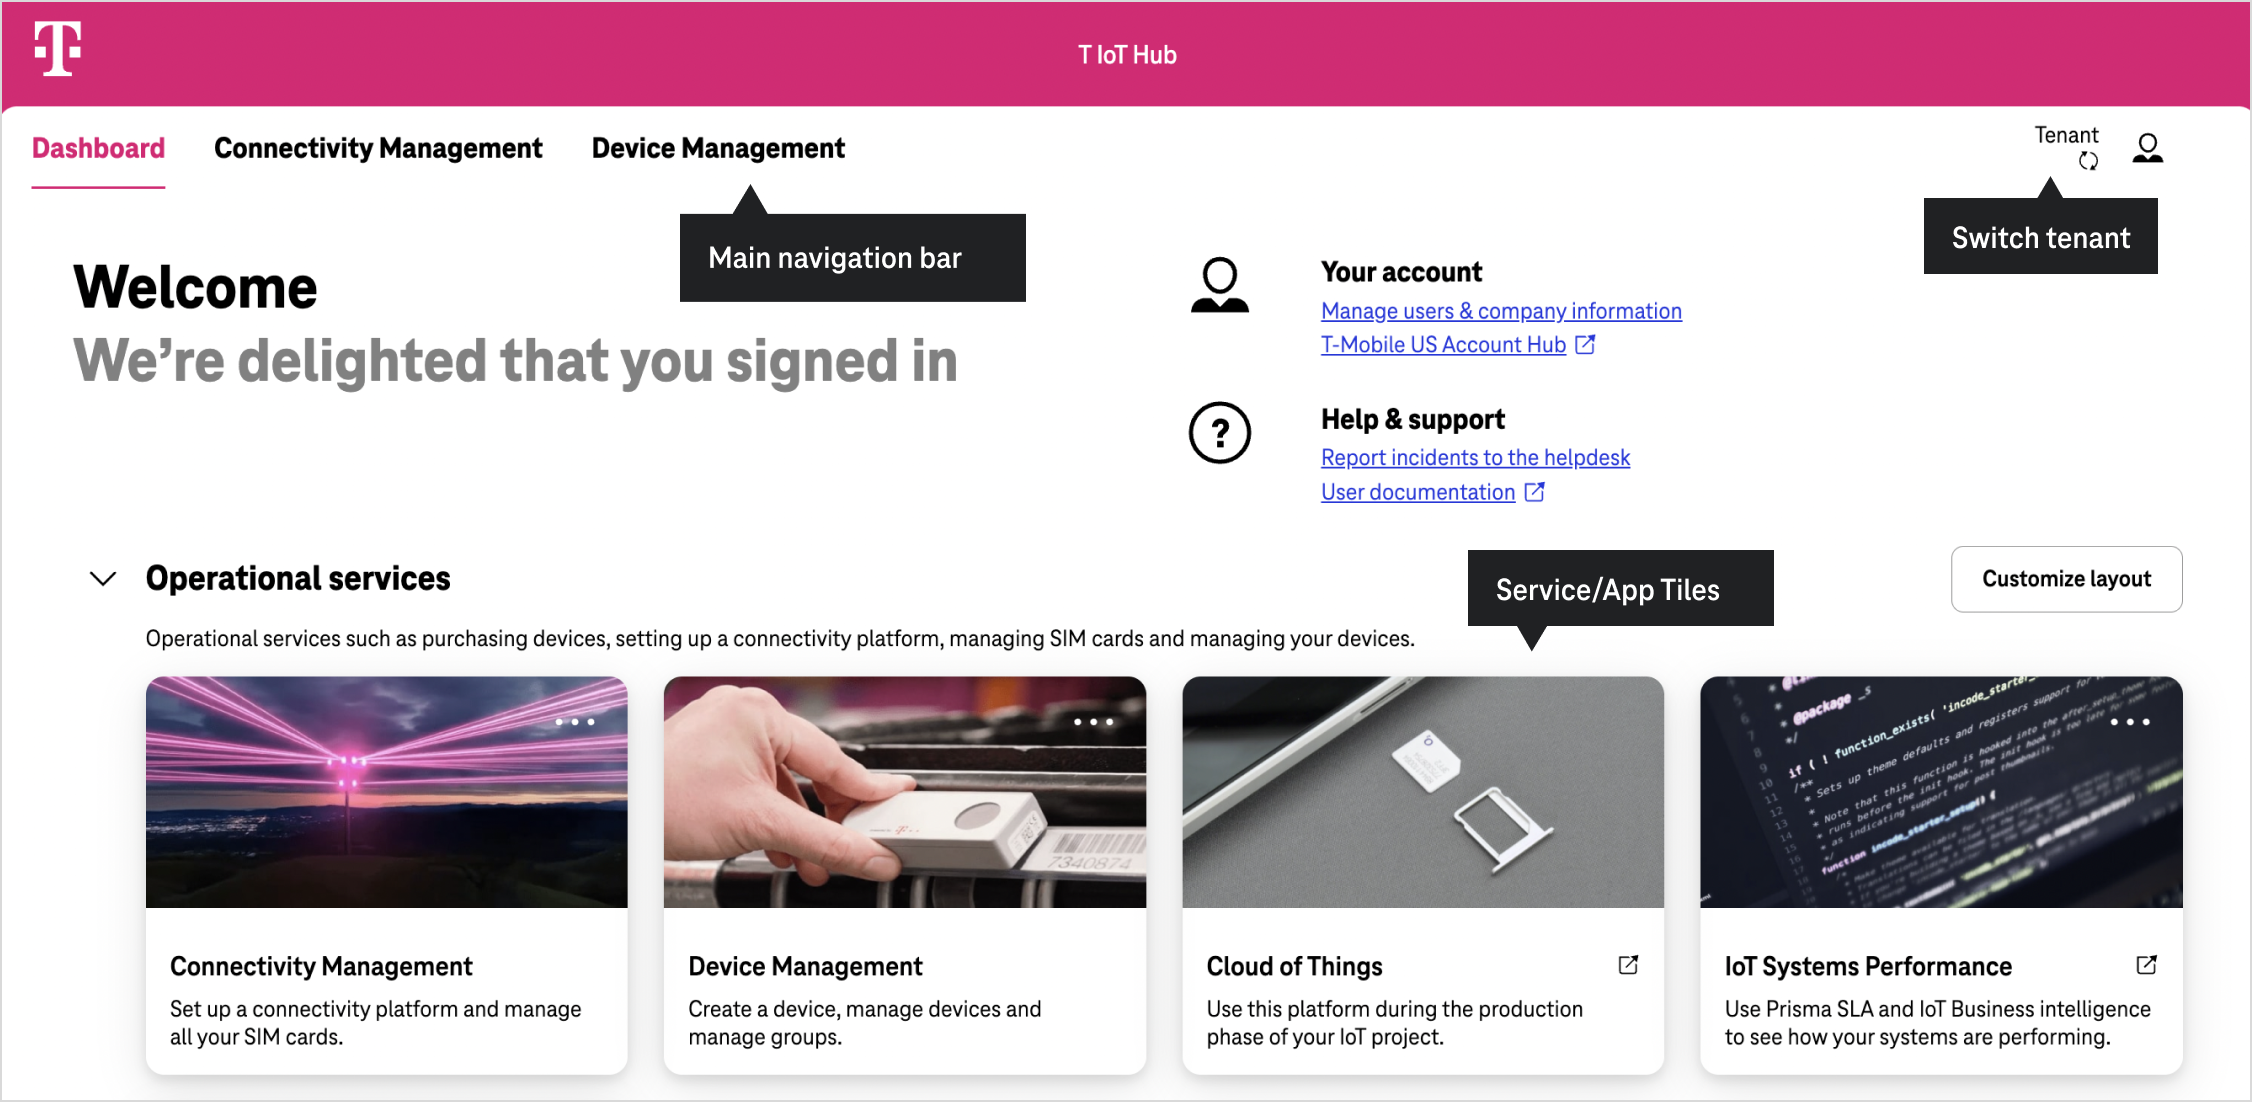
User profile and Tenant switch
In the upper right, you will find access to your user account / user profile.
If the administrator or user has access to multiple tenants, you can switch between them in the same location.
Just click on tenant name to get a selection available for you.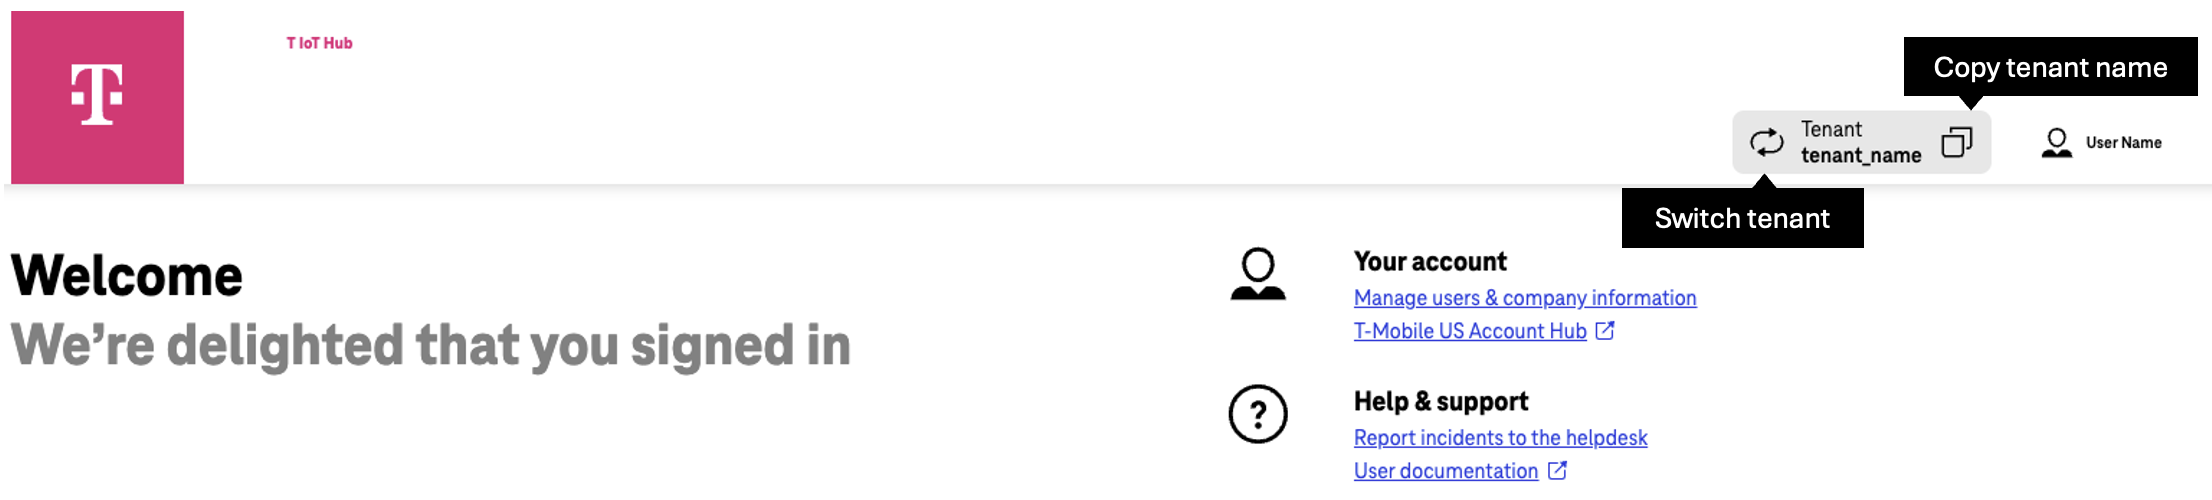 You can always copy the tenant name to clipboard by clicking on the copy icon that appears after hovering your cursor over the tenant name.
Additional services
Some tiles enable you to reach additional services. Click on the three dots menu on the upper right of tile and select one of the options.
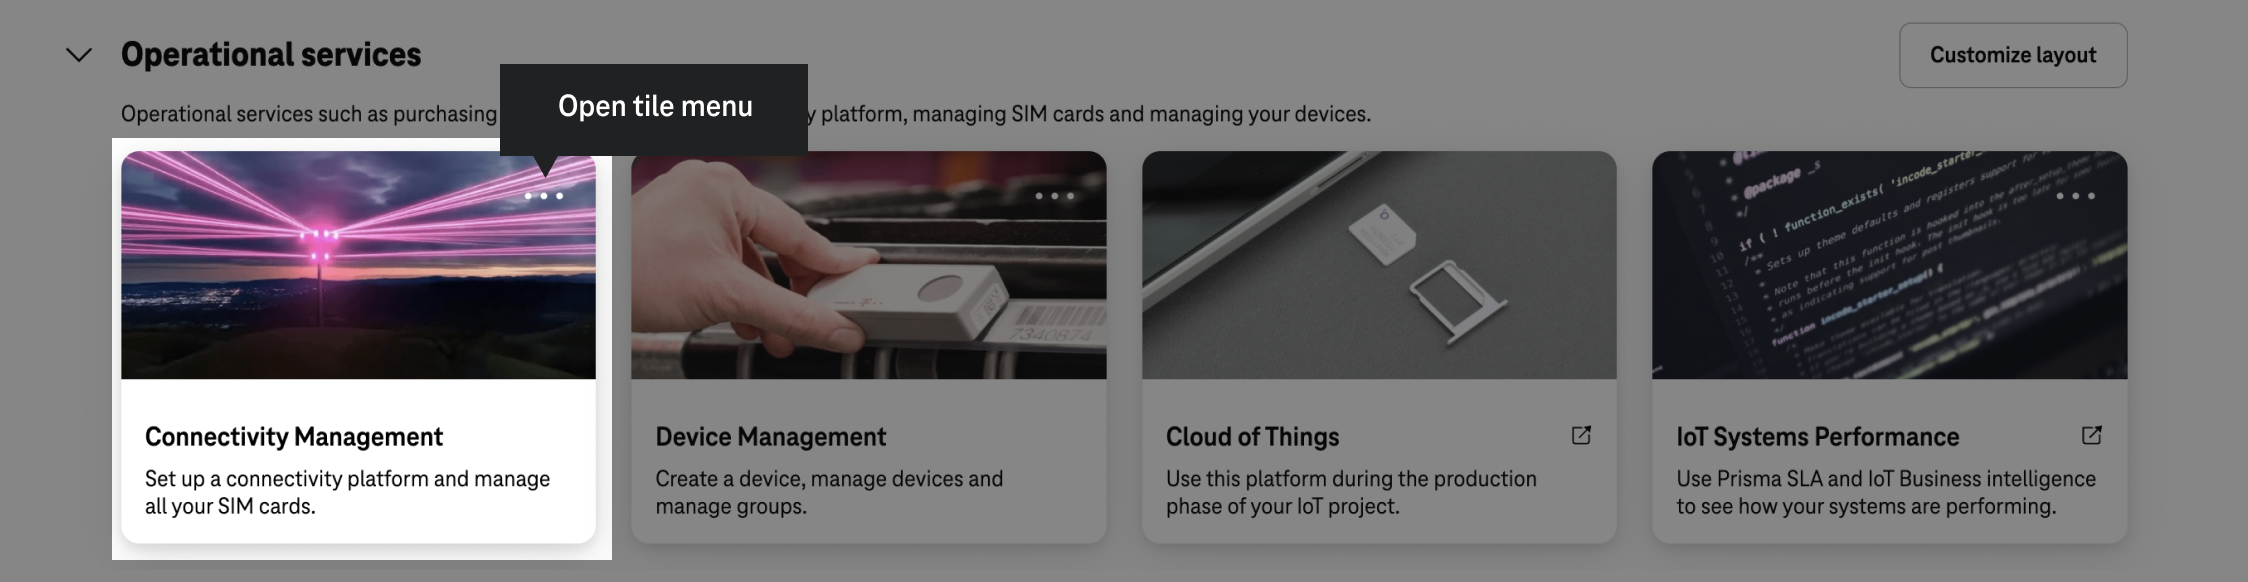
Depending on the tenant setup, the apps displayed in the navigation bar may vary.
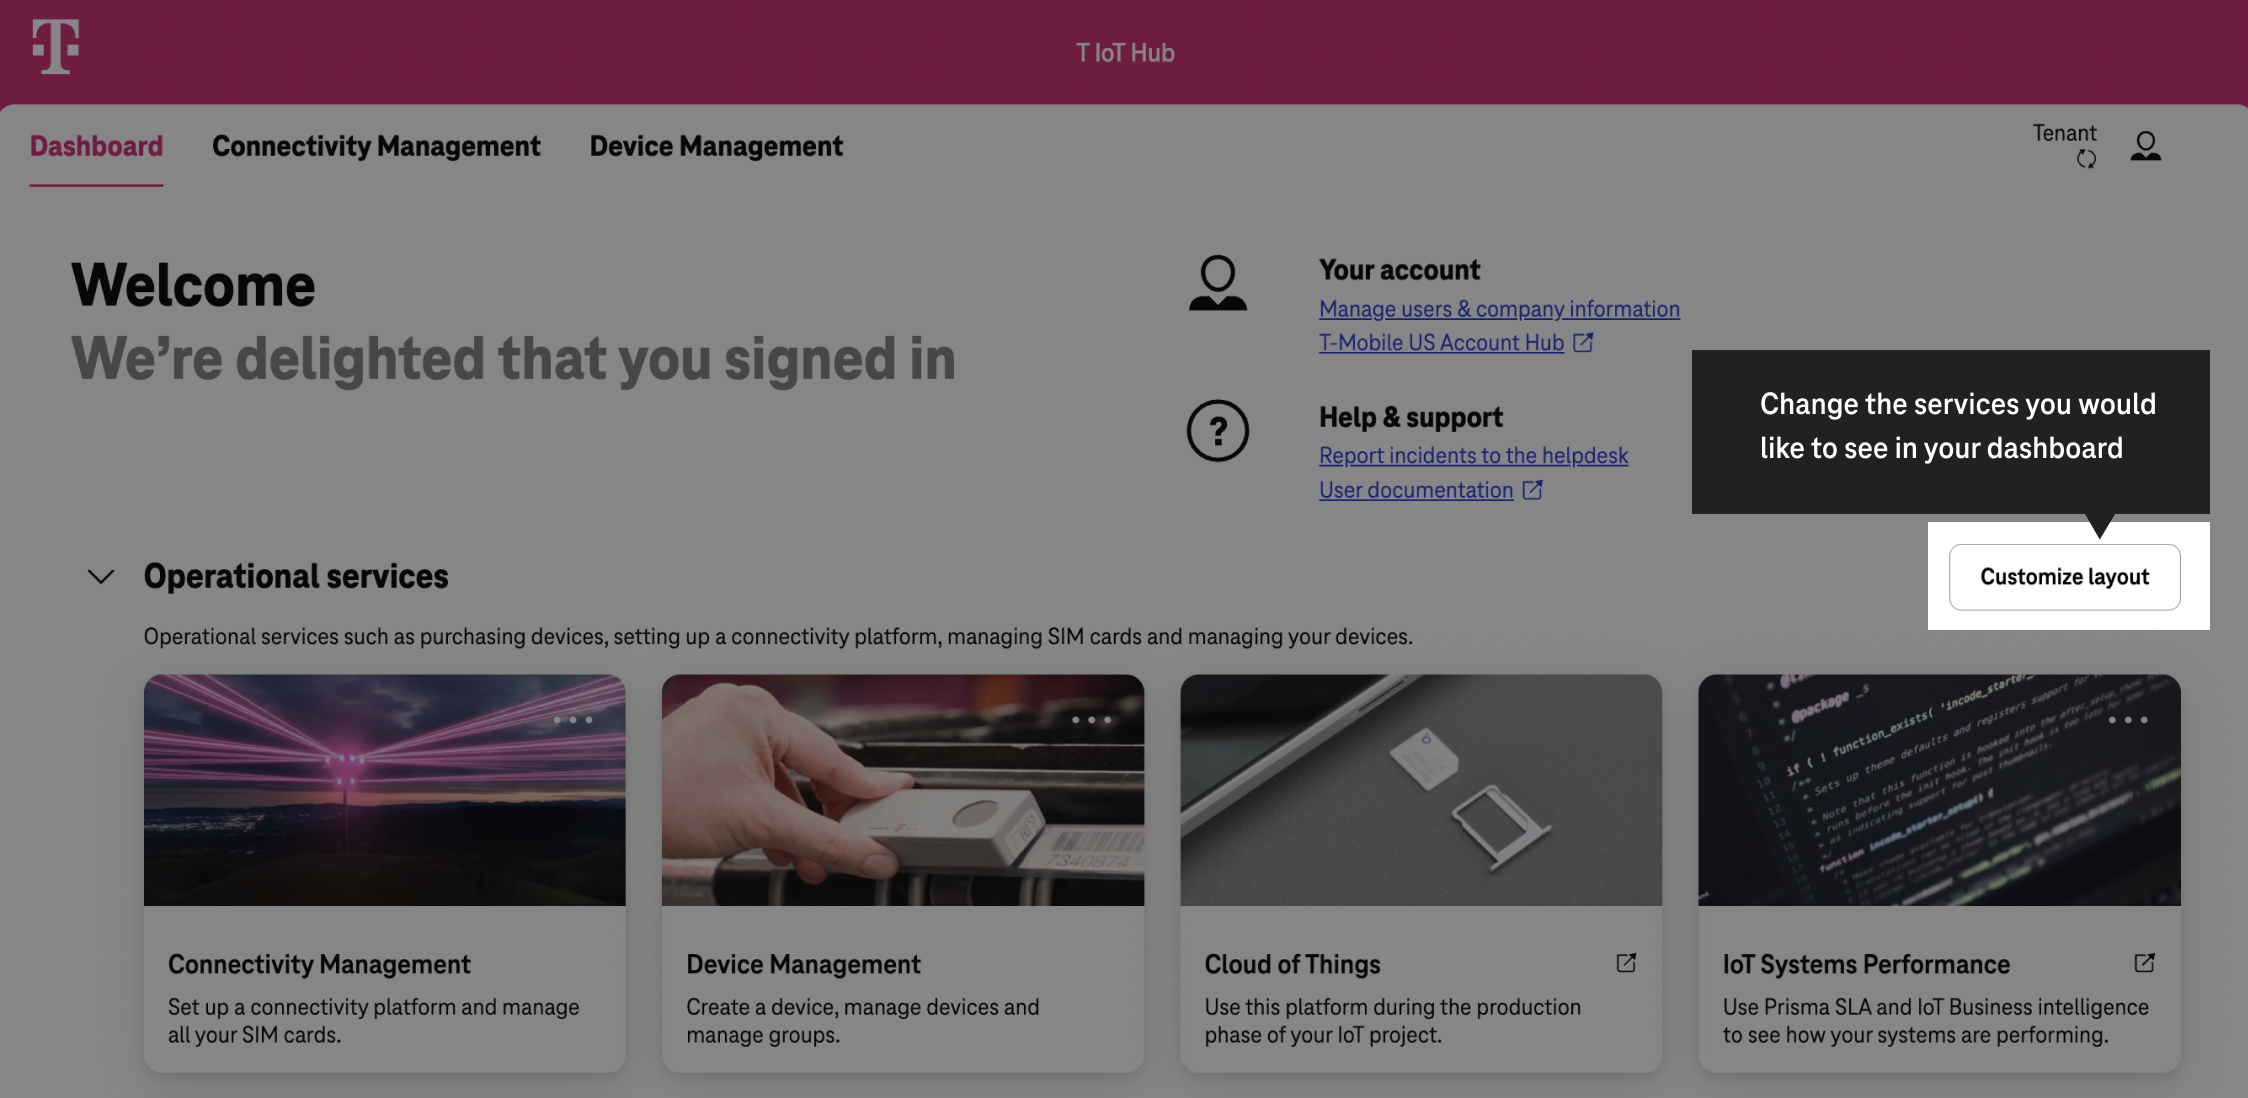
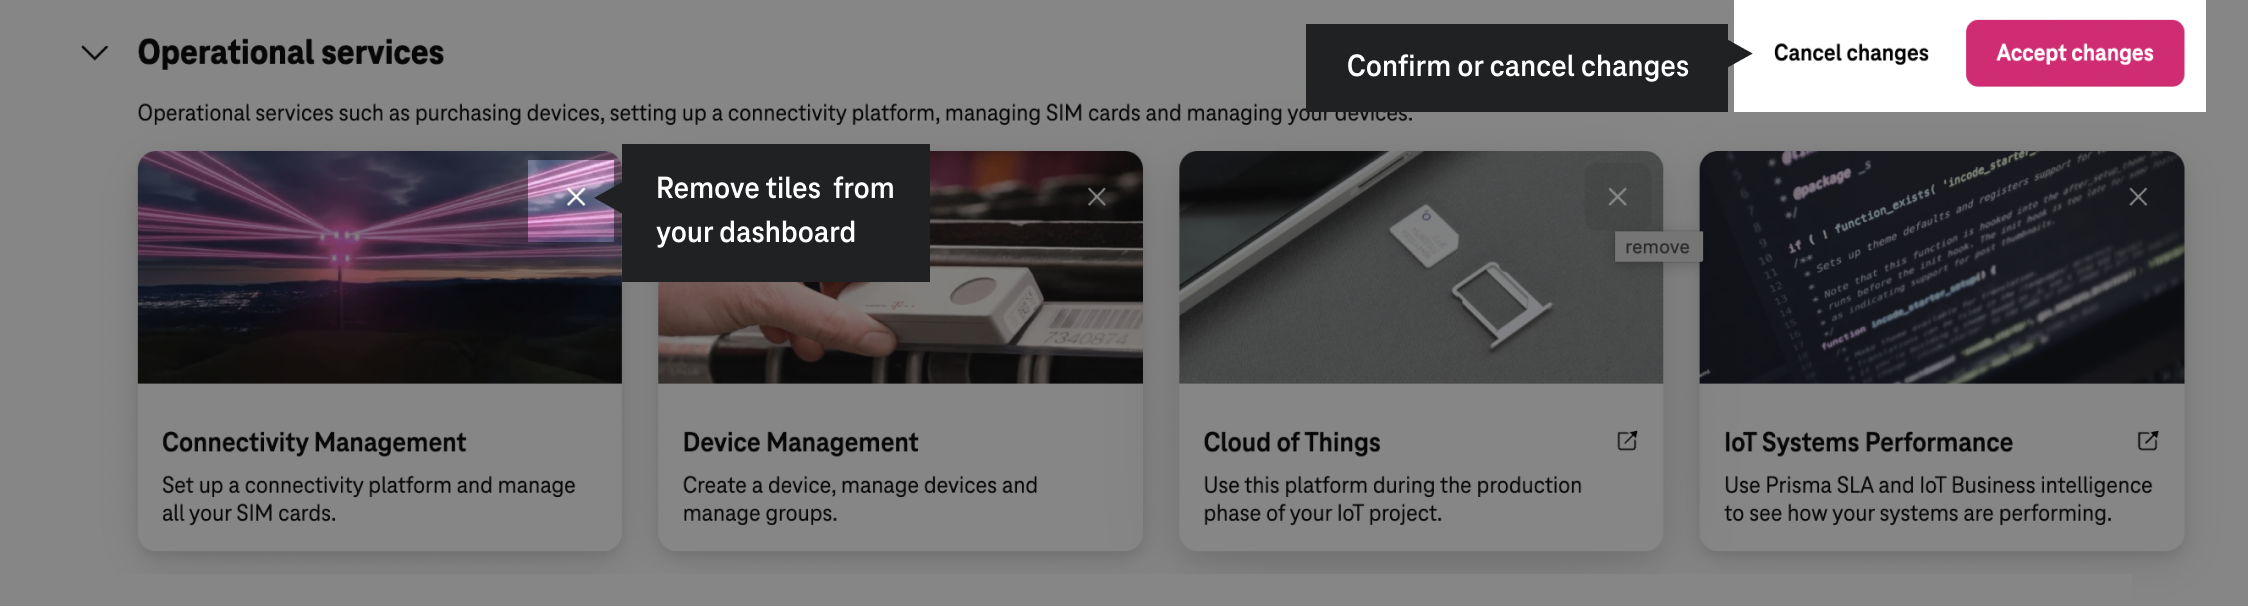
Customize layout
Pressing the Customize layout button allows the user to add / remove tiles that have been activated for this tenant. It is also possible to re-arrange the tiles (change the order they are displayed).
Simply press the Add tiles button.
The menu will display all available operations to add and manage tiles.
You can Remove tiles by clicking on the “Cross” icon on the tile.
- Depending on the tenant, an arbitrary number of tiles can be added, linking to pages and services.
- If all tiles of the selected tenant are displayed, the add tile button is not available.
- For more information about the currently activated tiles for your tenant, please contact your company’s administrator.
- If you are an administrator and want to see more options, please contact your management.
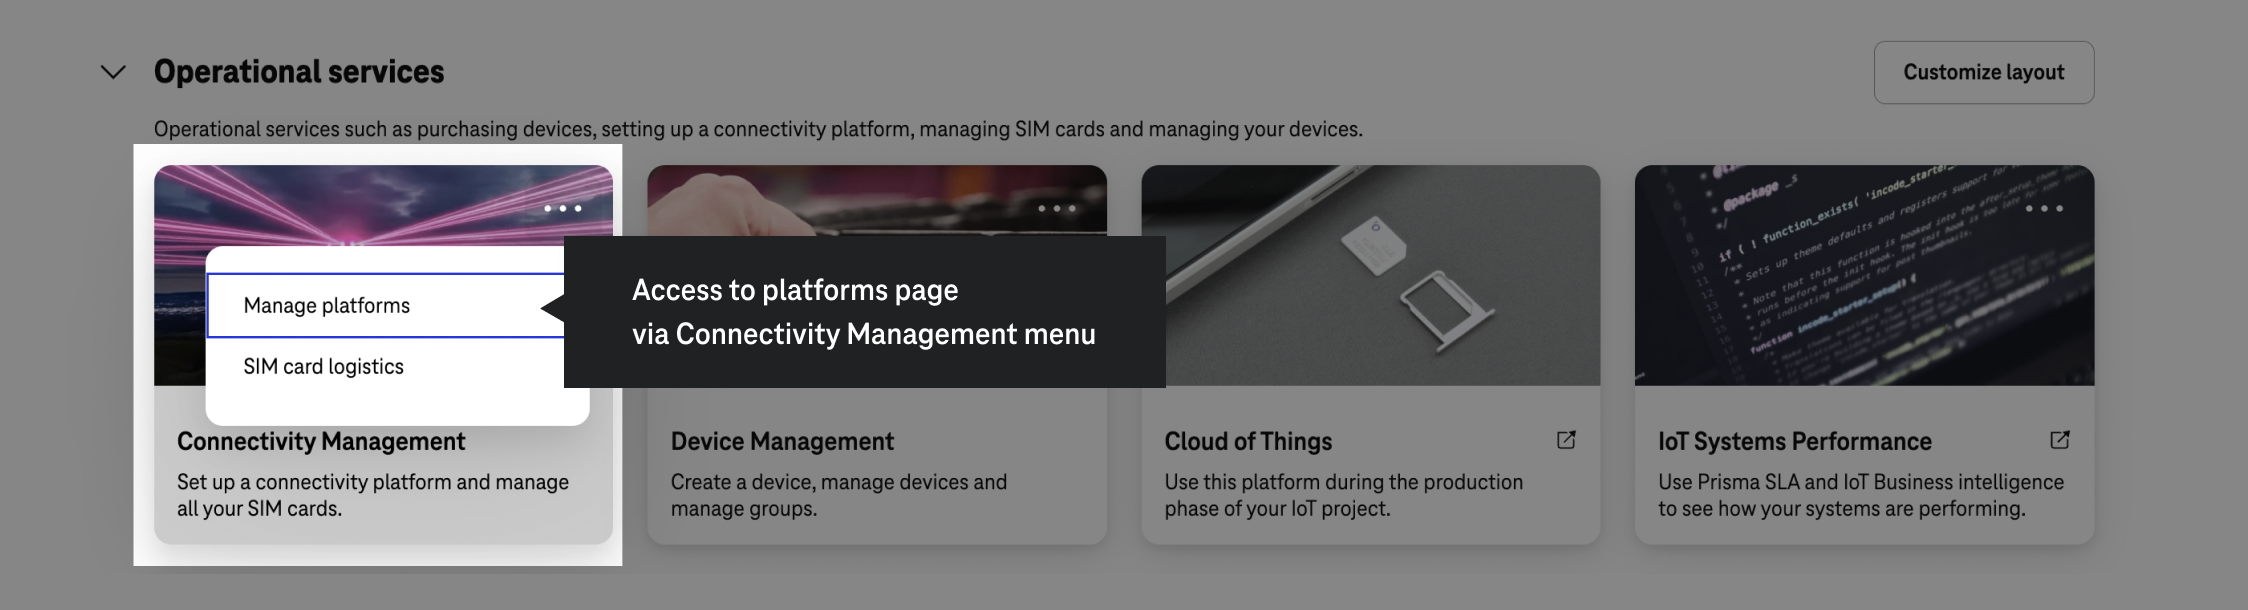
Platforms Page
The Platforms page can be accessed directly from the T IoT Hub dashboard using the menu in the Connectivity Management tile. The Platforms tile also gives an overview of available platforms.
To manage platform credentials, please go to the Platforms page.
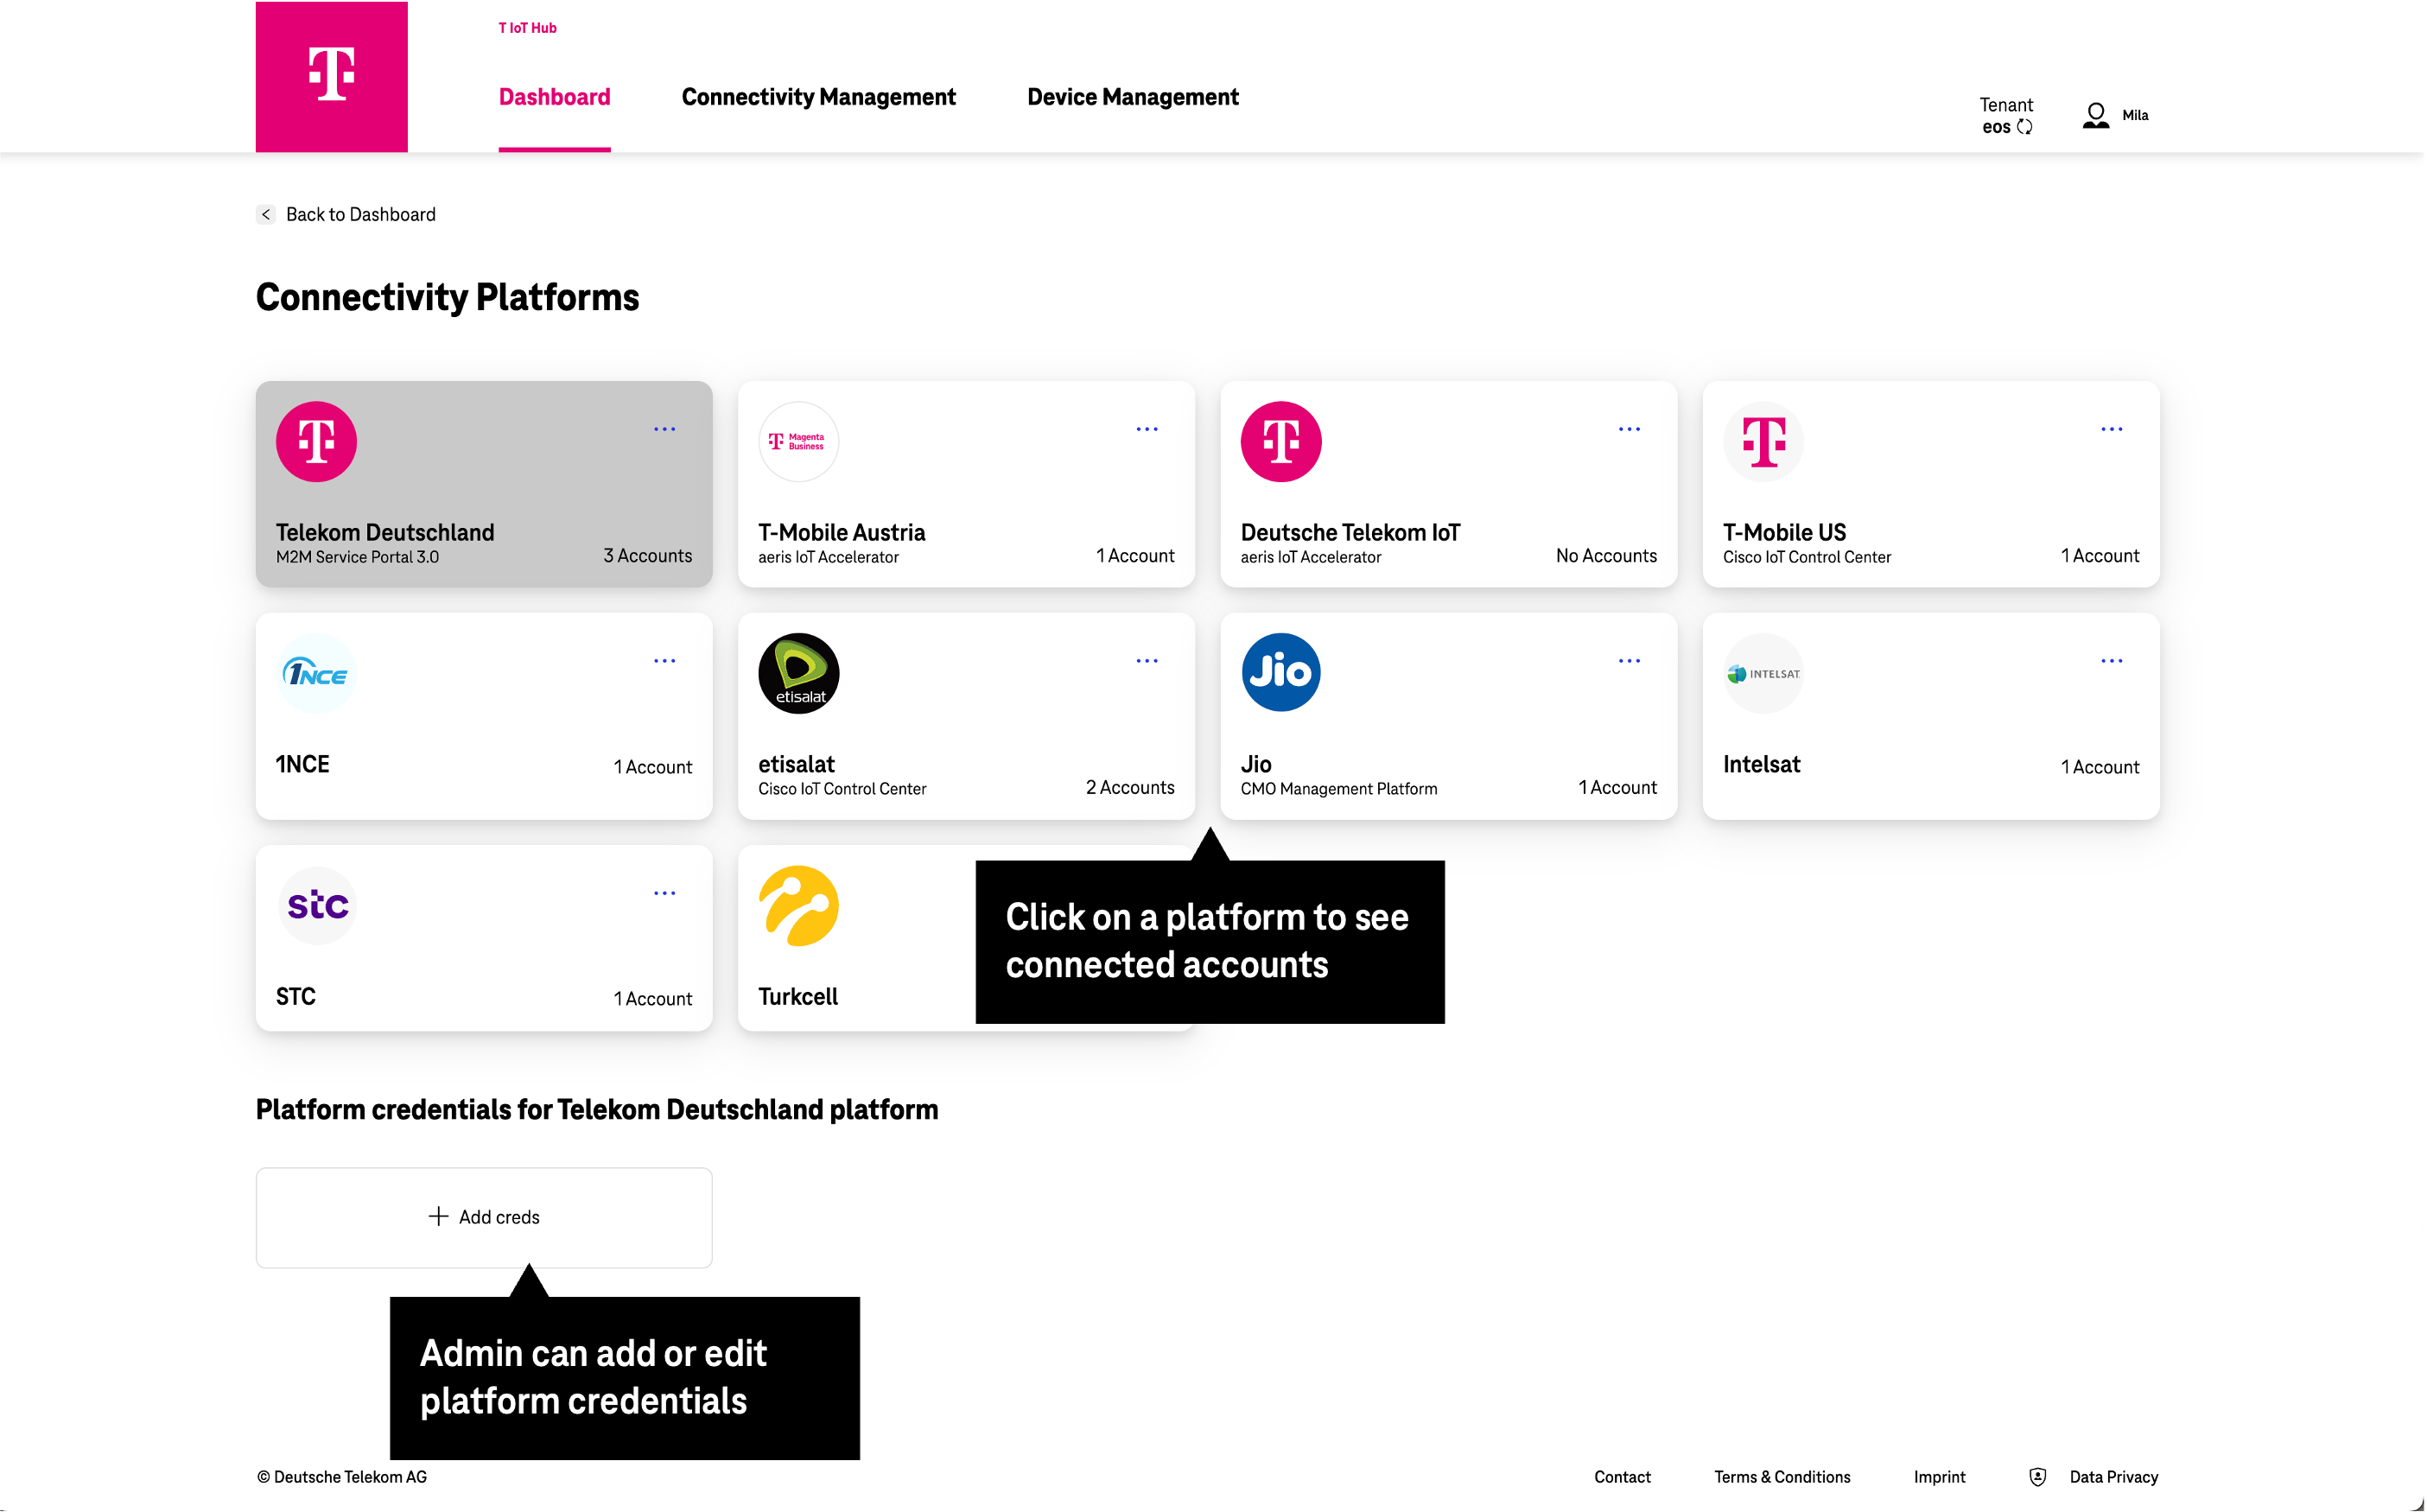
The Platforms page displays the currently compatible platforms, which can be connected to the T IoT Hub.
The list of Platforms may vary according to setting of the tenant.
When first being setup, a user with administrator role privileges needs to connect their company’s platform account with the T IoT Hub.
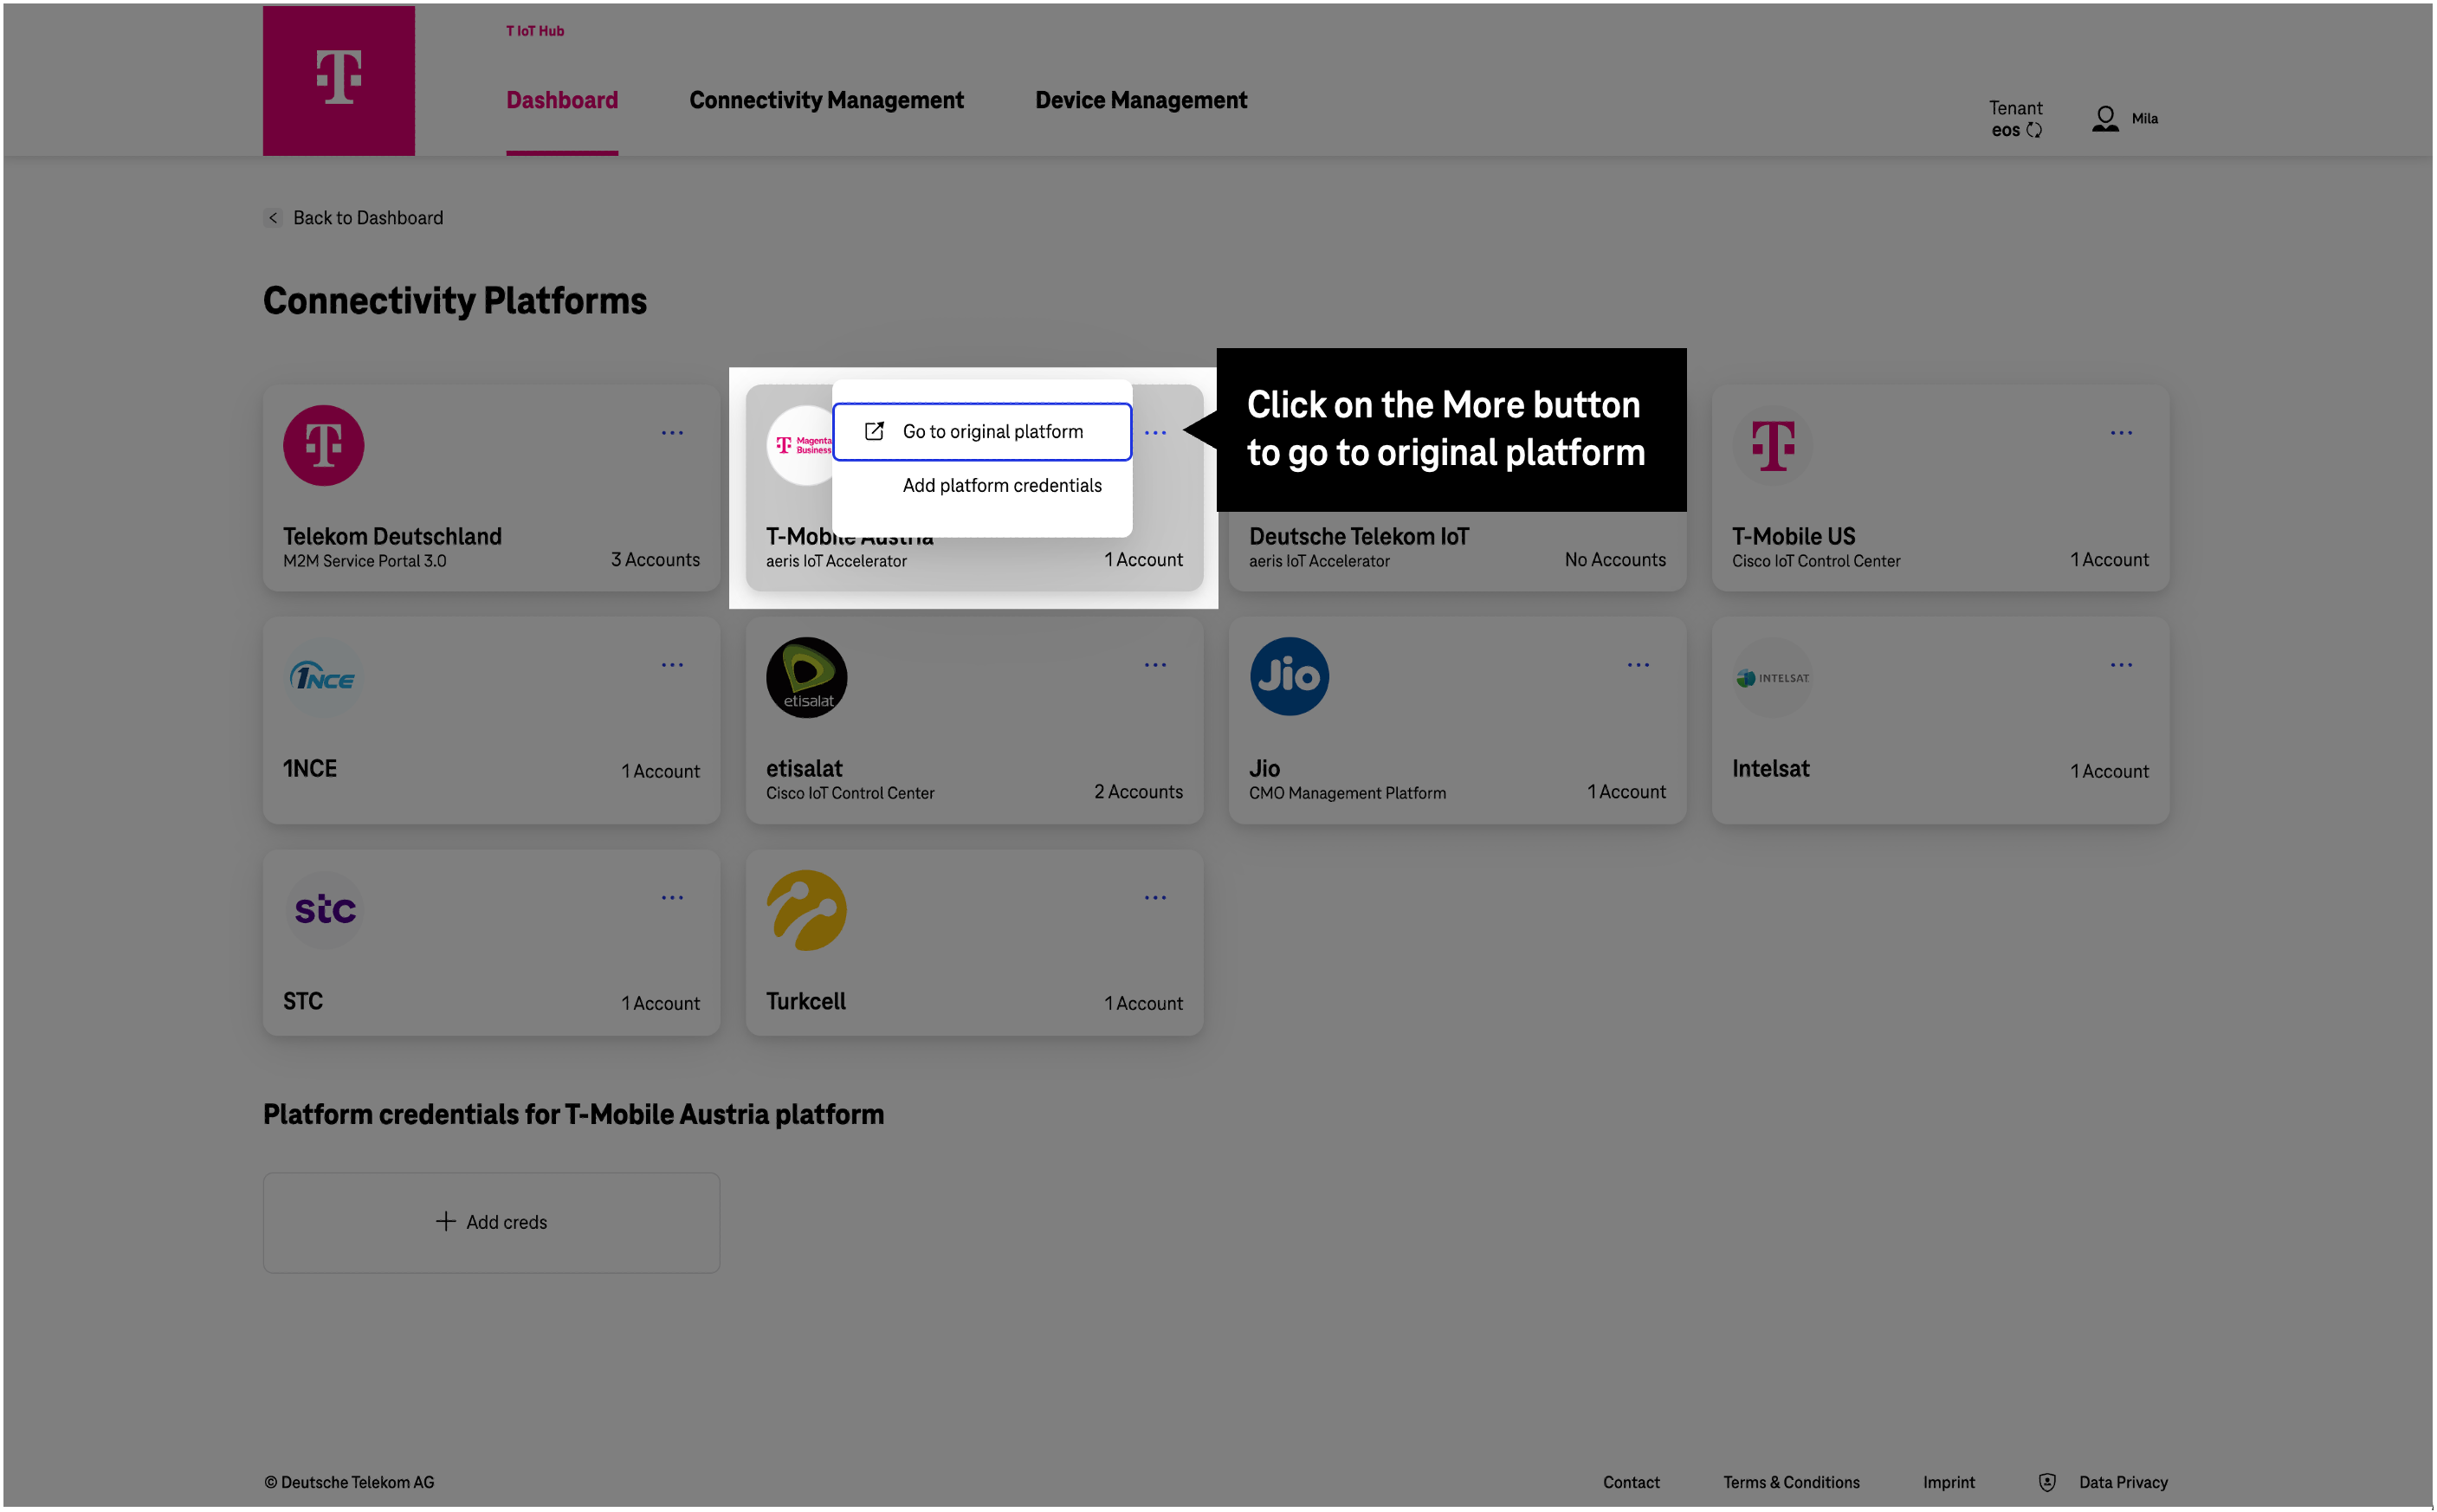
Platforms are identified by the mobile operator and the name of the technical platform known to the user.
To access the original platform login directly, click on the external link icon.
- The API access may use a different platform name using an API prefix.
For administrators only: After selecting a platform, you will see a list of added credentials below the platform list. If no credentials have been added yet, only the Add New Account button will be displayed.
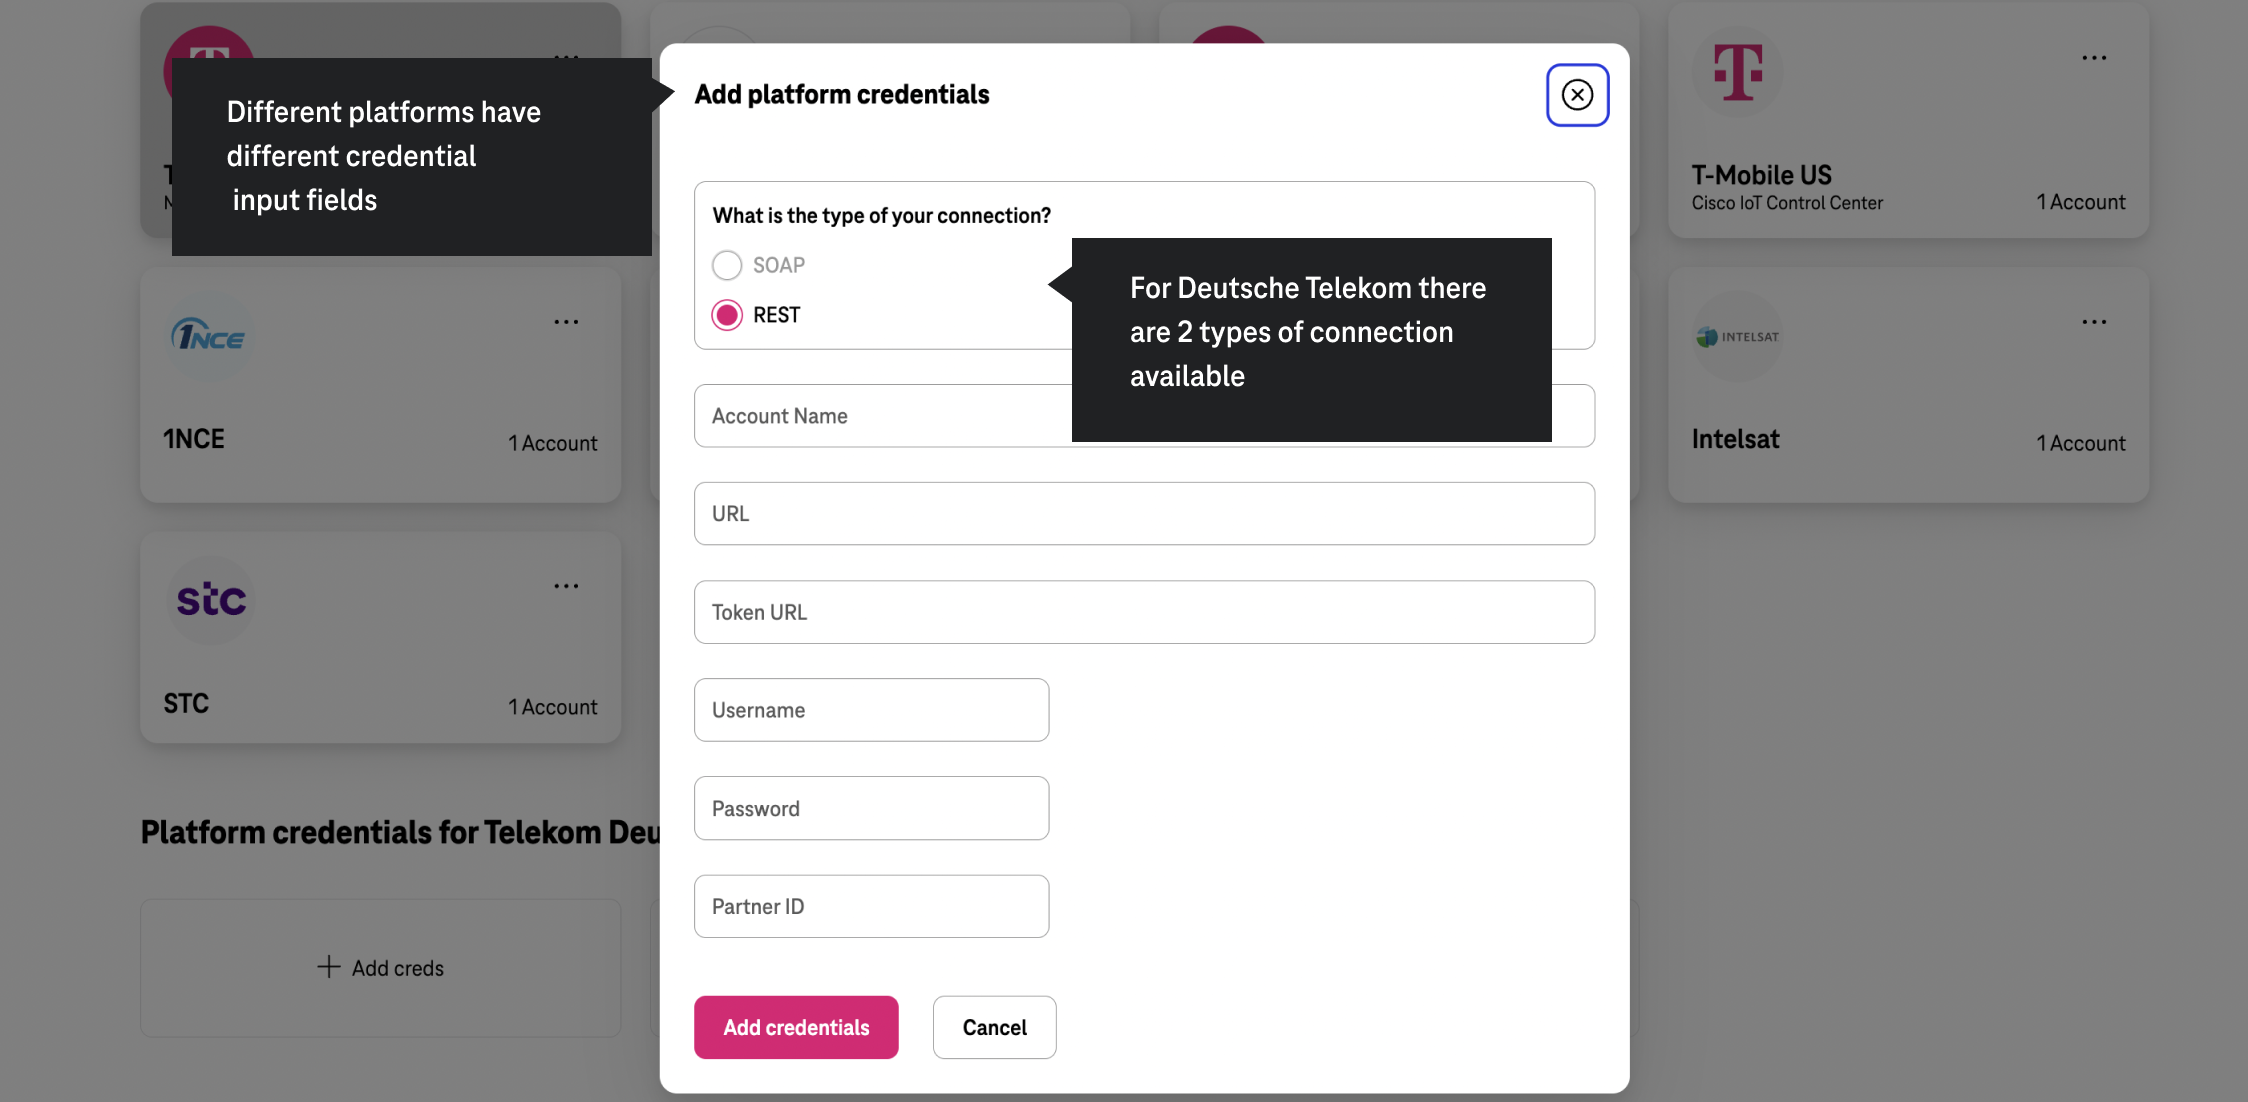
A pop-up window will open, containing a form to enter the credentials.
- The required credentials vary by platform, with the input fields adapting accordingly.
- This information is only known to the company’s administrator.
For Telekom Deutschland the credentials depend on the type of your connection.
Once authenticated successfully, T IoT Hub will be able to connect directly to the platform, and display the data provided by the platform immediately.
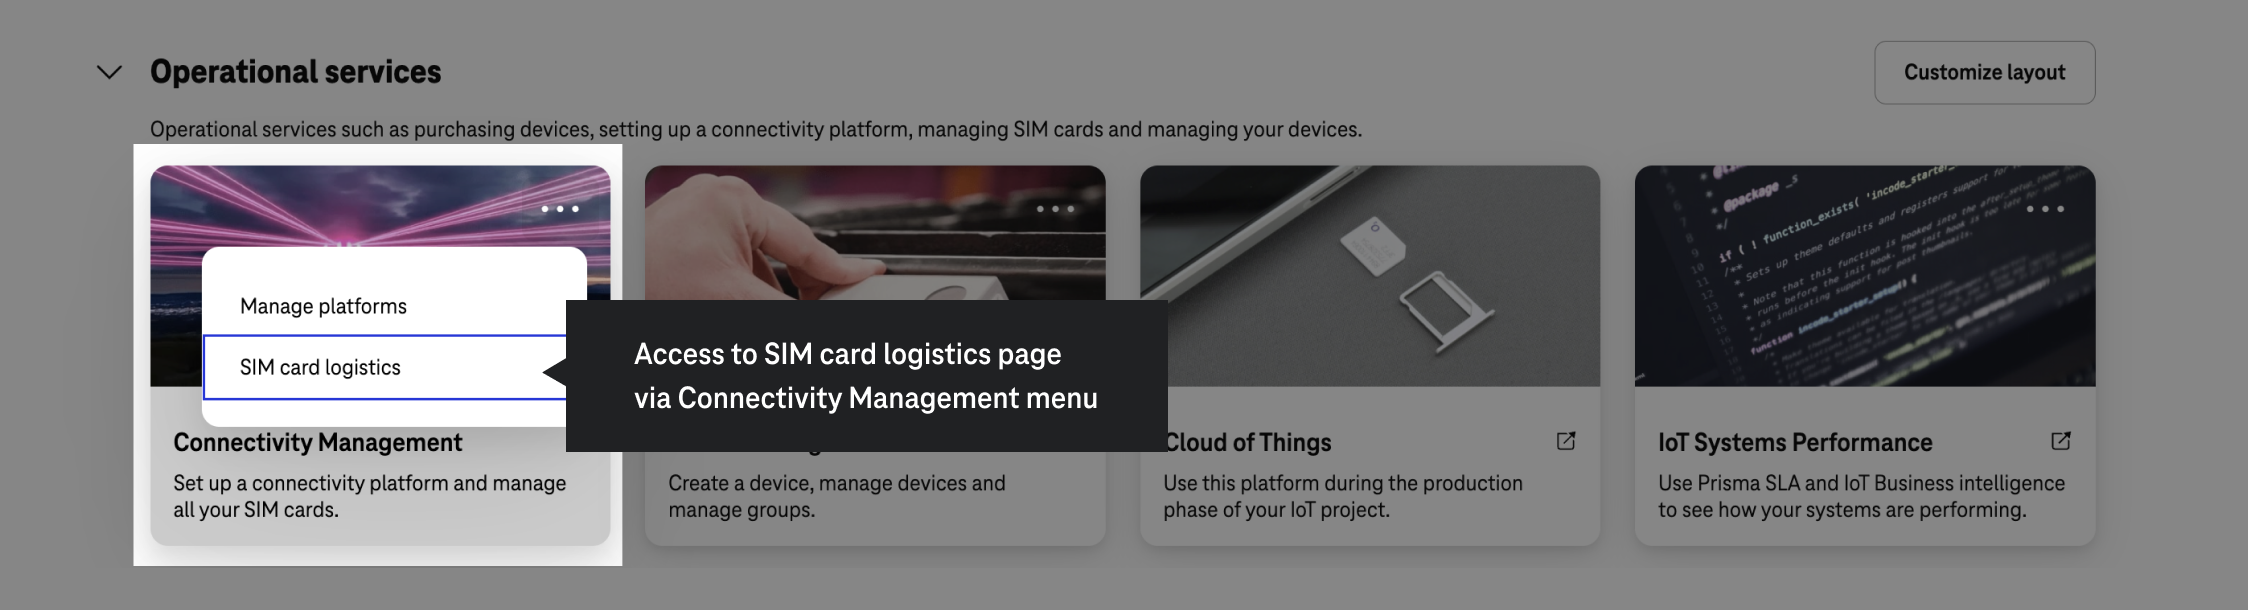
SIM card logistics
The SIM card logistics page can be accessed directly from the T IoT Hub dashboard, using the tile.
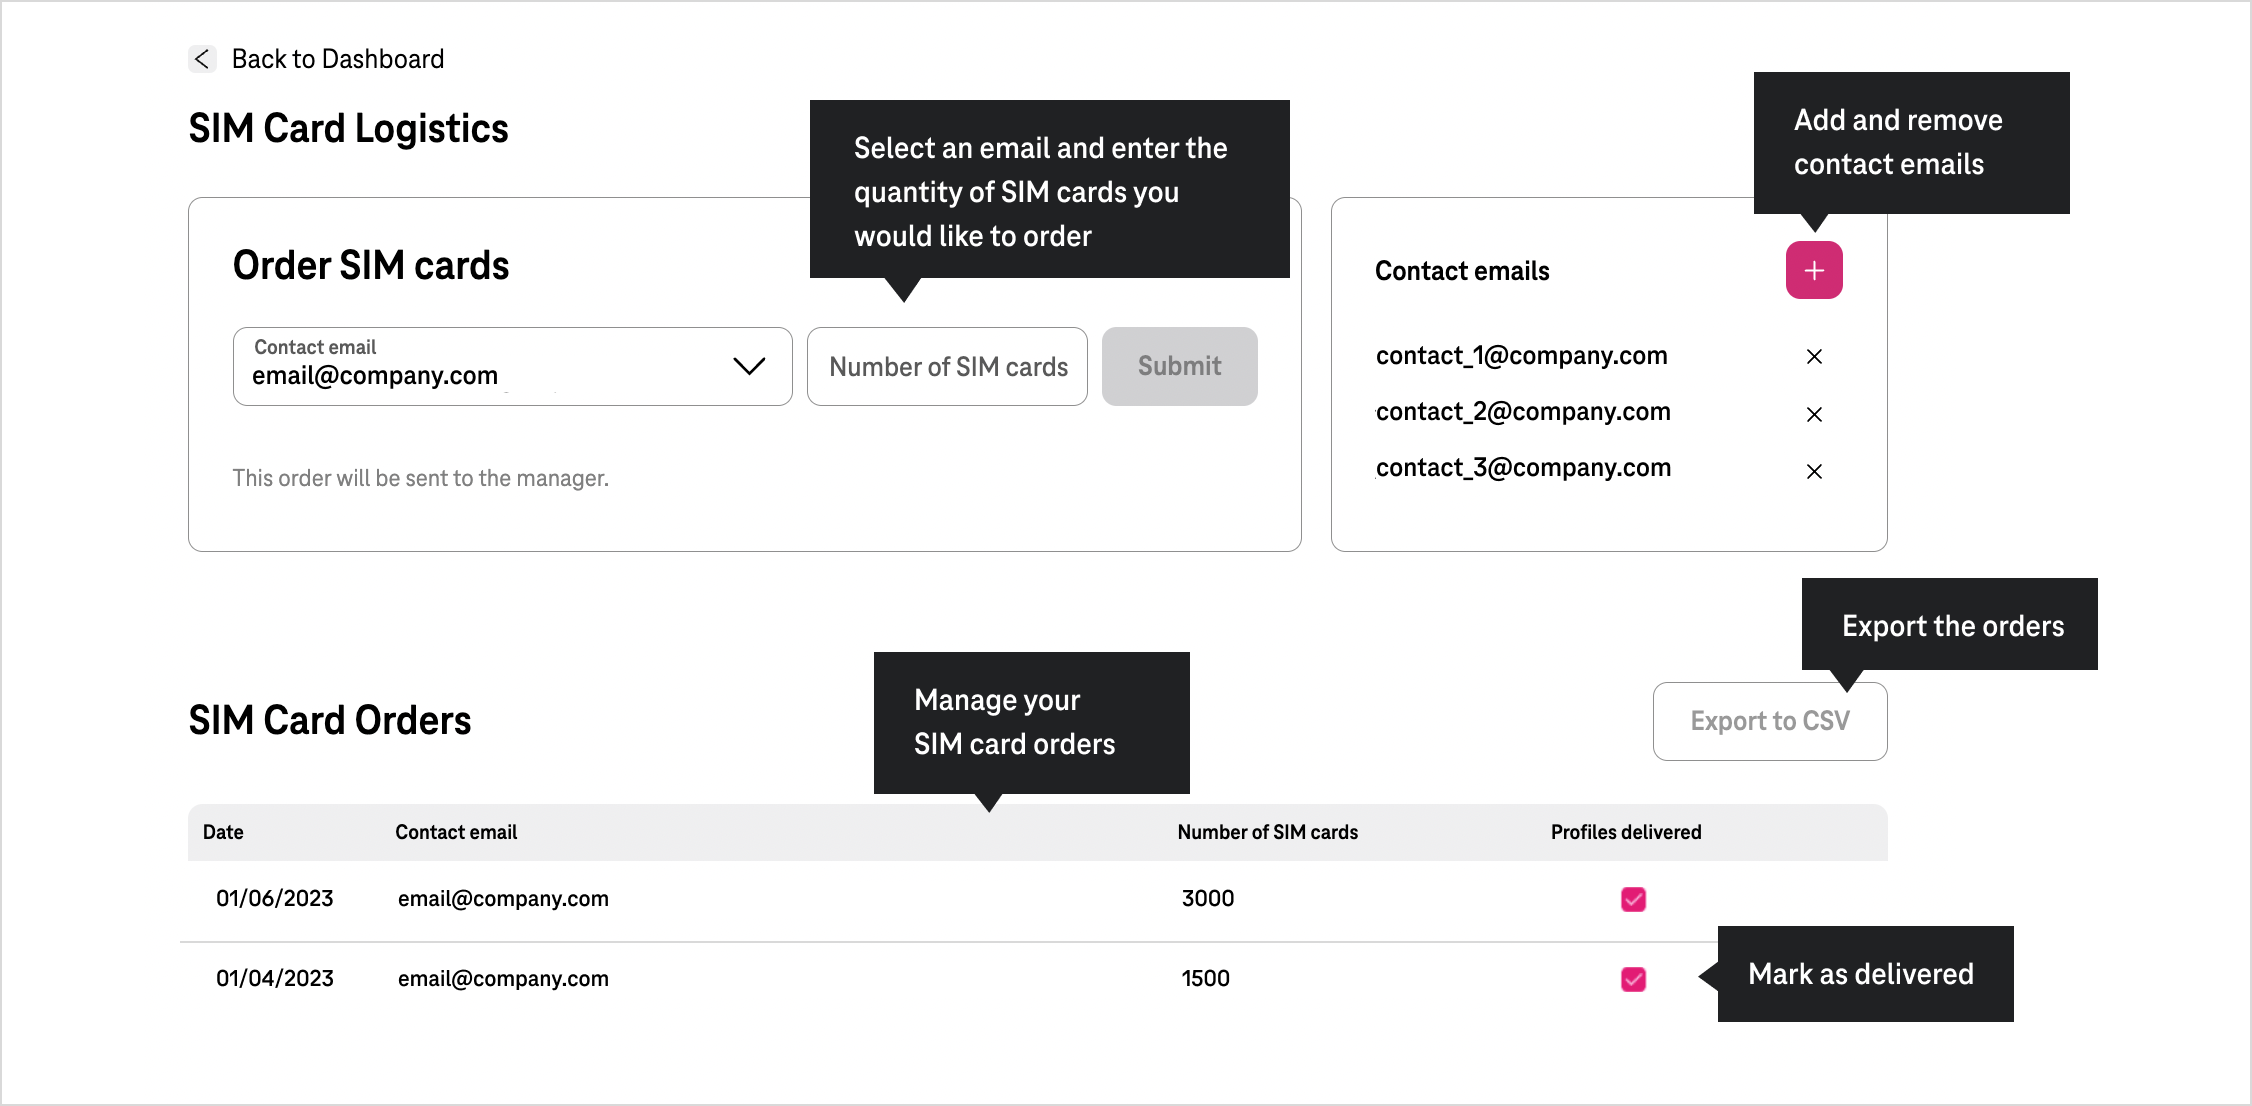
On this page, you can add a list of contact email addresses and use them to order SIM cards. Simply select an email, specify the number of SIM cards, and place your order.
The list of orders is available below the form.
- The SIM card logistics page is a custom feature available exclusively to customers with individual contracts.