Precise Positioning Get started
Login to T-IoT Hub
Open the page T IoT Hub.
Have your T-IoT Hub credentials ready.
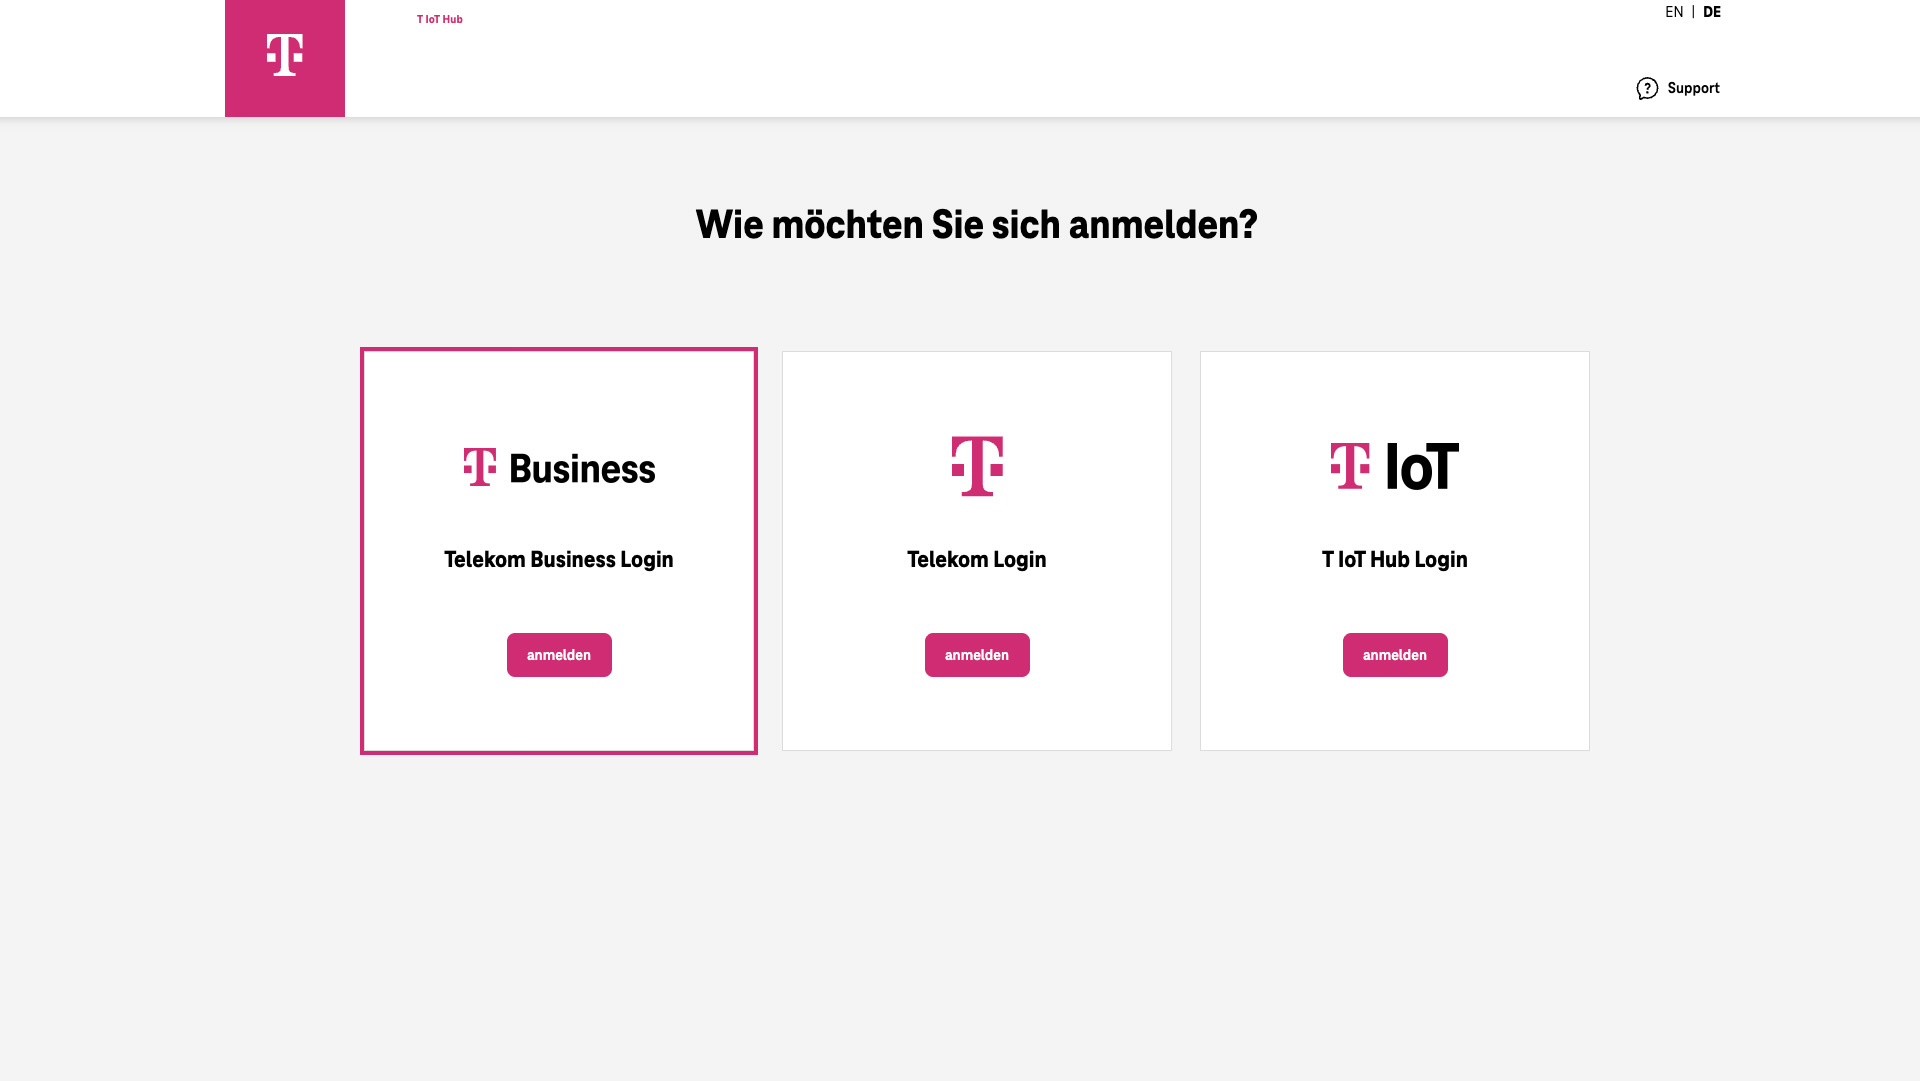
Click “Telekom Business Login.”
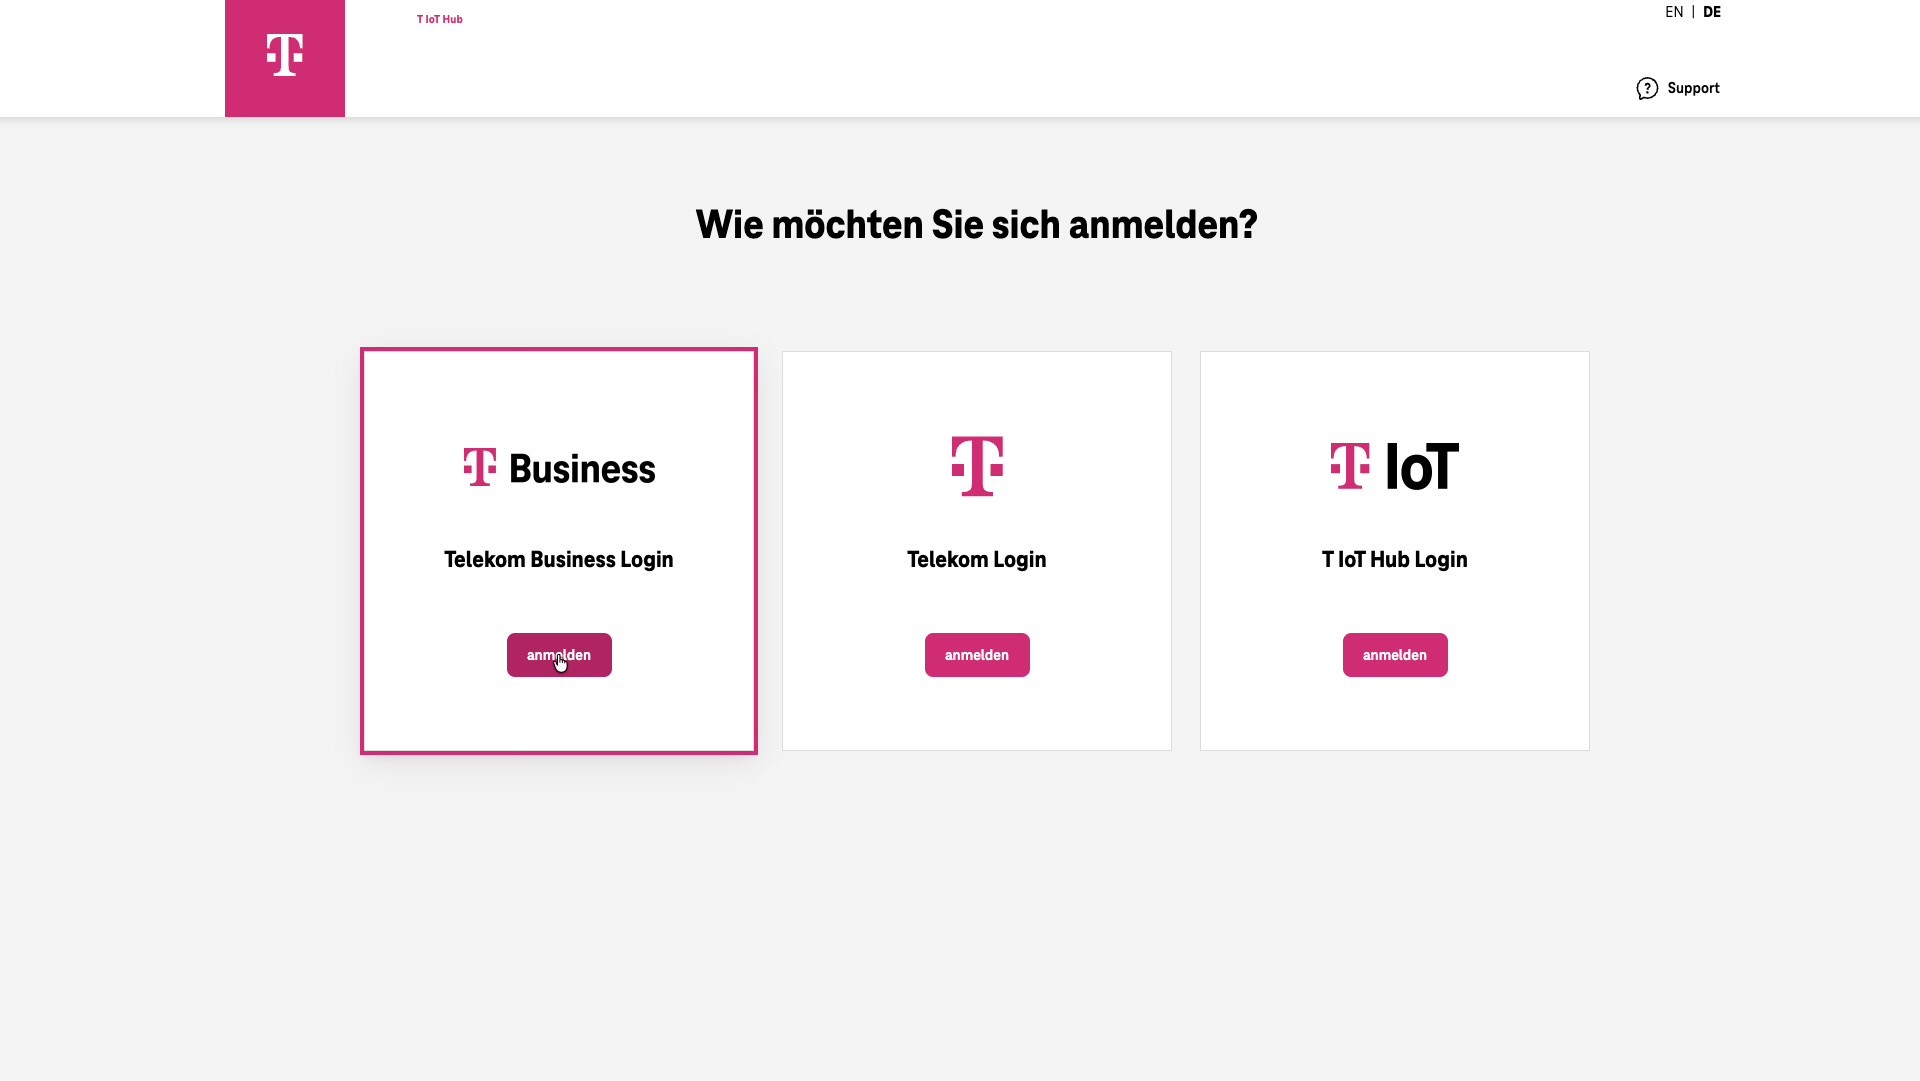
Enter your username and password.
Click “Login.”
You will be redirected to your customer tenant in T-IoT Hub.
Customer Tenant T-IoT Hub
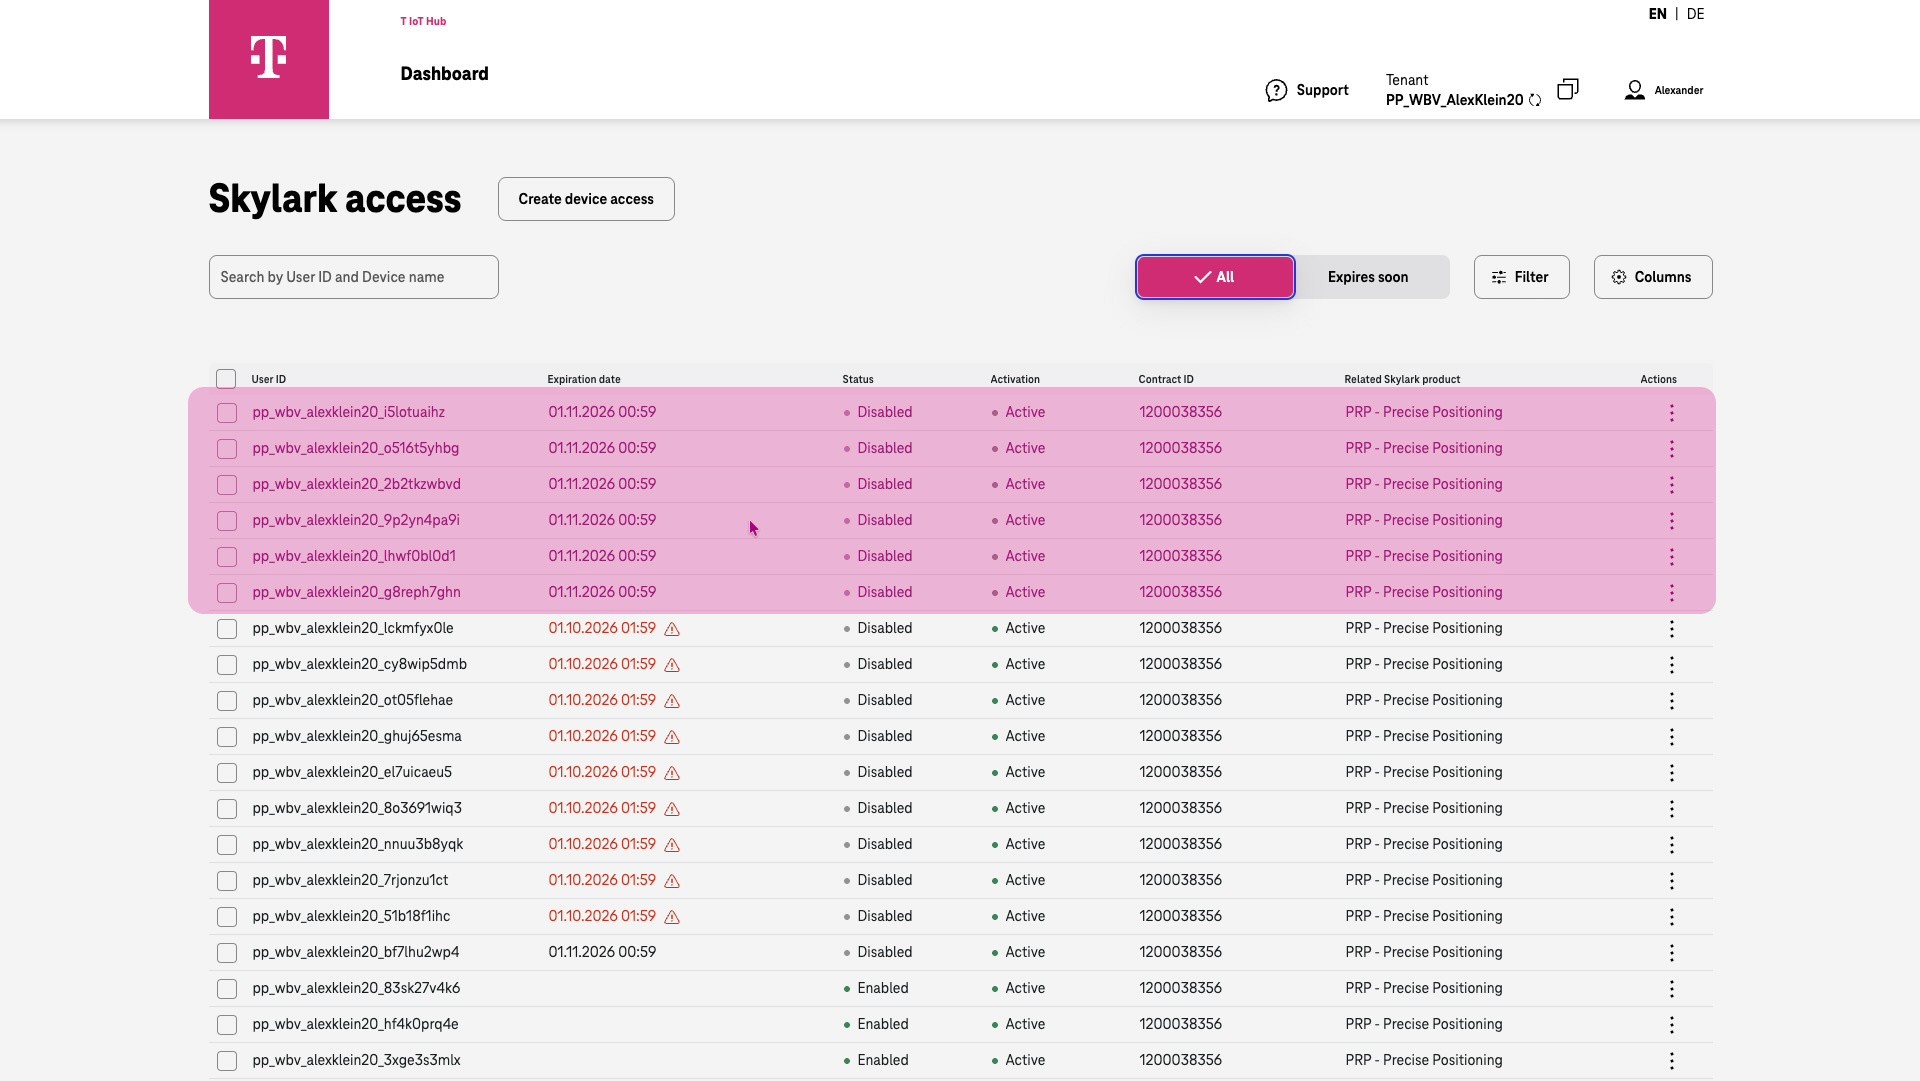
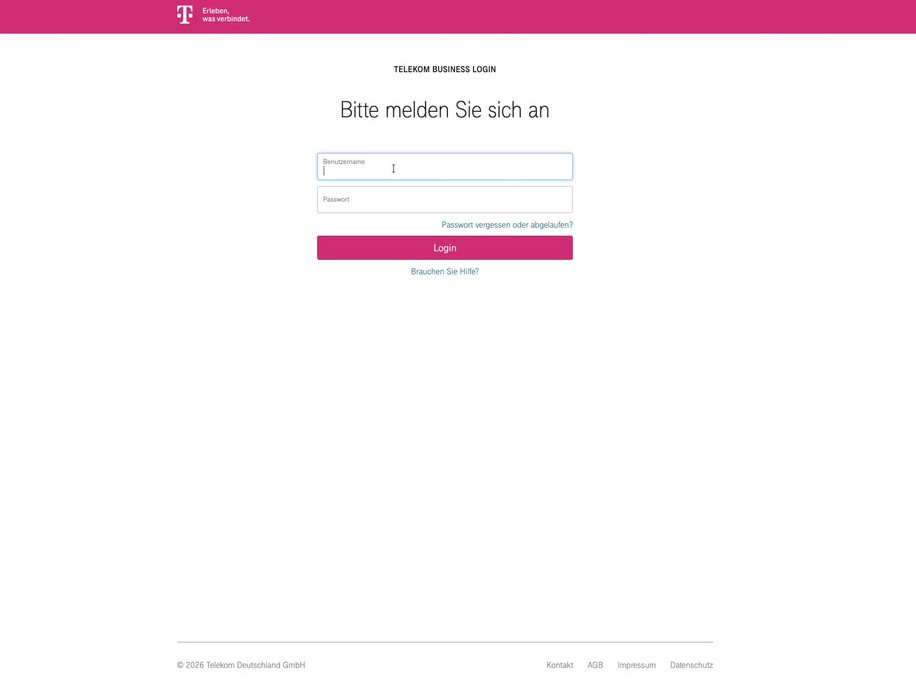
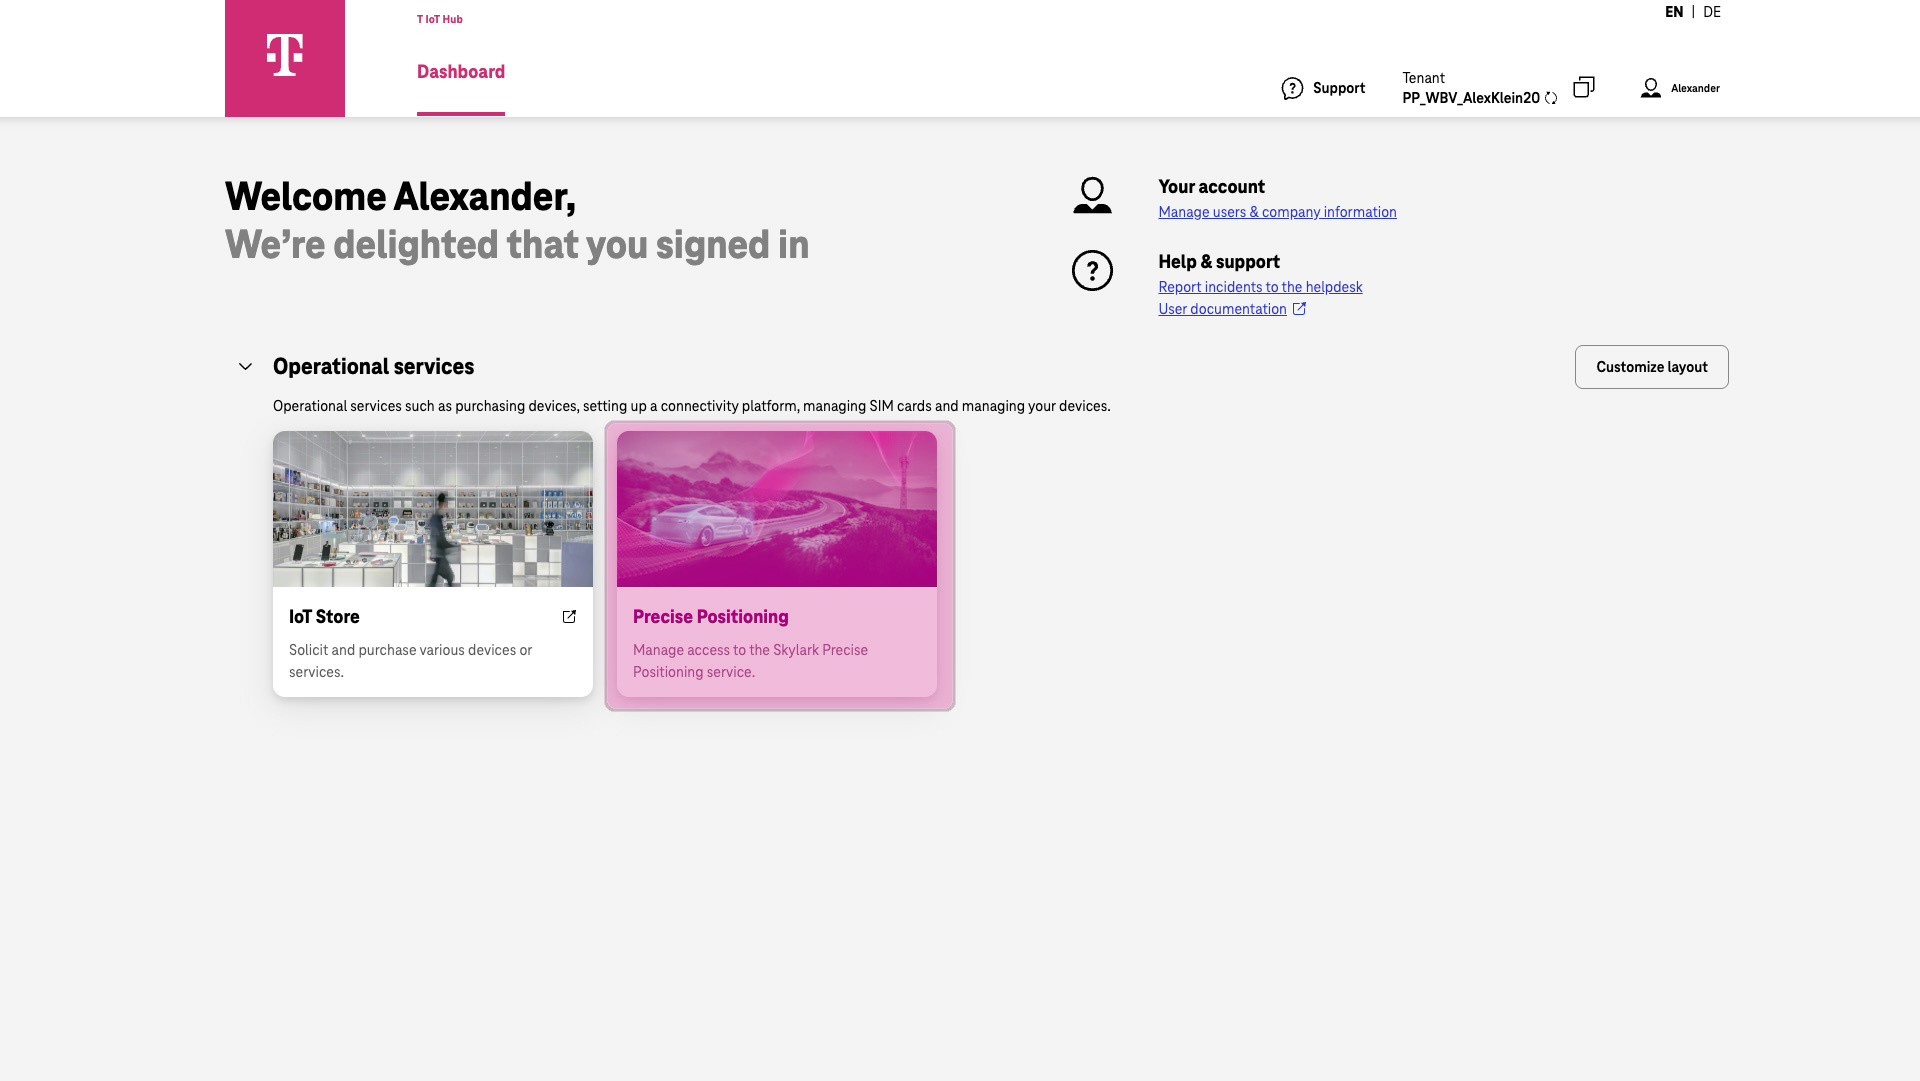
After successfully logging in, your tenant dashboard is displayed.
From there, you can either open the IoT Store or check your Precise Positioning accounts.
Create one account
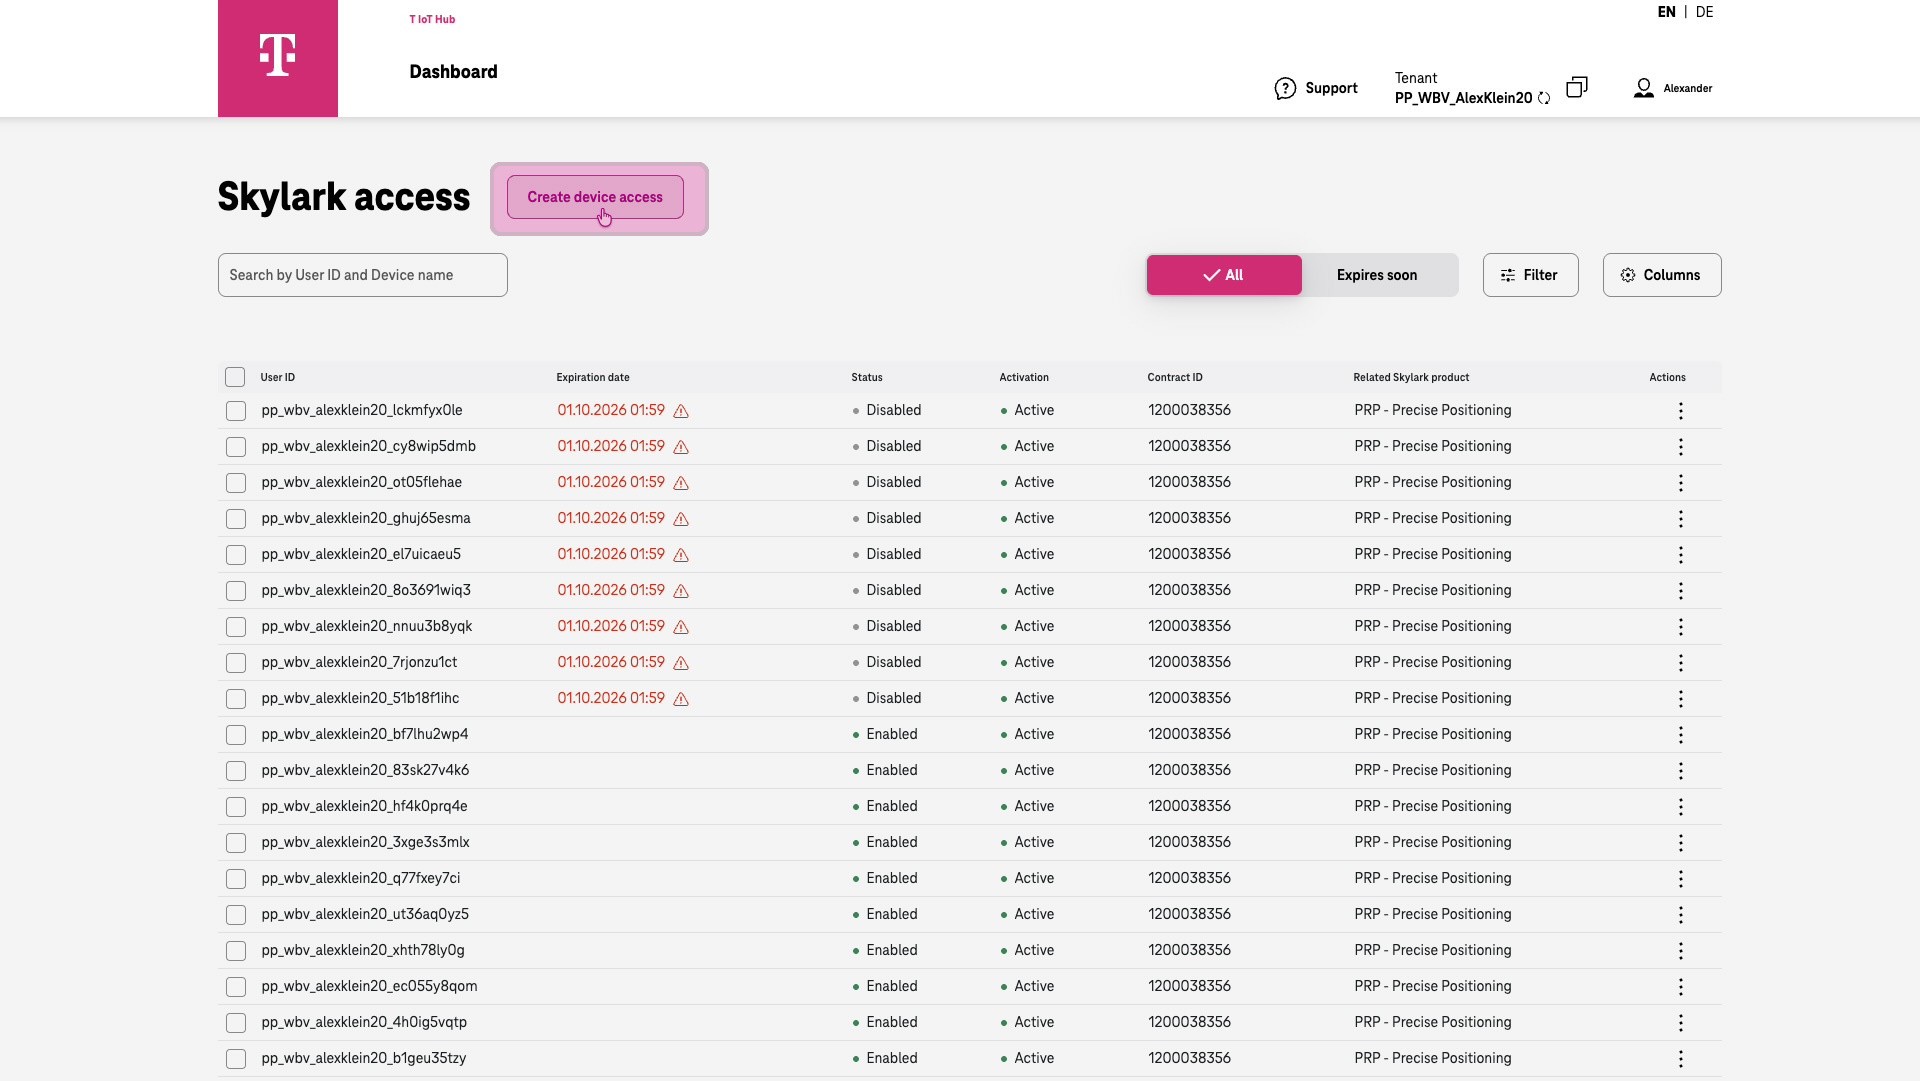
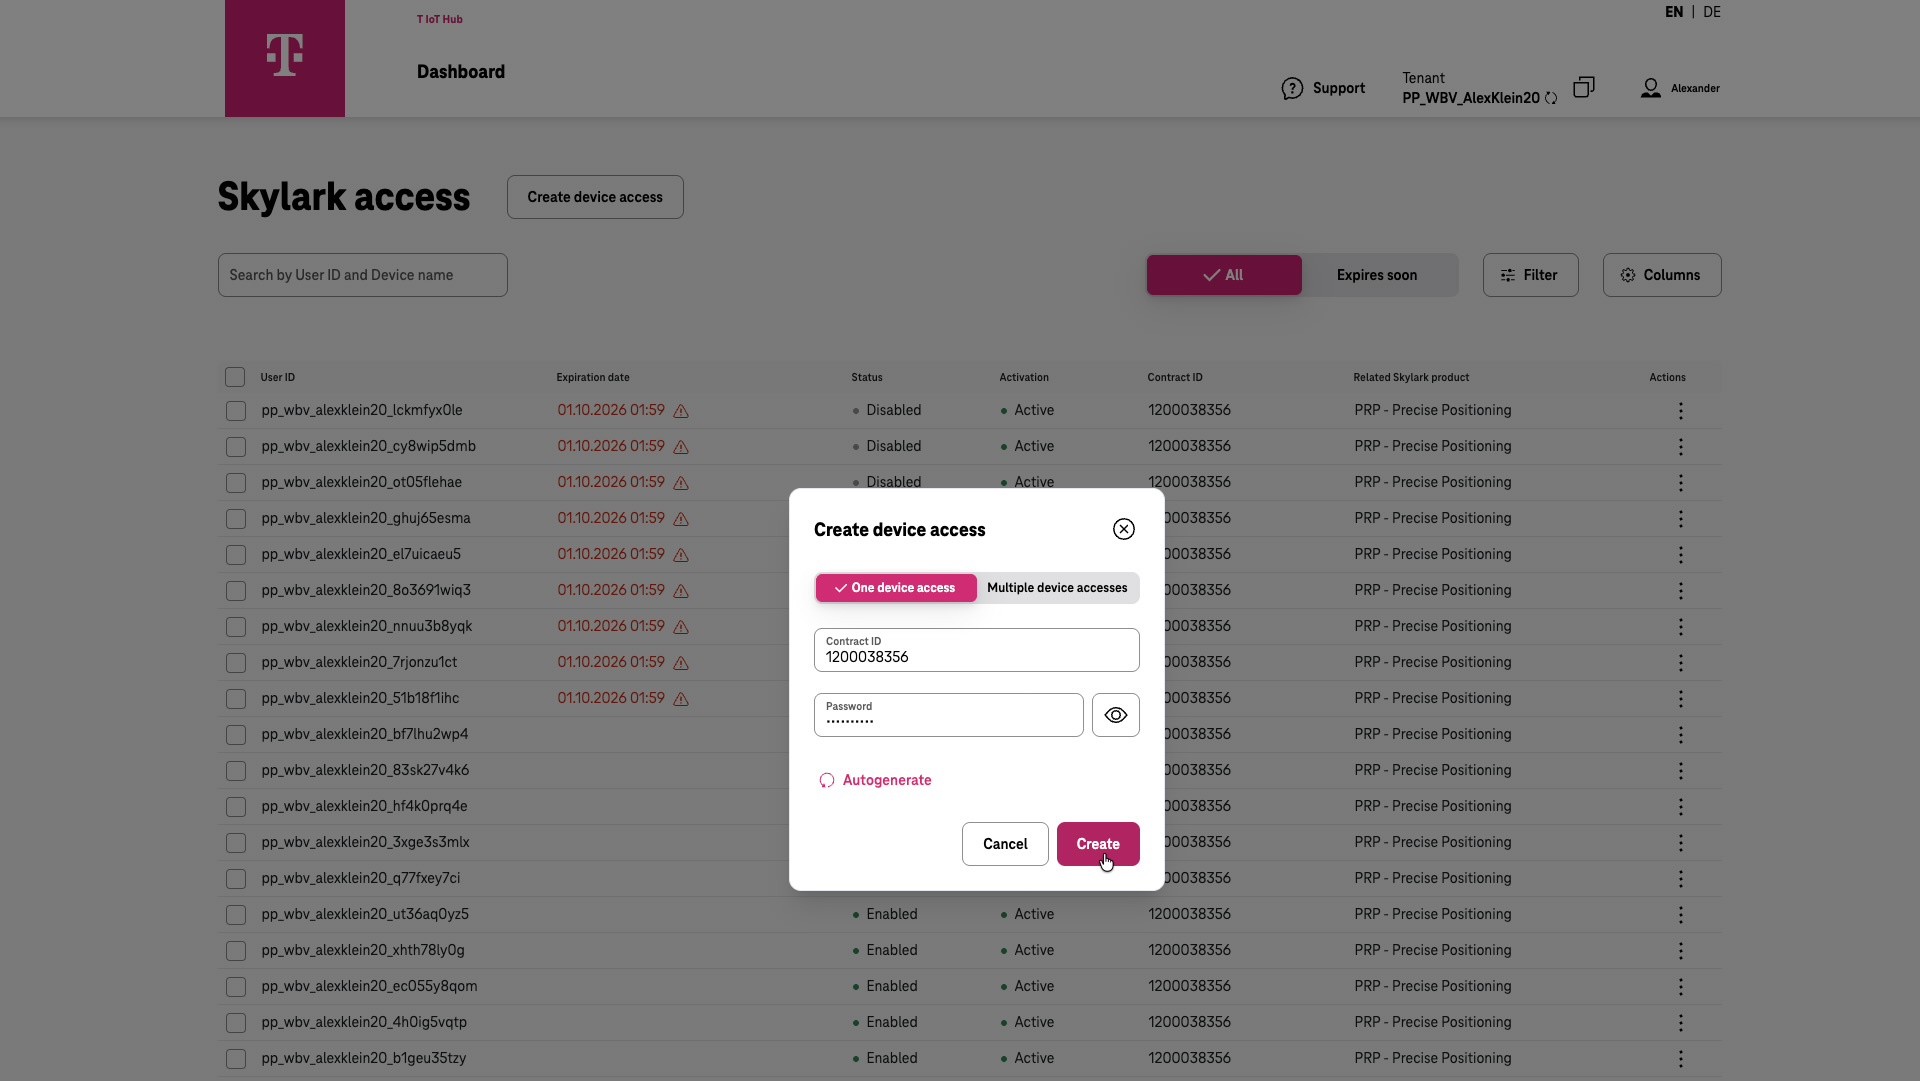
Click “Create device access.”
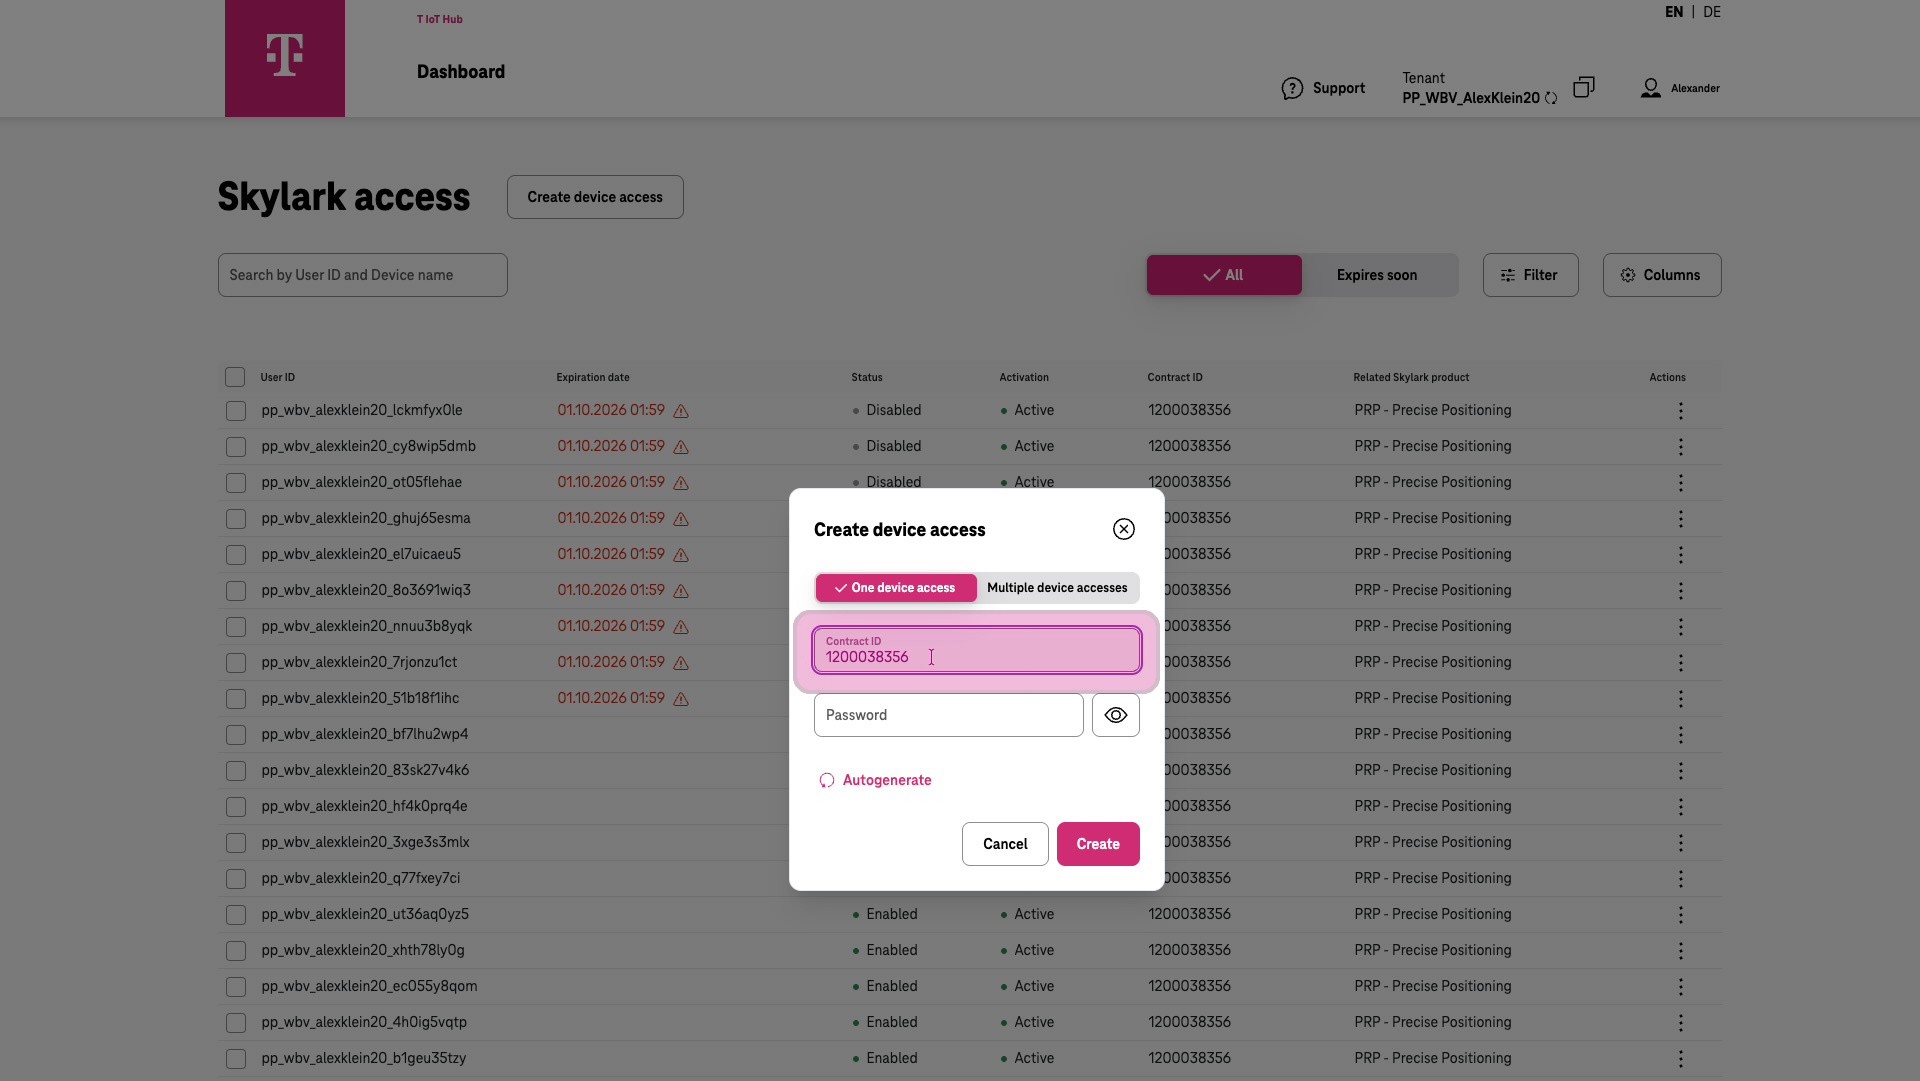
Enter the Contract ID you received by email.
You can leave the password field empty and click “AutoGenerate” to have the system generate a password, or enter your own password.
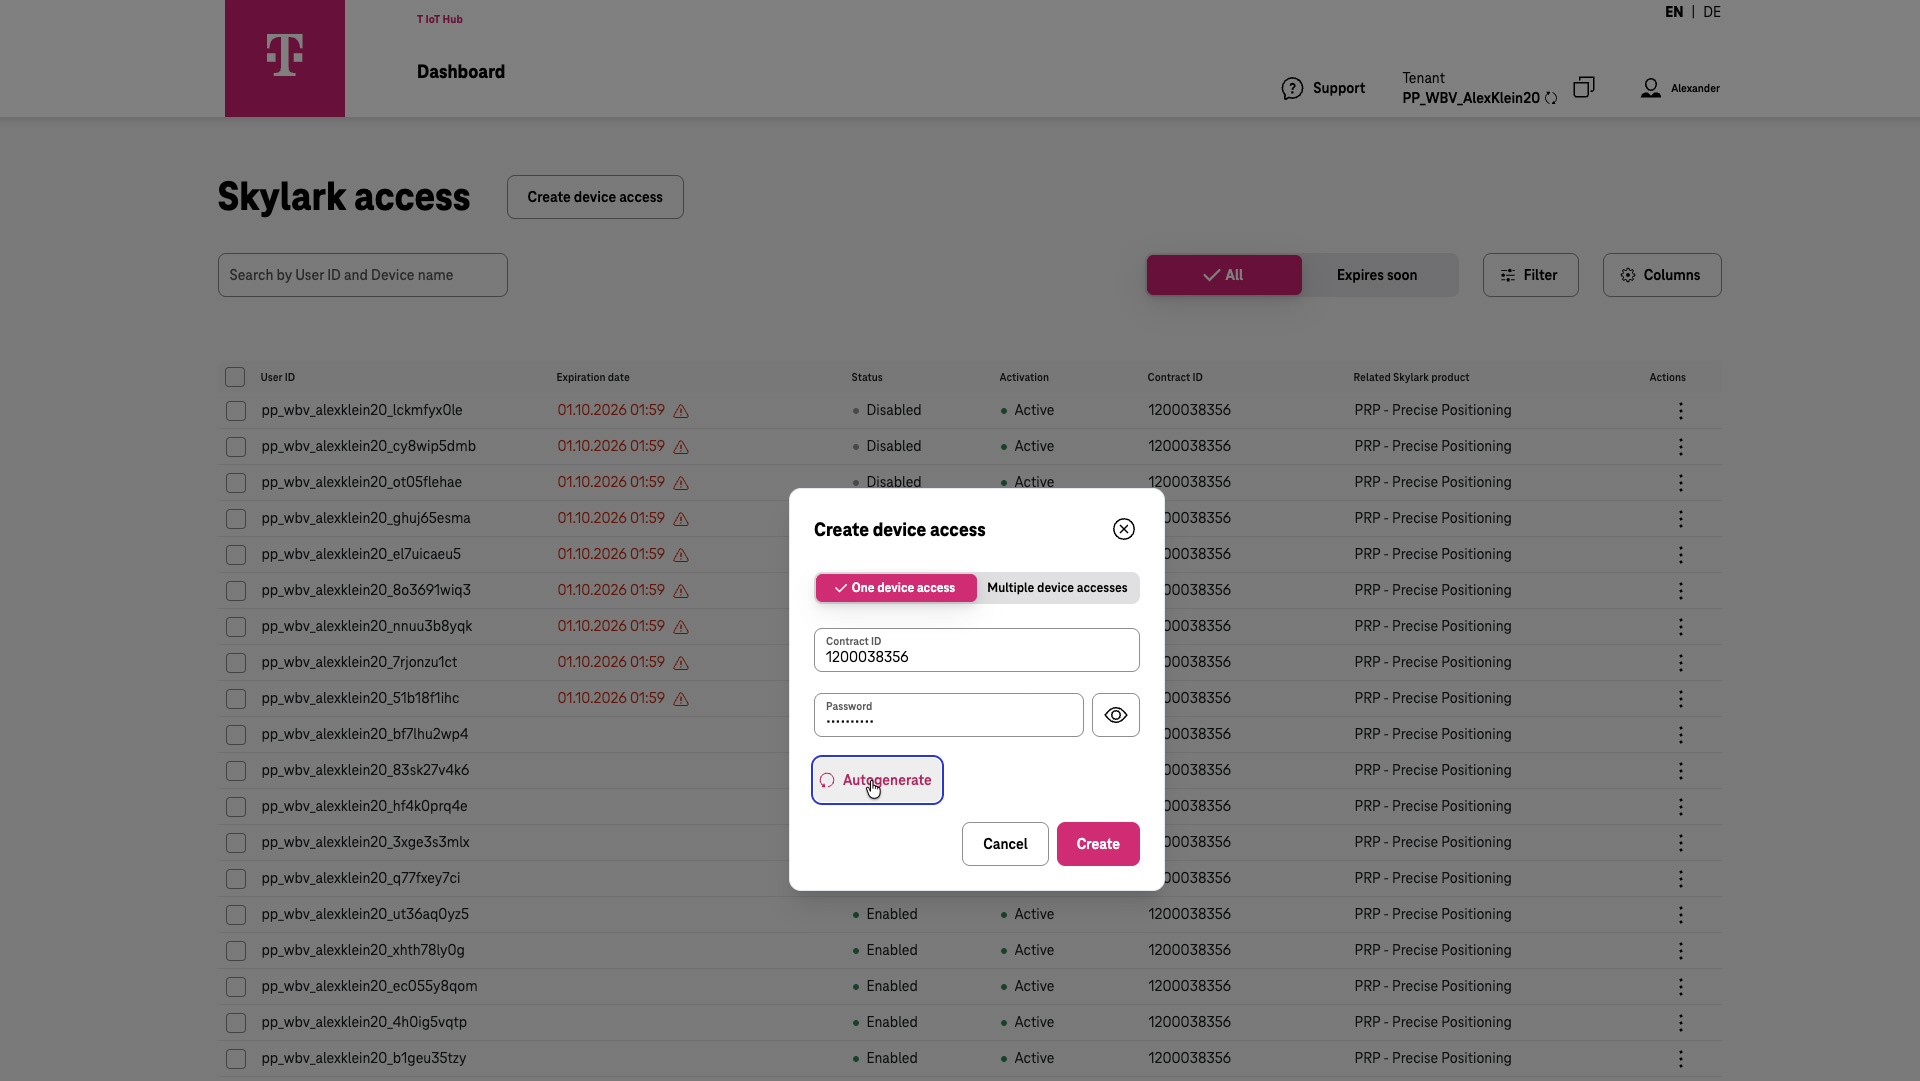
Click “Create.”
An information pop-up confirms that the account was created successfully.
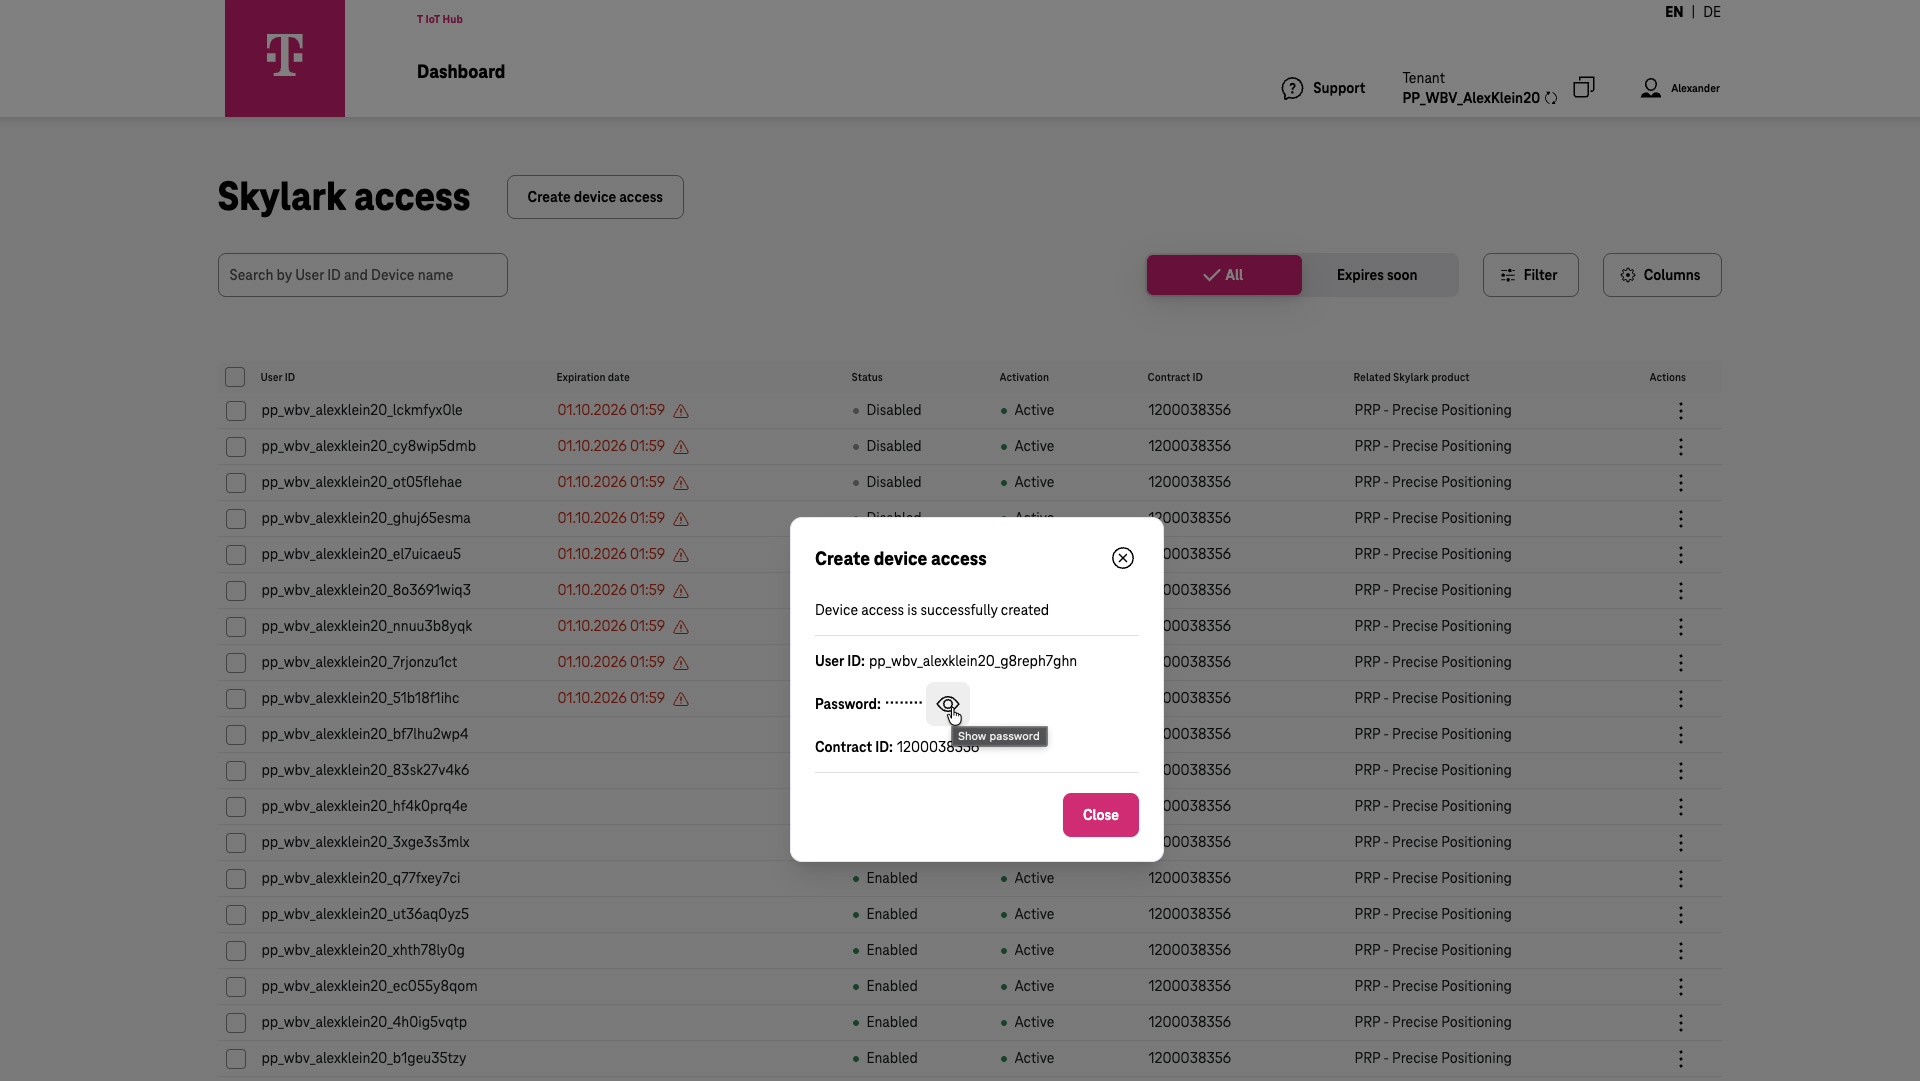
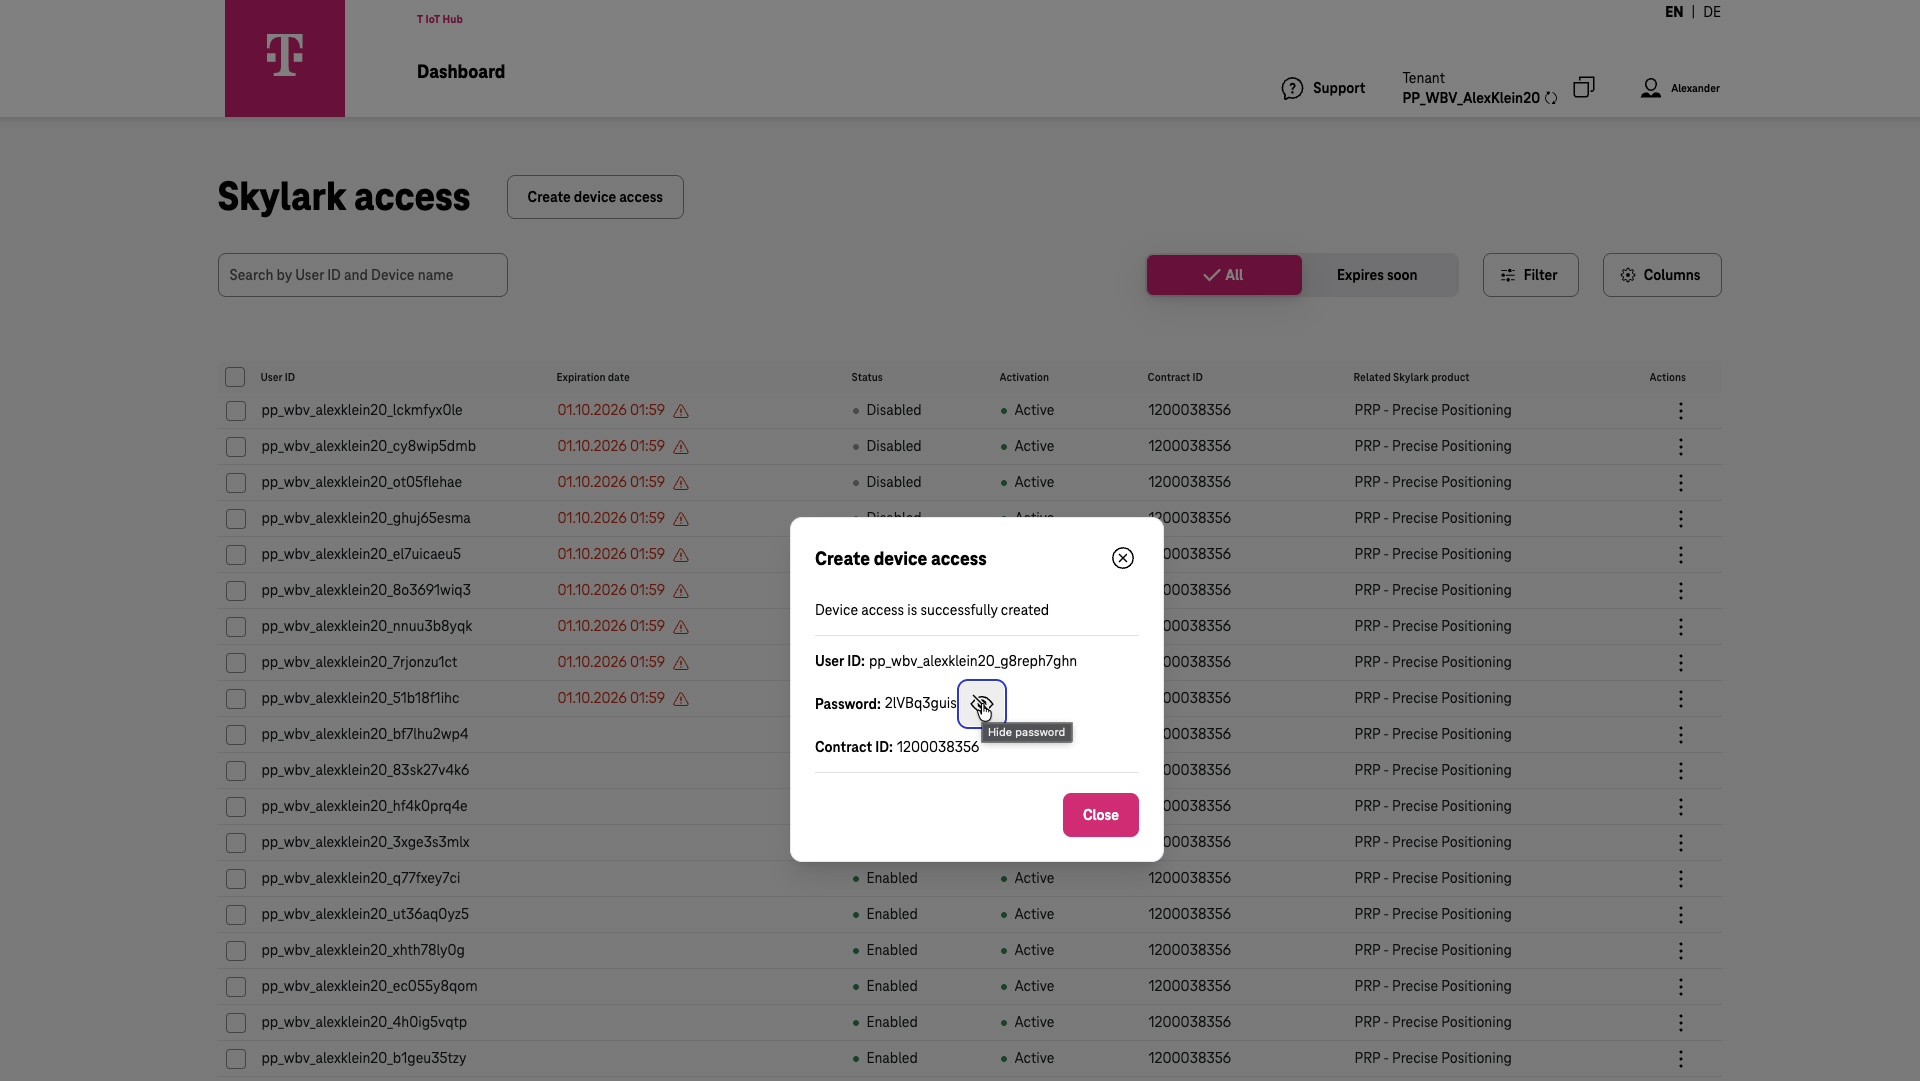
Click the eye icon to view and copy the auto-generated password.
Create multiple accounts
Click “Create device access.”
Switch to “Multiple device accesses.”
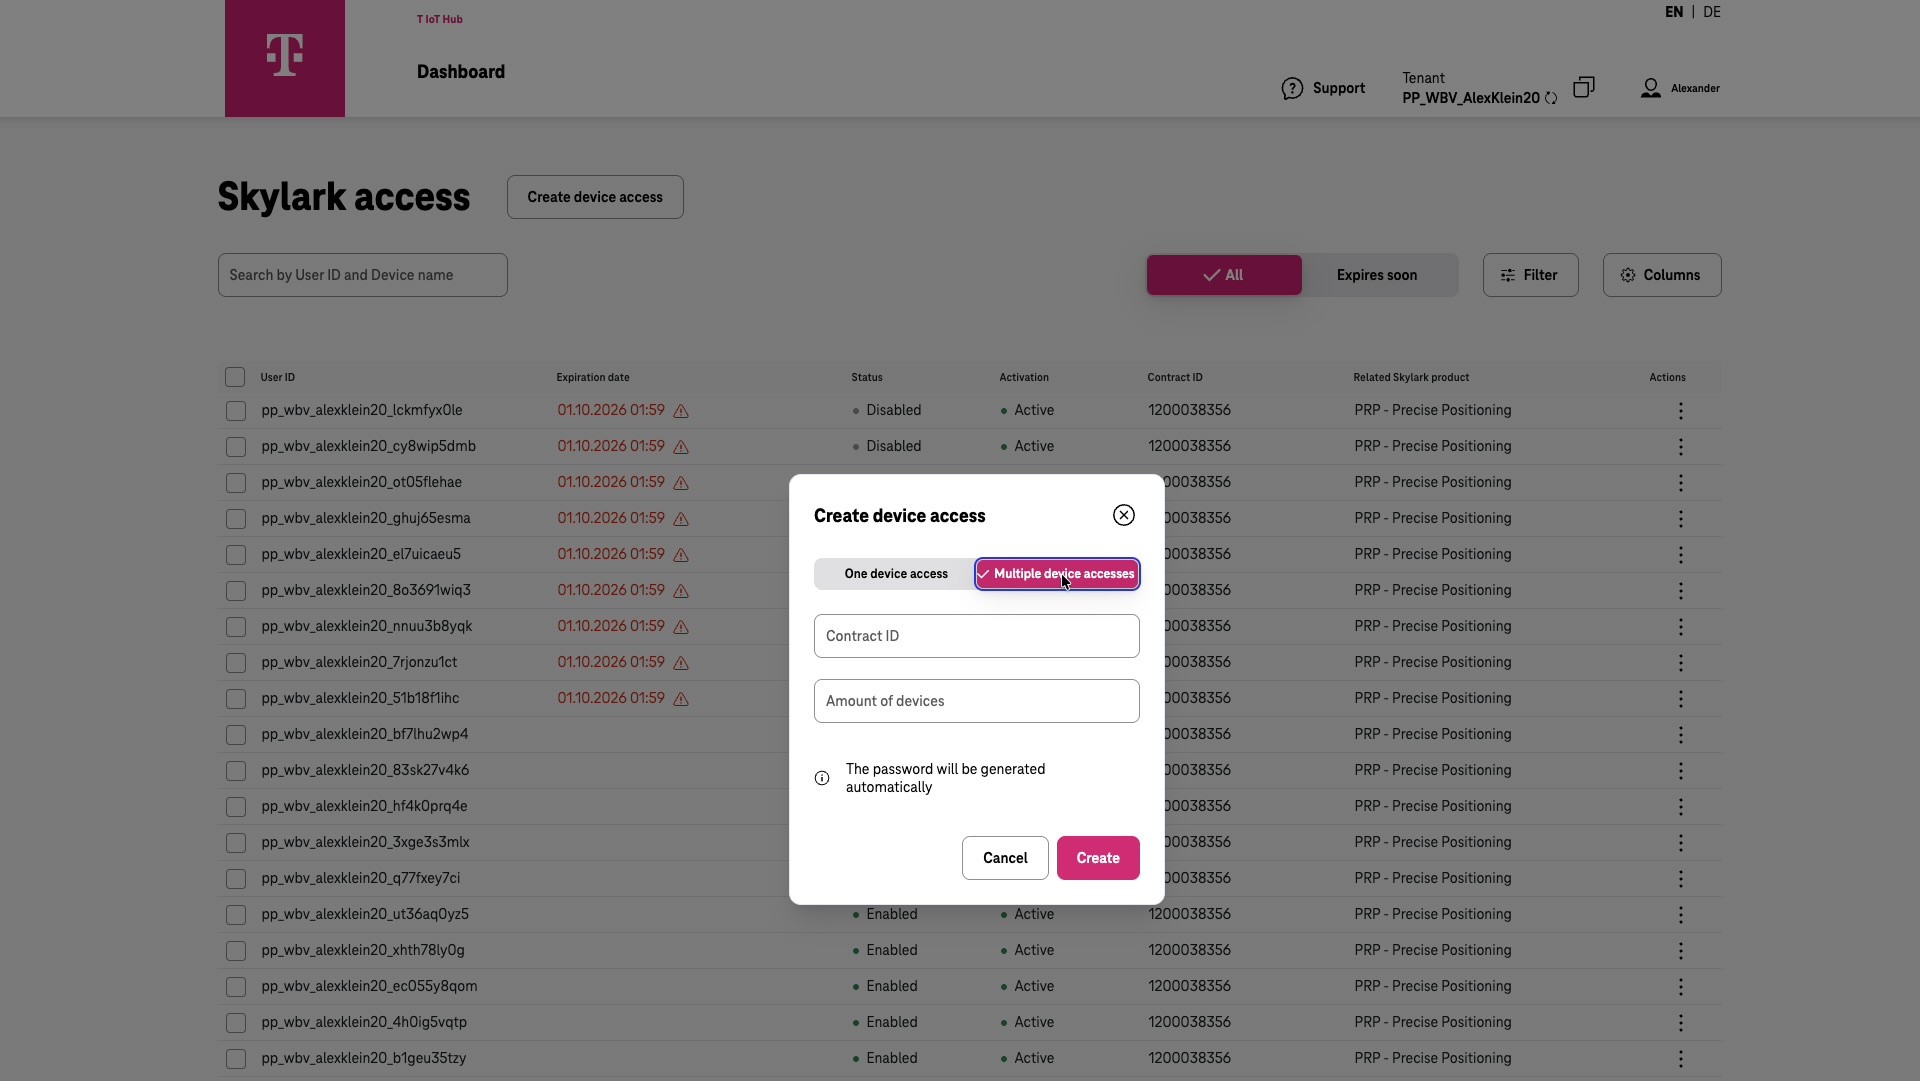
Enter the Contract ID you received by email.
Enter the number of accounts you want to create in the field.
Attention: If you create multiple accounts, the system will generate the passwords as a security measure.
Click “Create.”
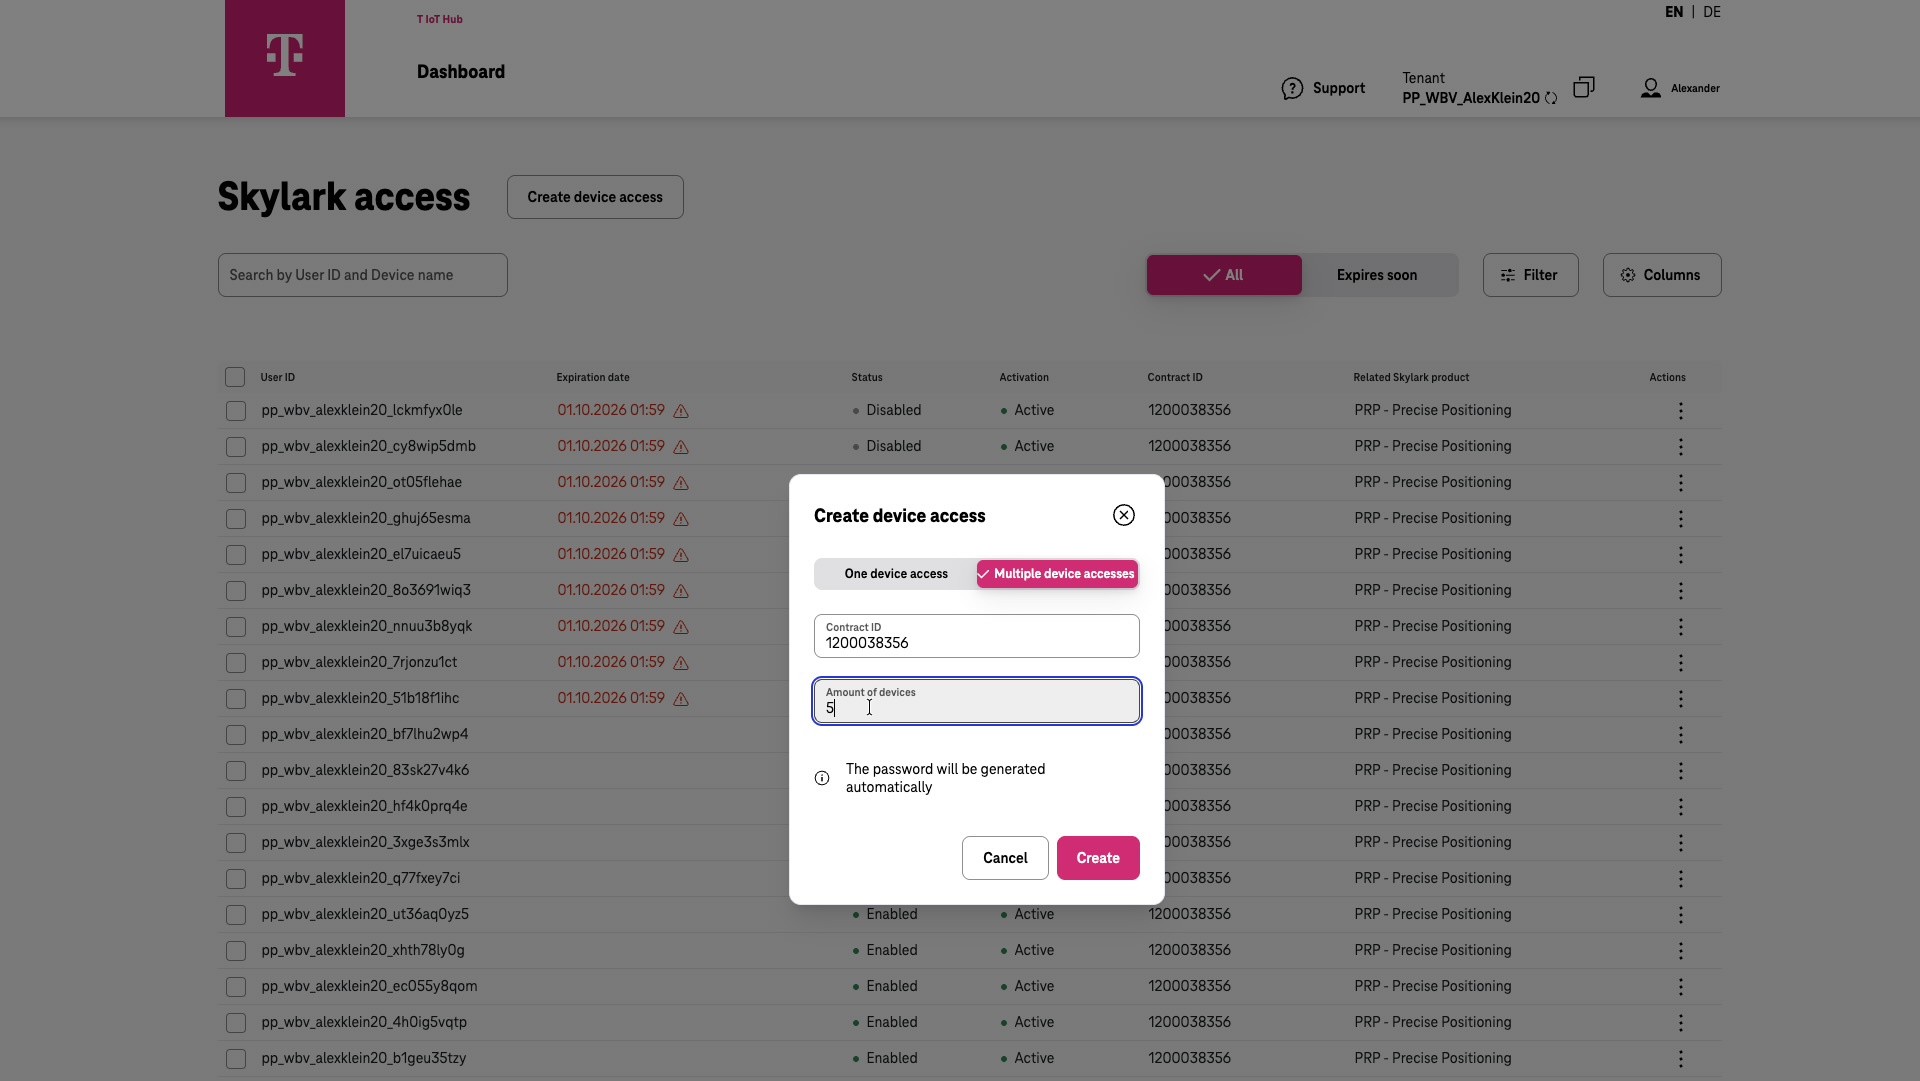
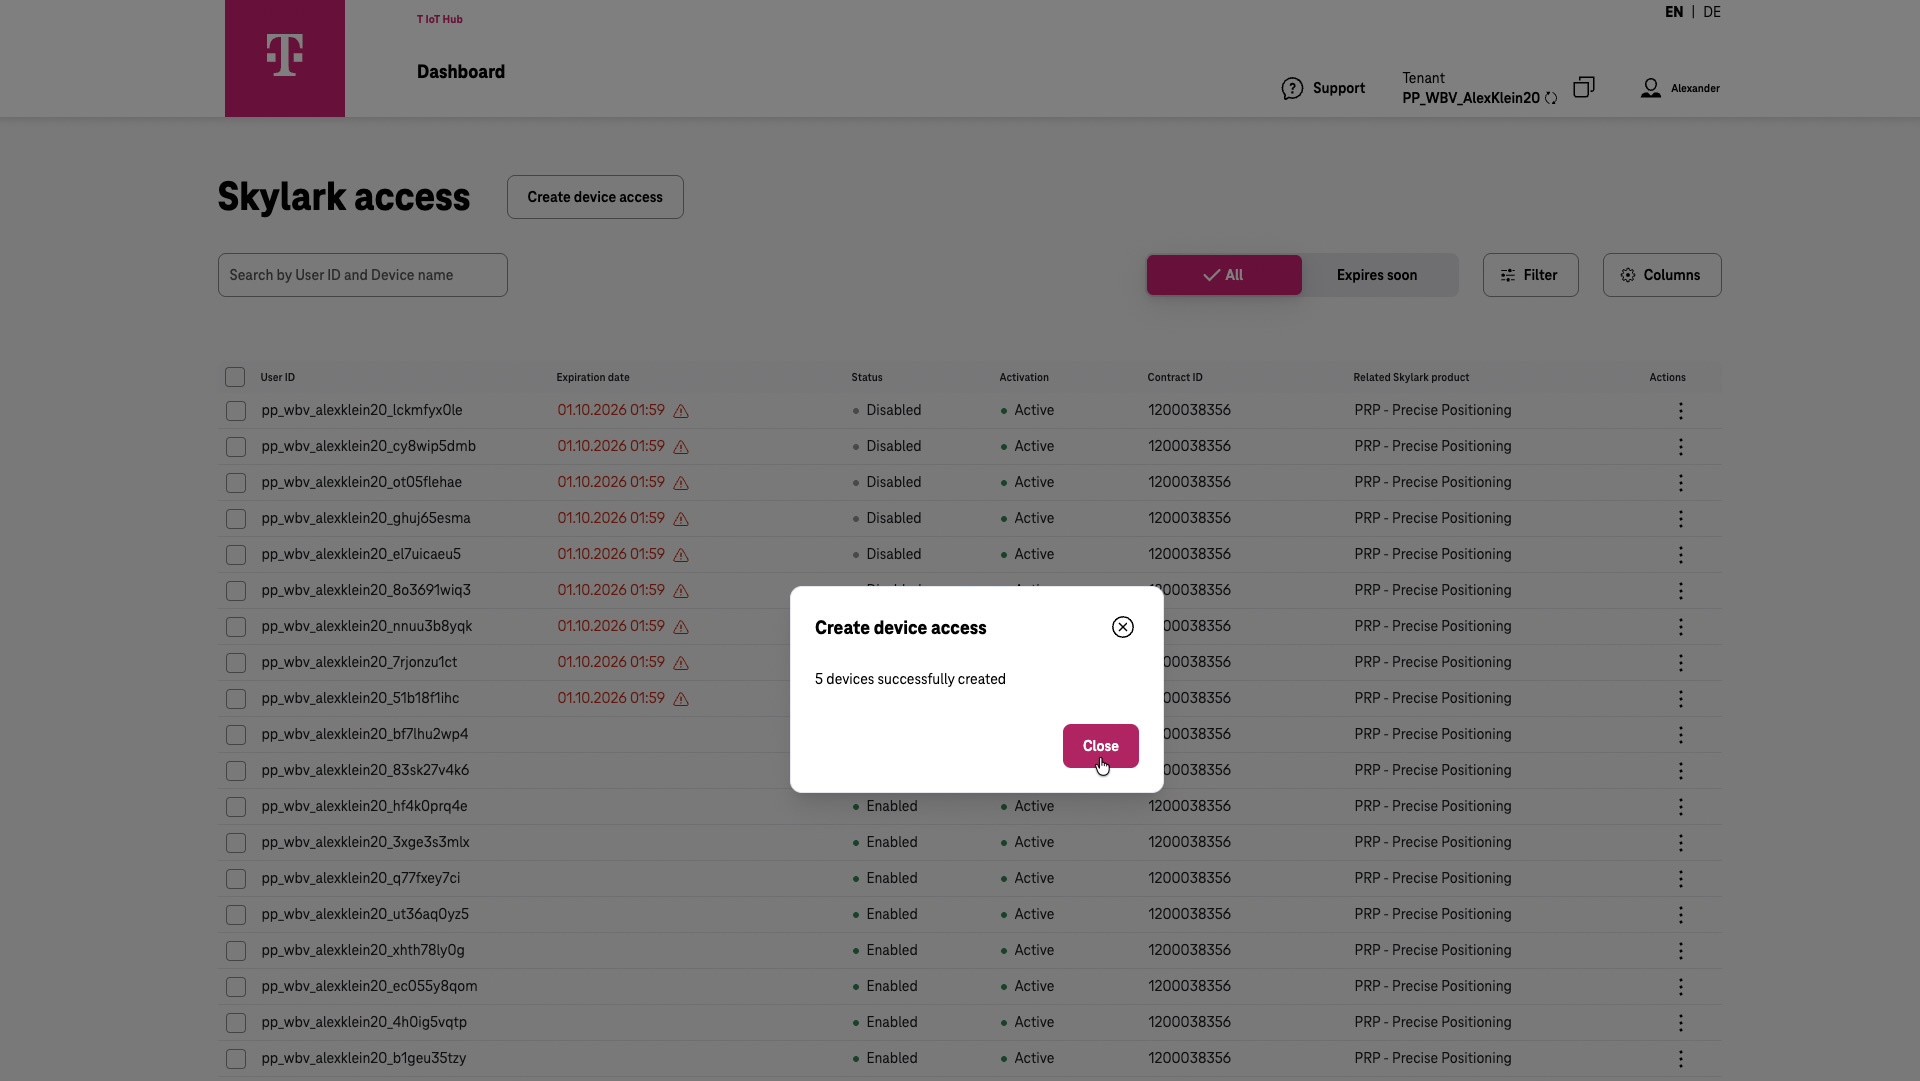
An information pop-up confirms that the accounts were created successfully.
Getting Account Information
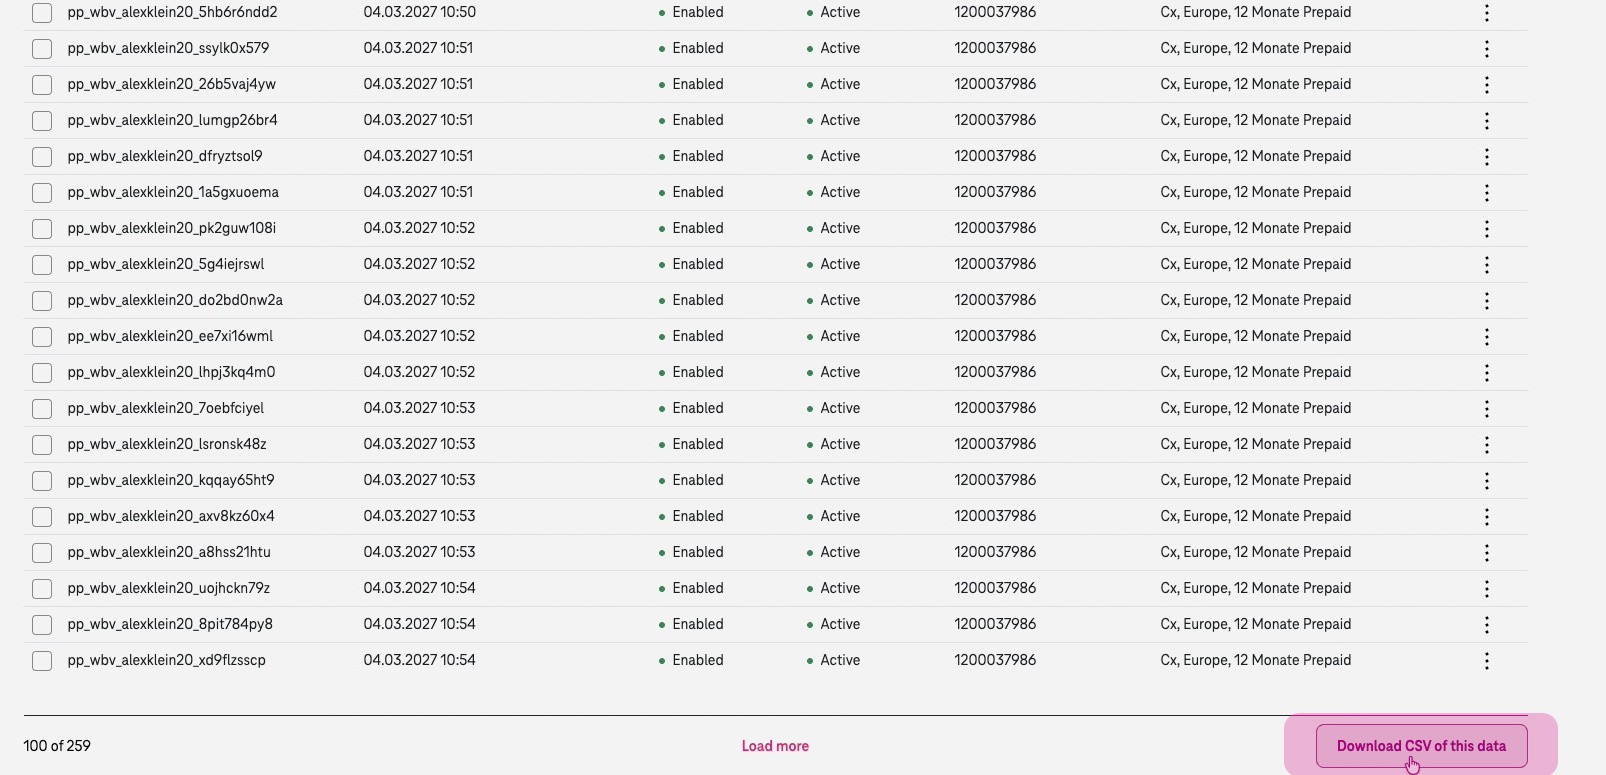
Scroll down the account list.
Click “Download CSV of this data.”
Open the CSV file.
You can find all account passwords in the last column of the file.

Editing accounts
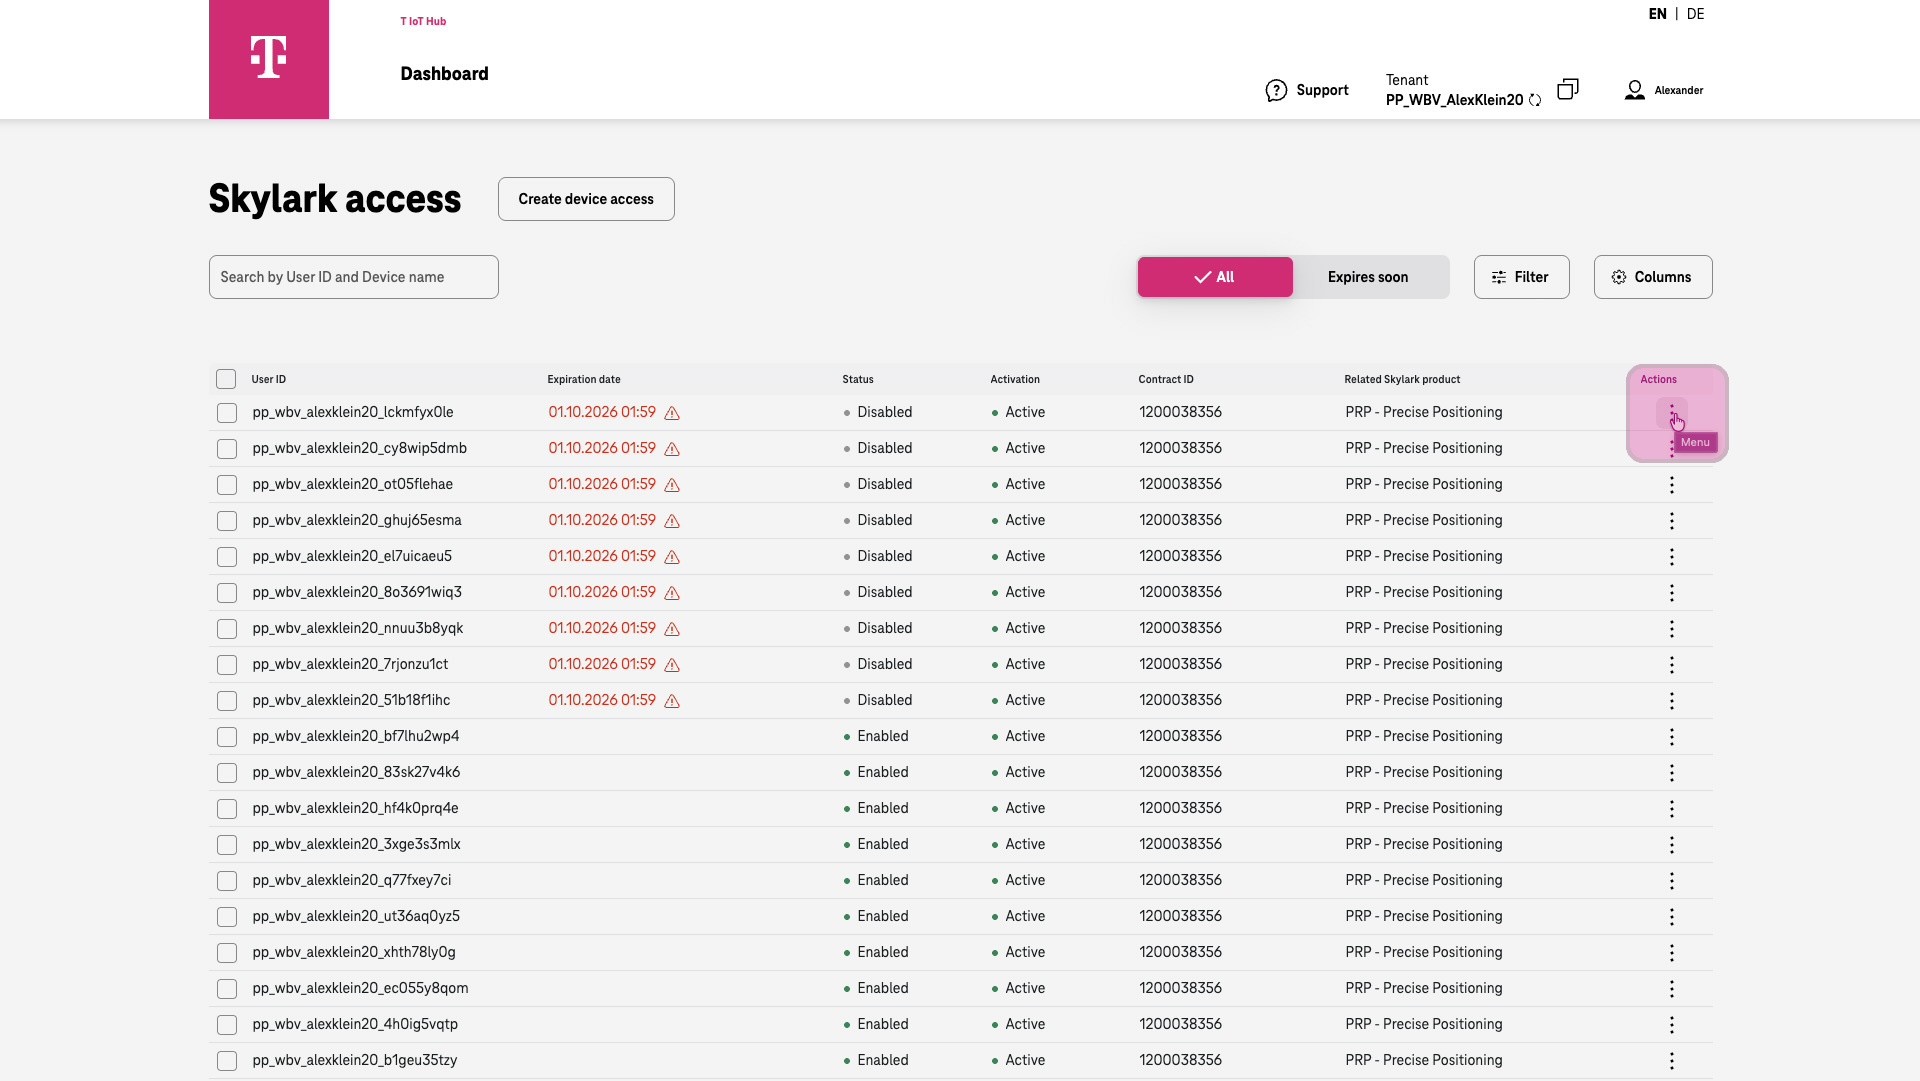
Click the three-dot menu for the account to open additional actions.
Editing accounts - View
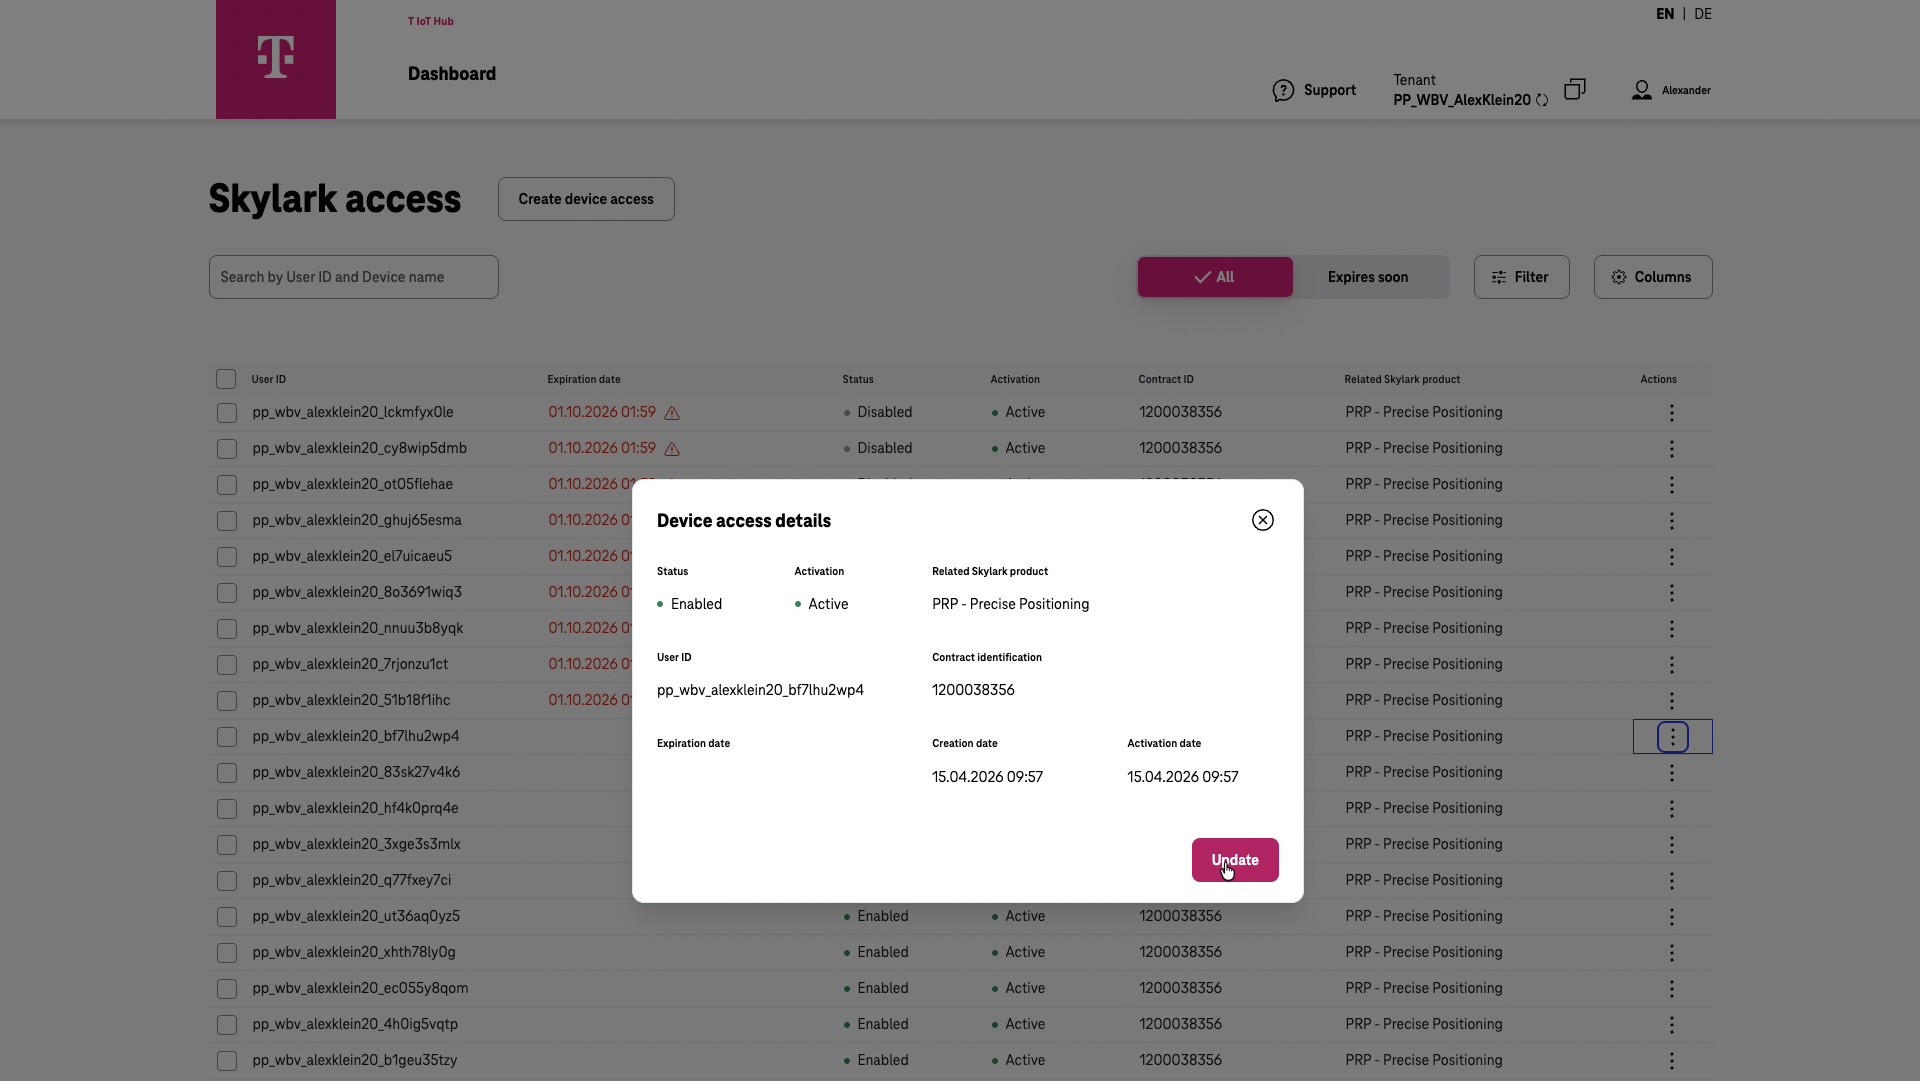
“View details” displays detailed information about the account.
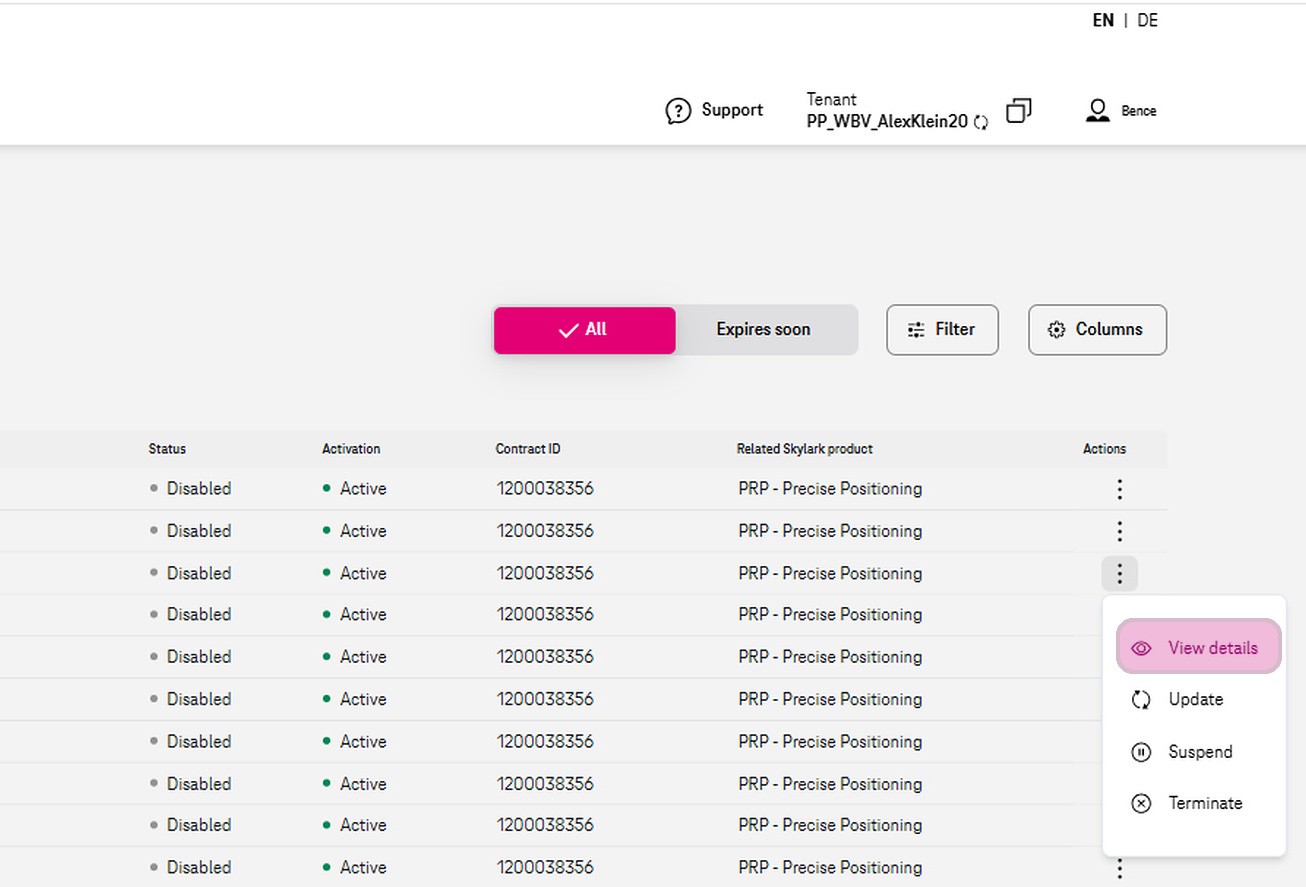
You can view all details for the account.
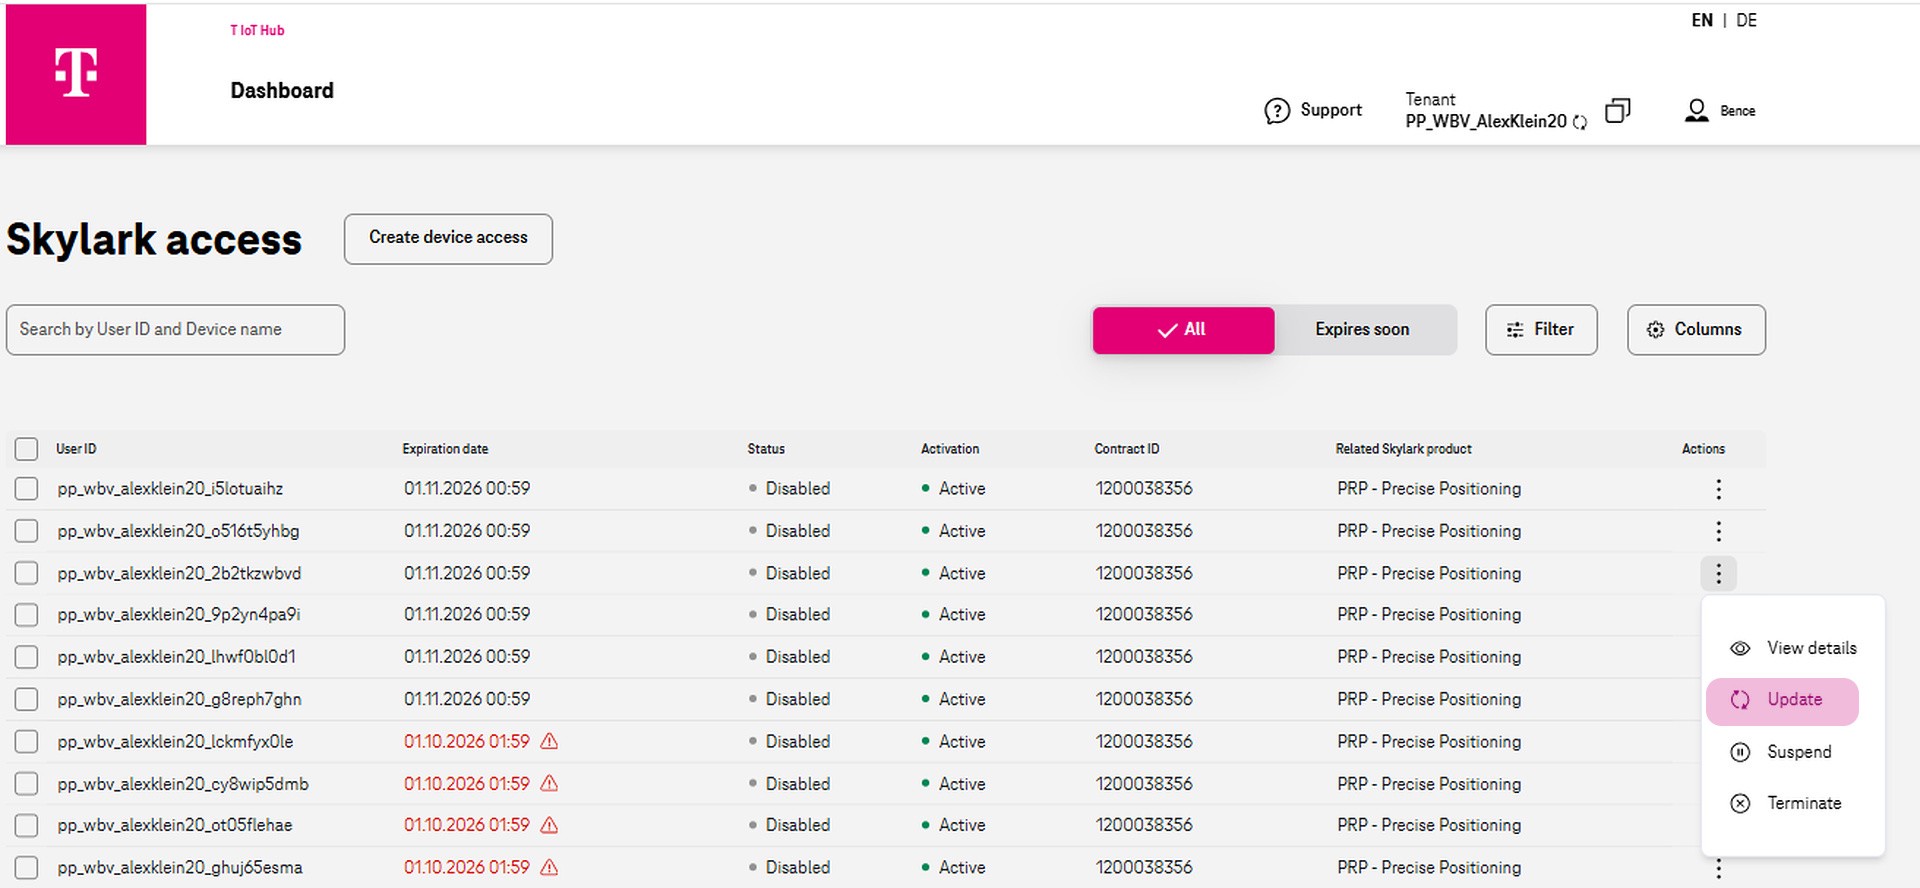
Editing accounts - Update
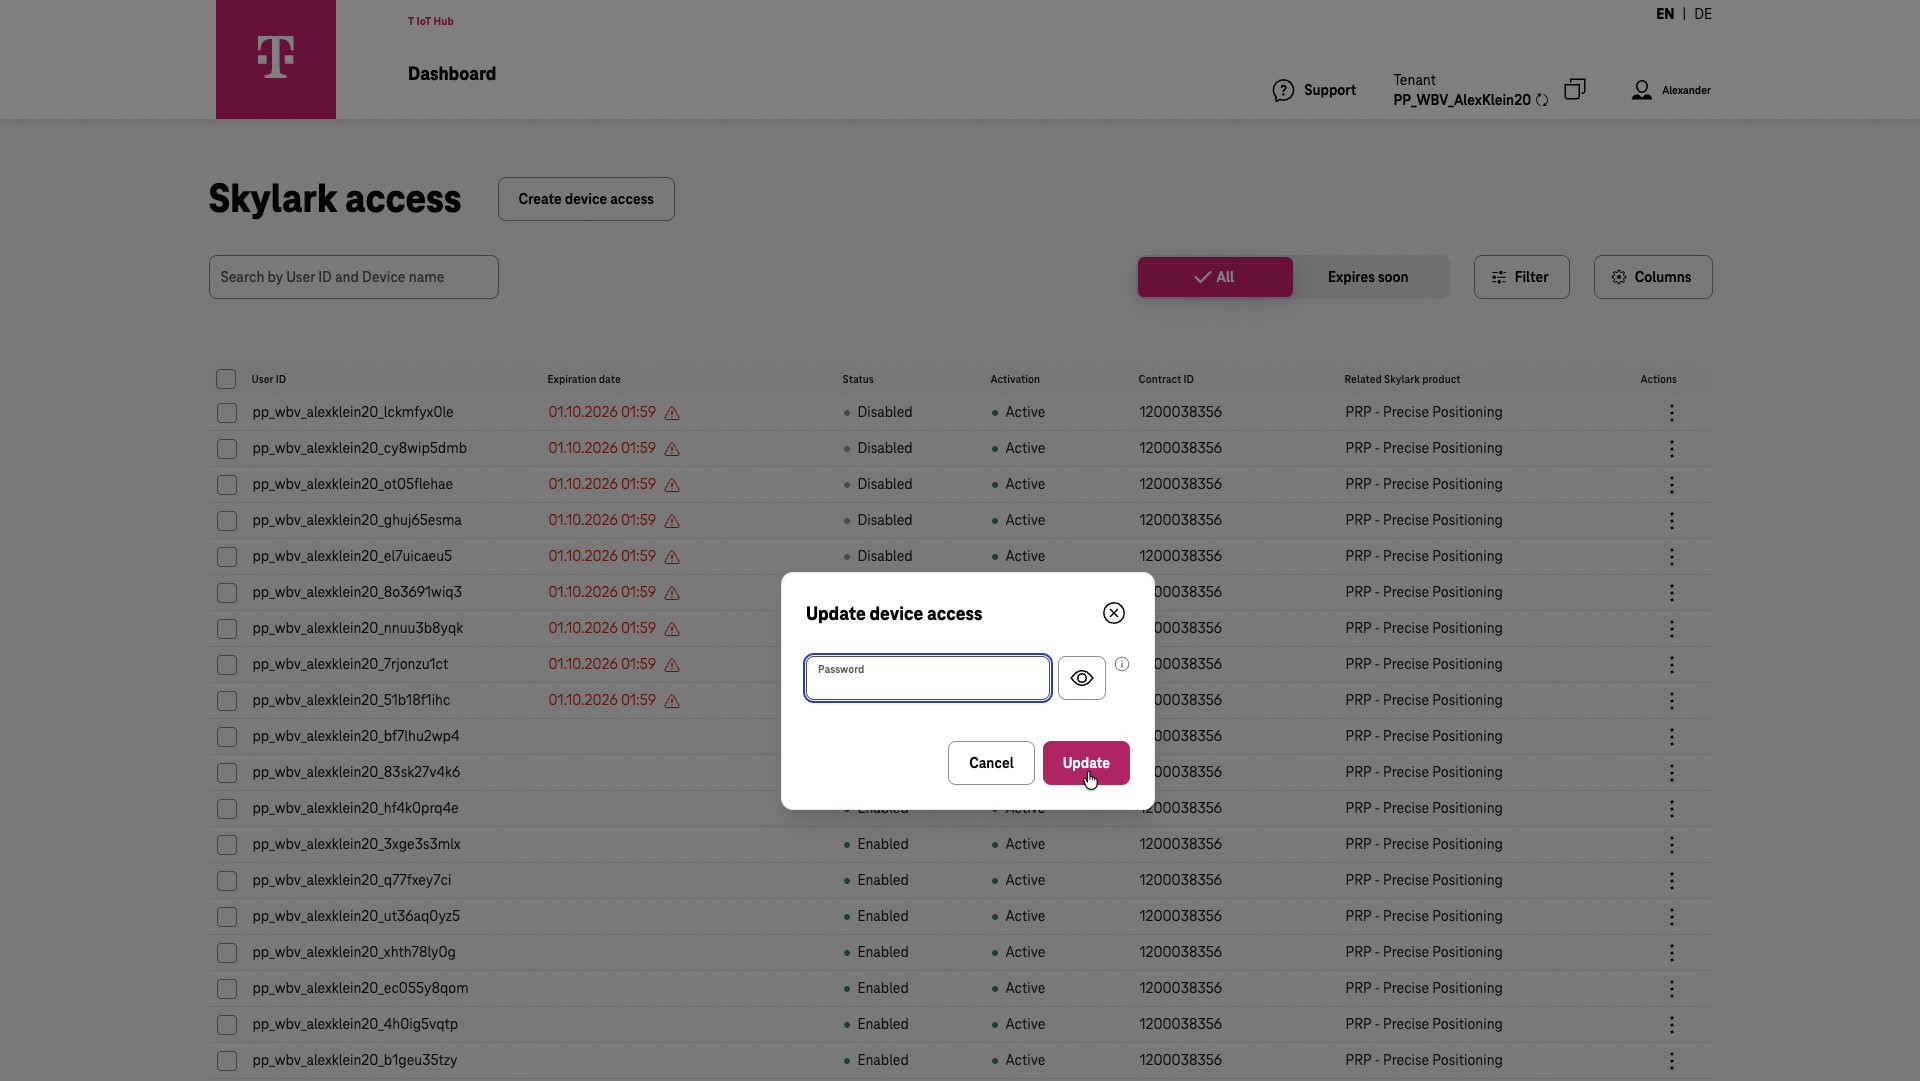
“Update” lets you set a new password for the selected account.
You can either enter your own password or leave the field empty to have the system generate a new random password.
Editing accounts - Suspend
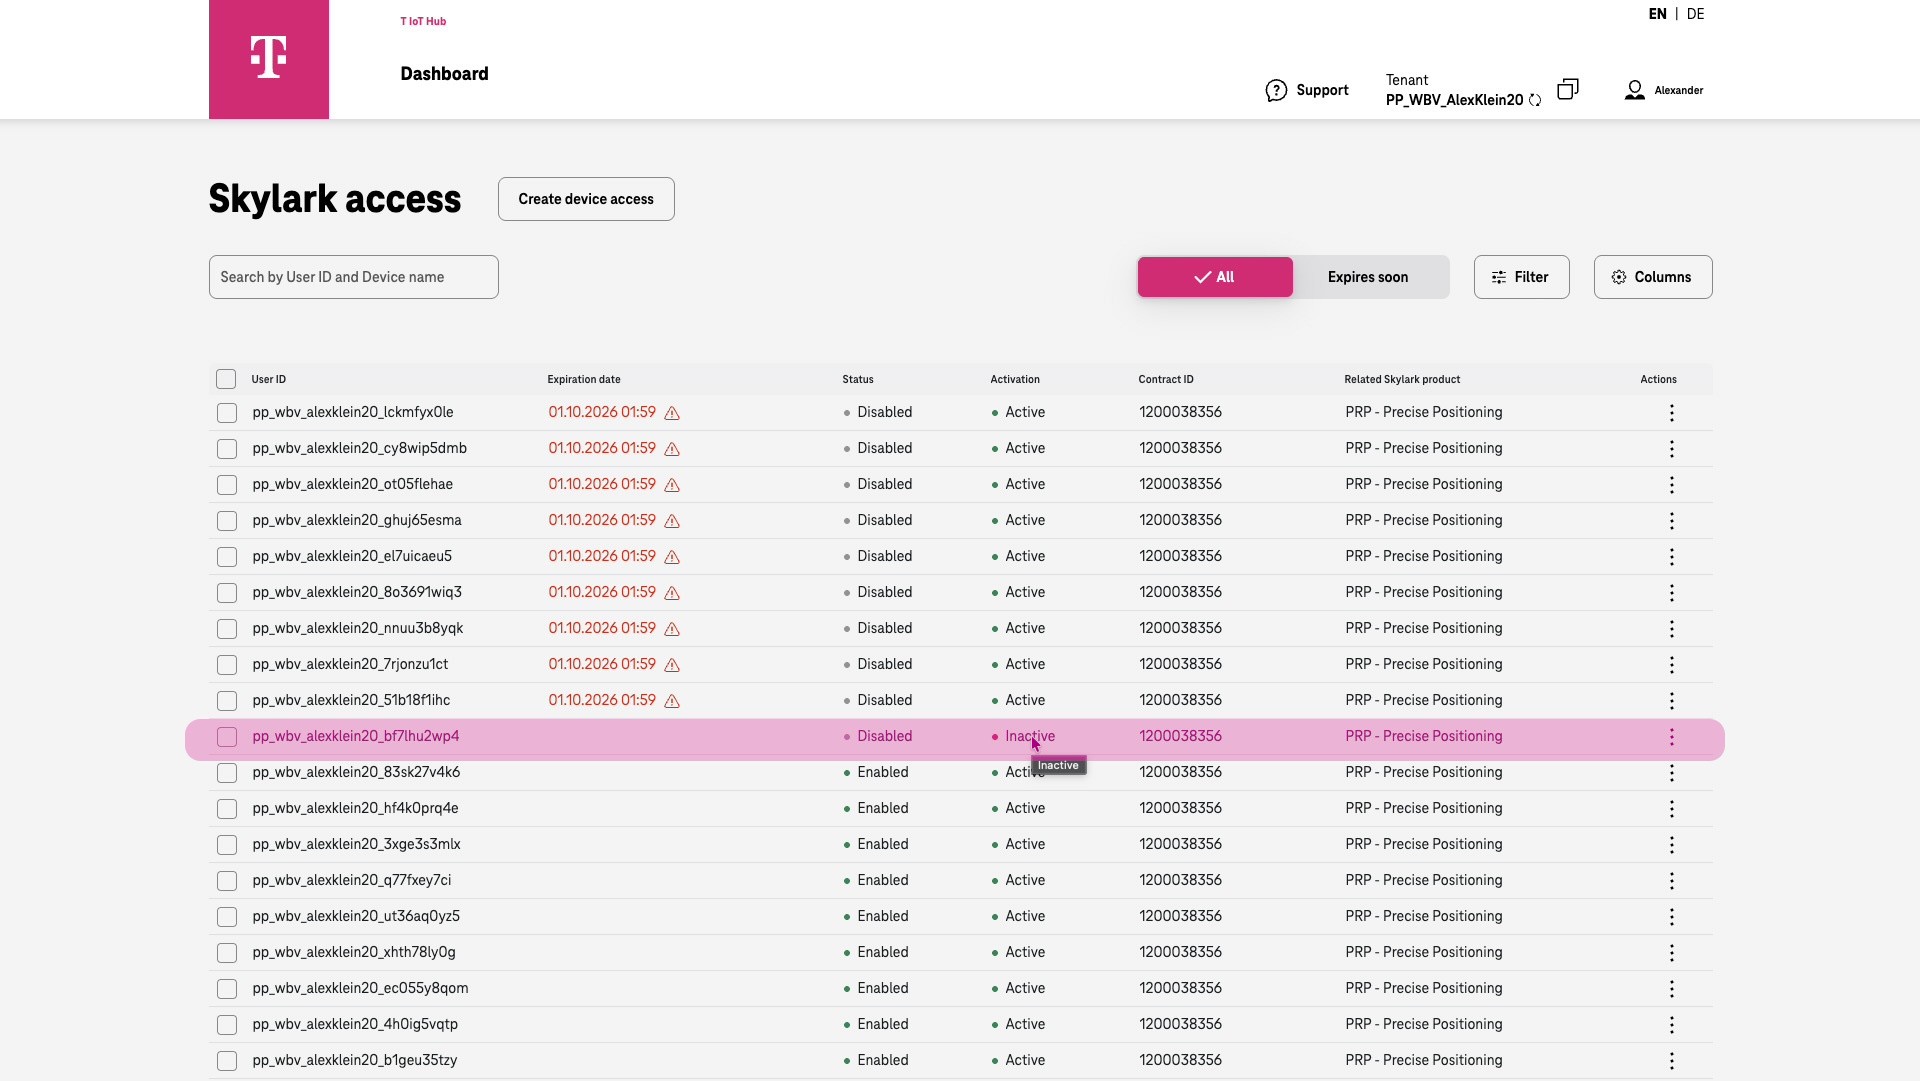
“Suspend” lets you suspend the account indefinitely until you choose to re-enable it.
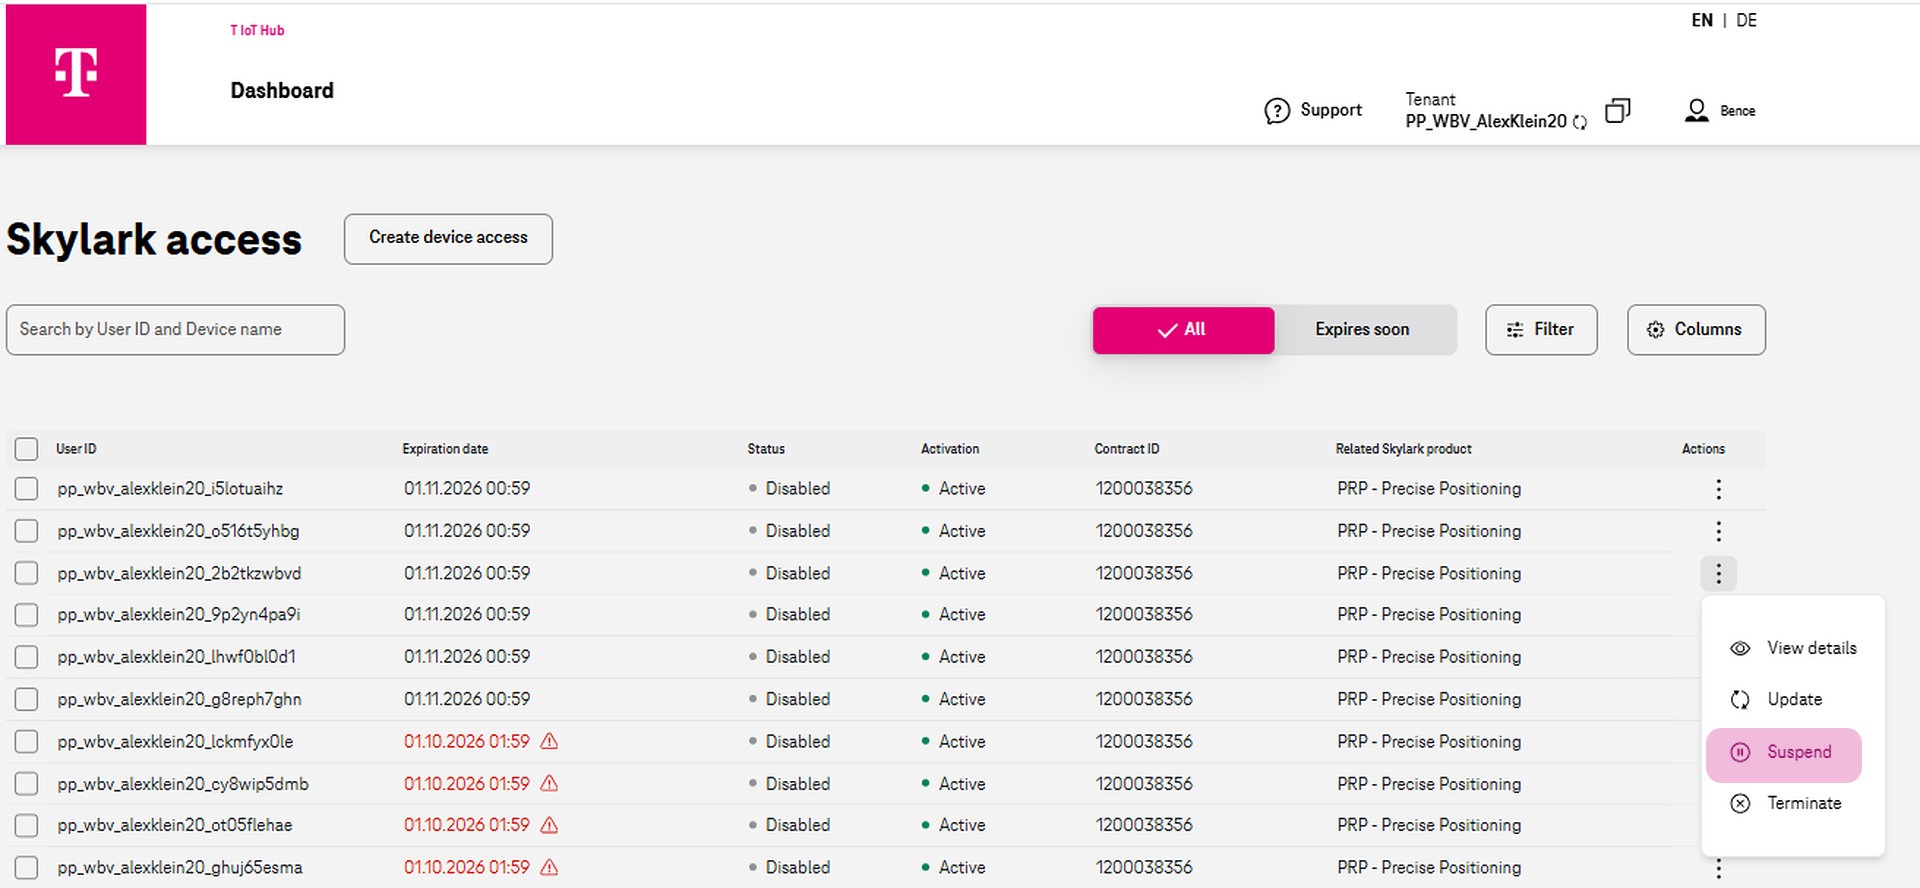
The account will then be marked as “Disabled” and “Inactive,” preventing further use.
Editing accounts - Resume
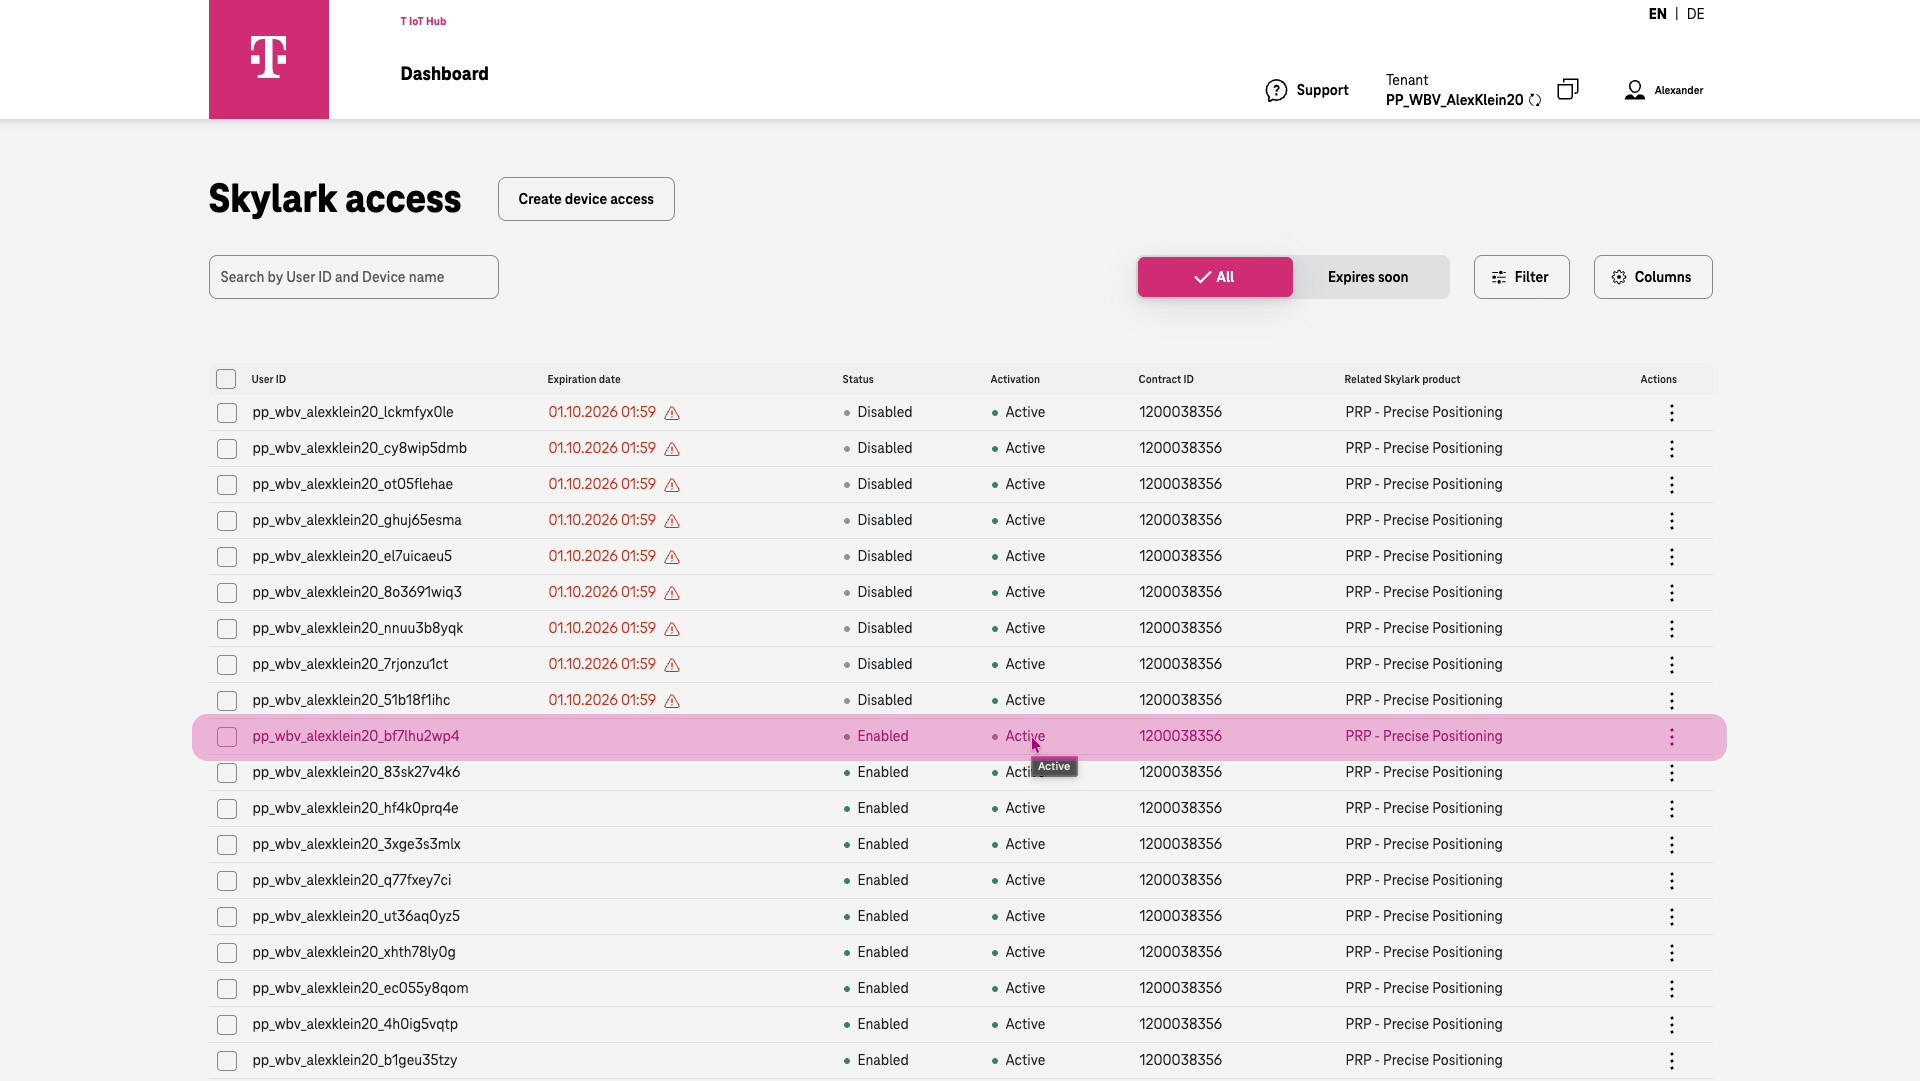
To re-enable the account, select the “Resume” function from the menu.
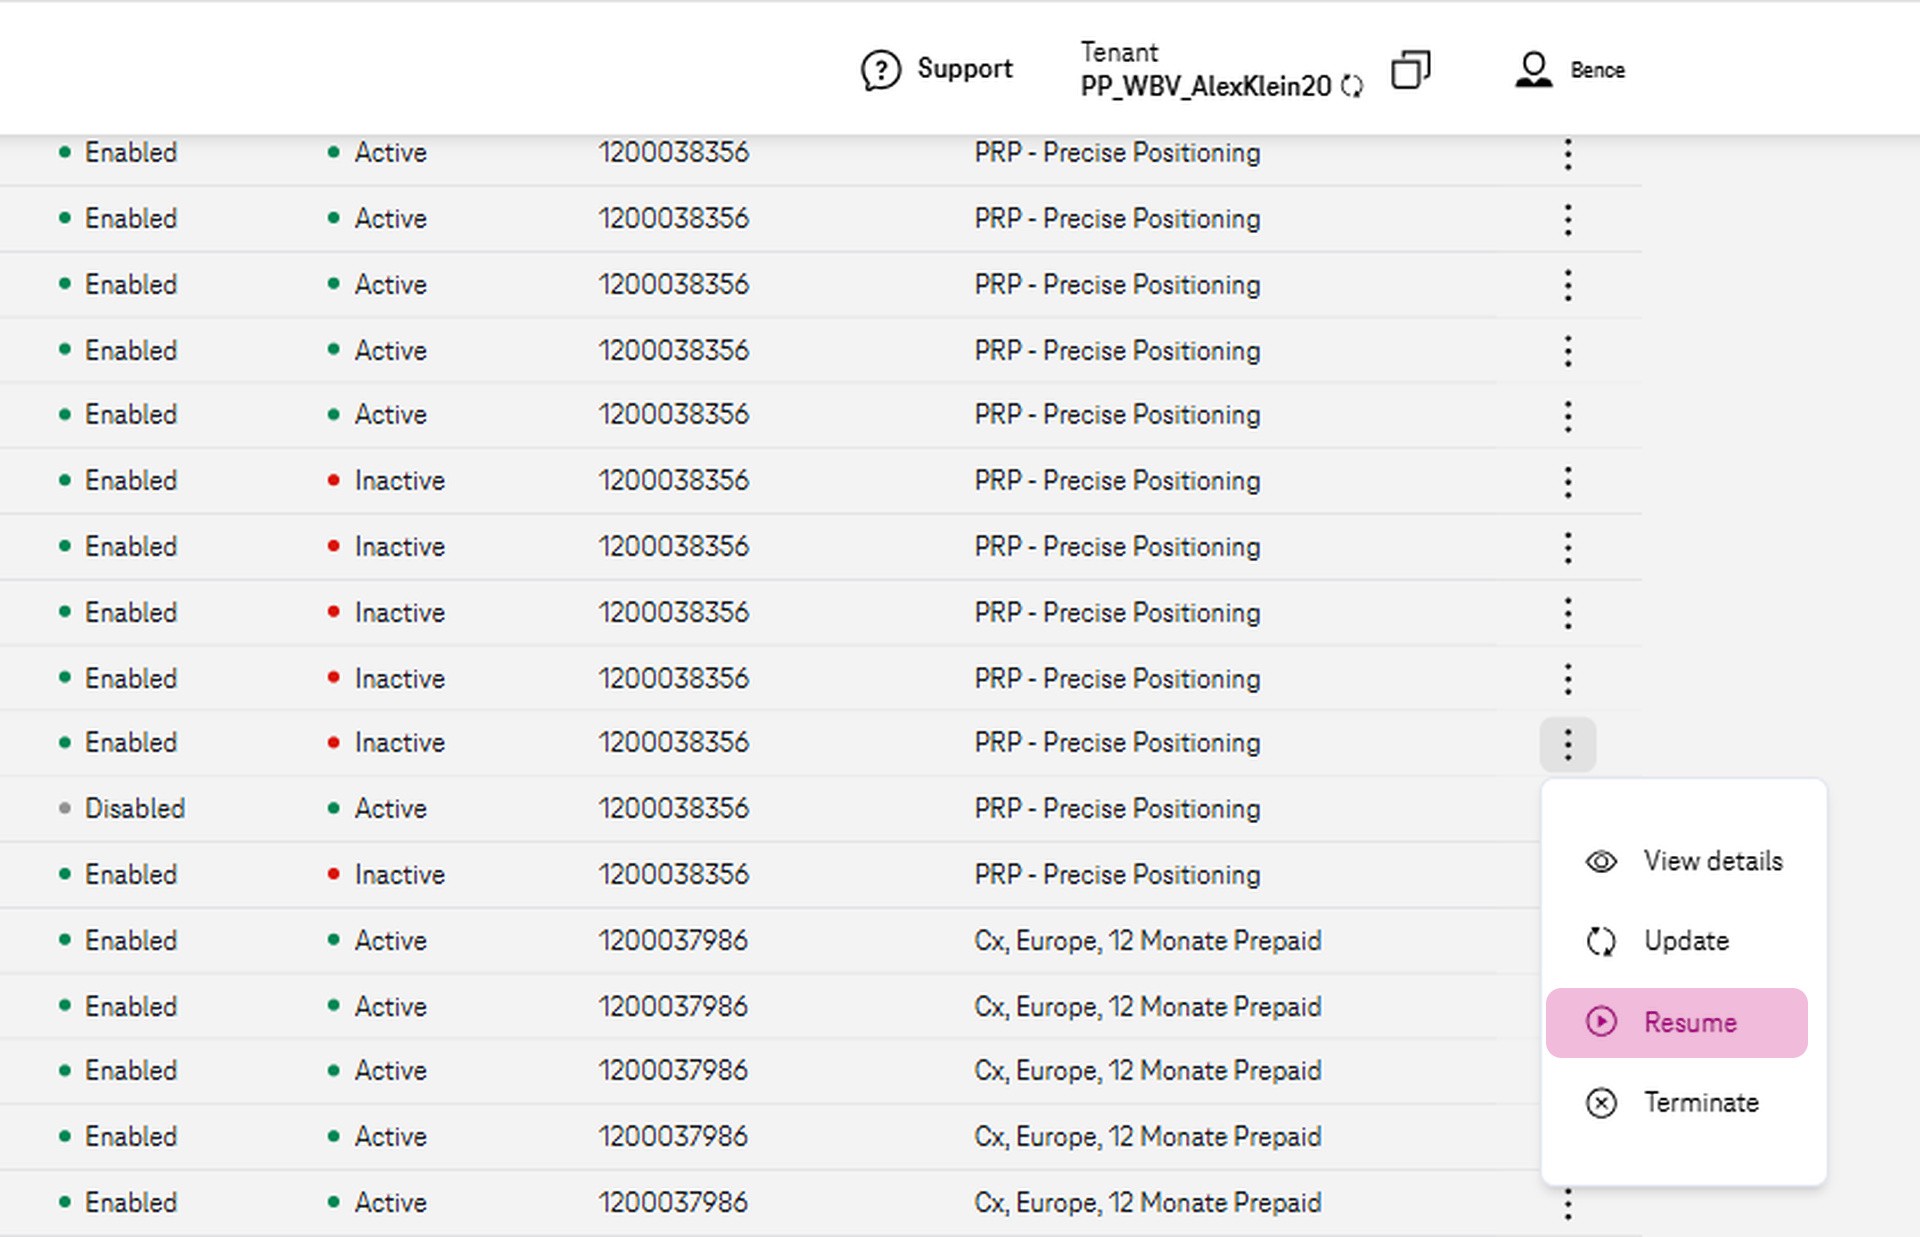
The account becomes active and enabled again.
Editing accounts - Terminate
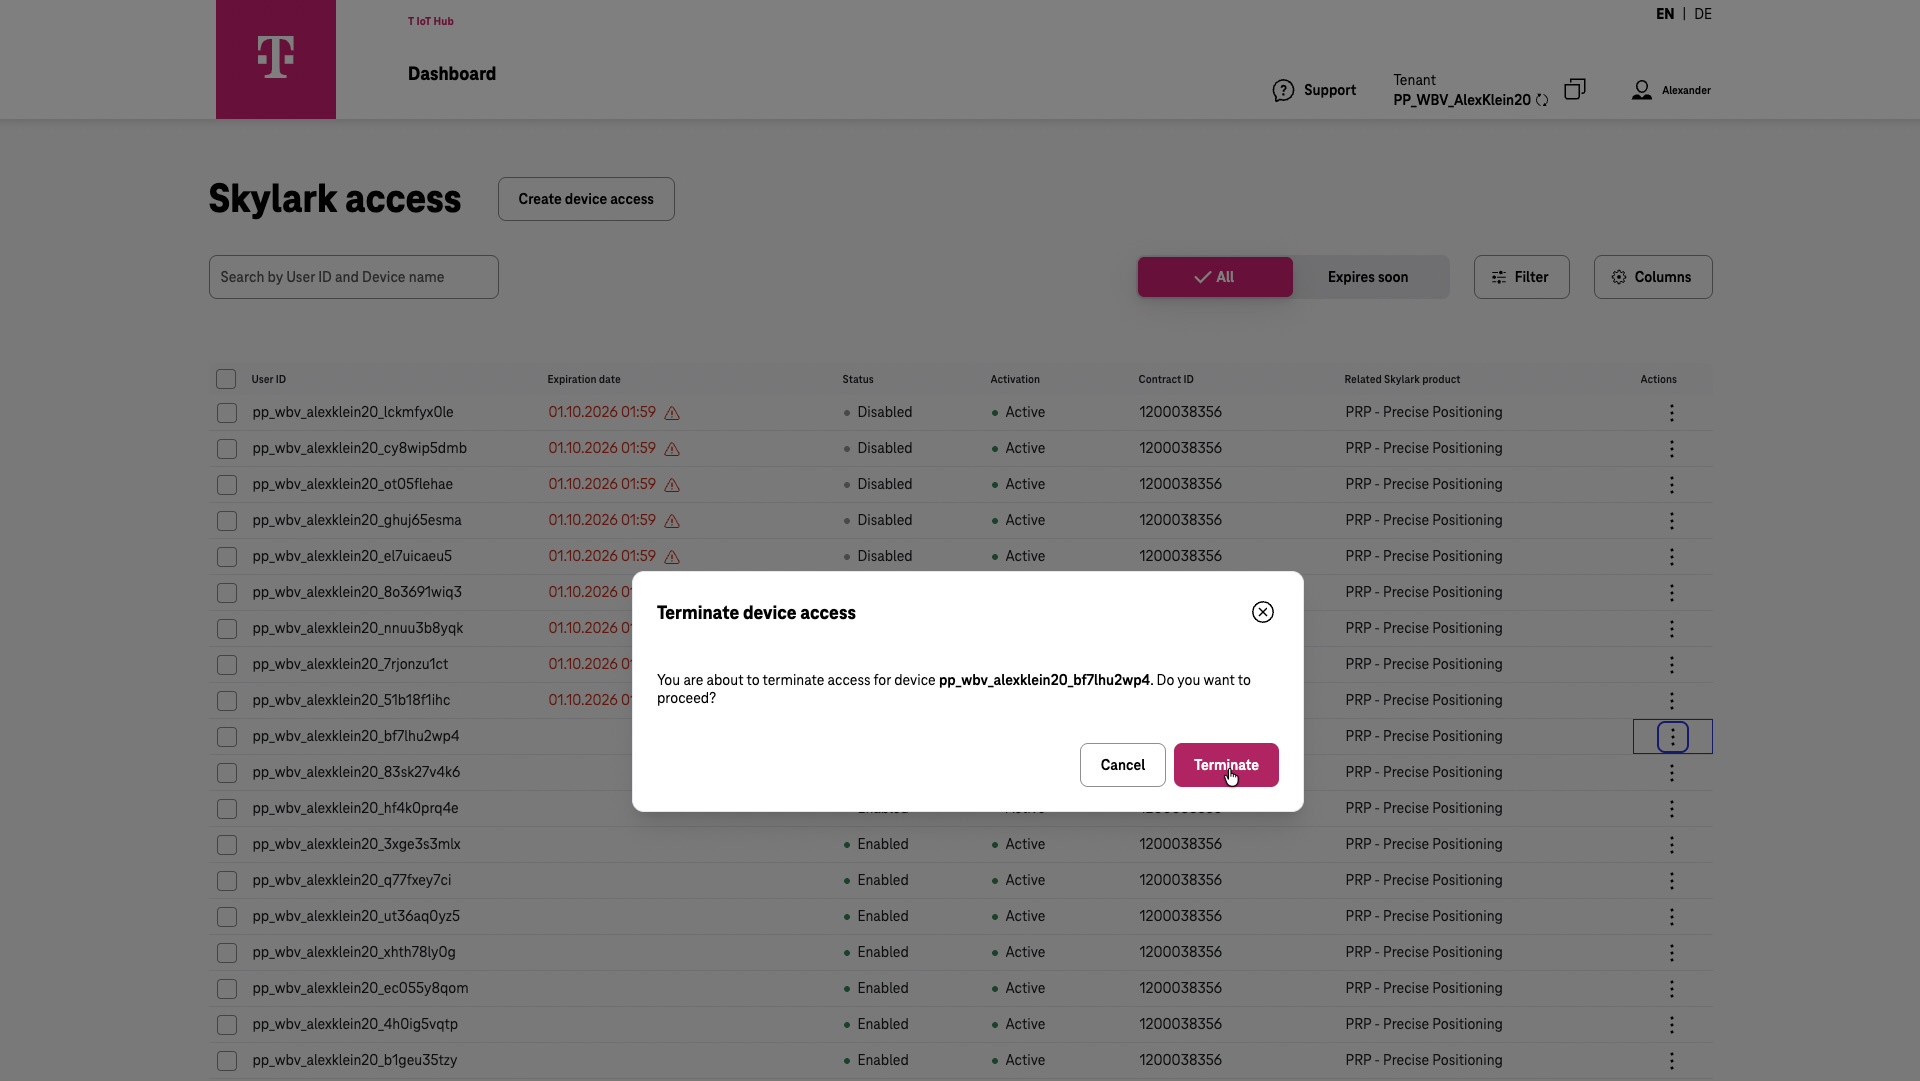
To cancel an account completely, select “Terminate.”
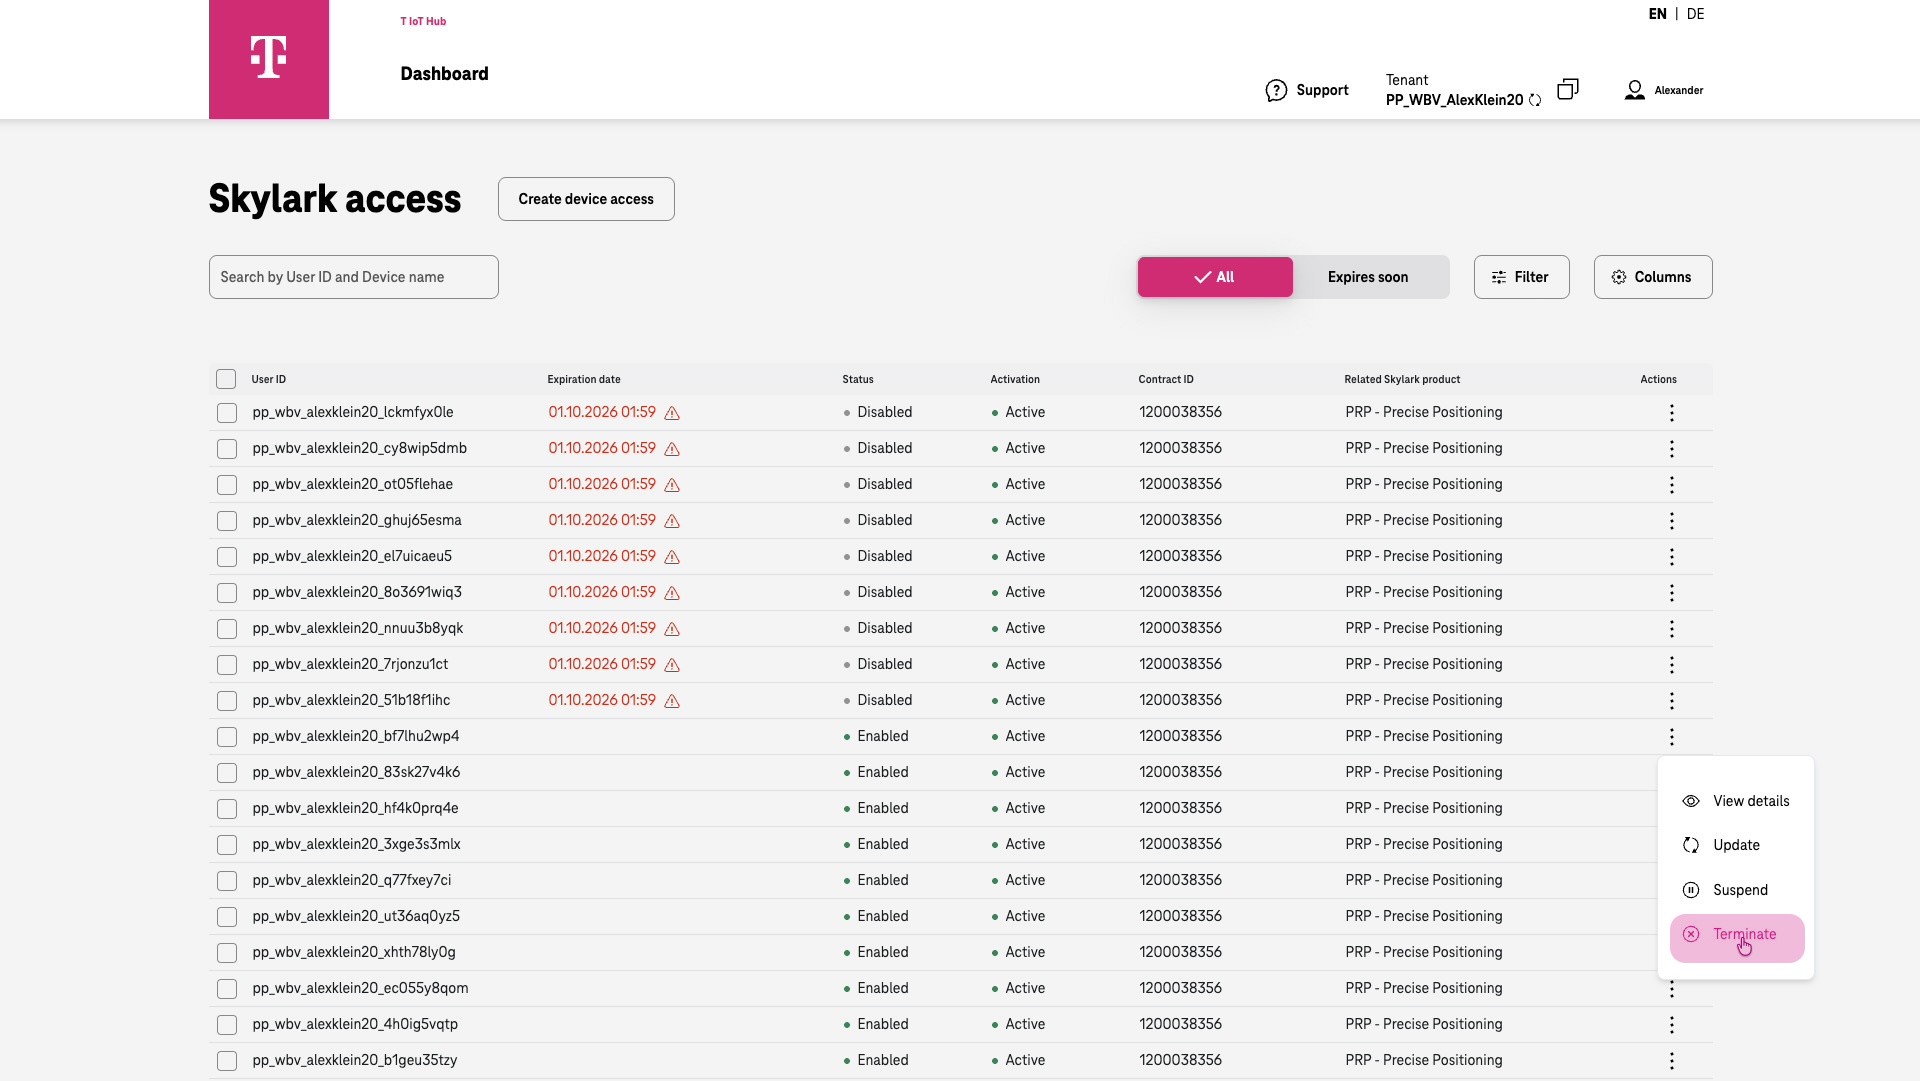
“Terminate” cancels the account at the end of the current month.
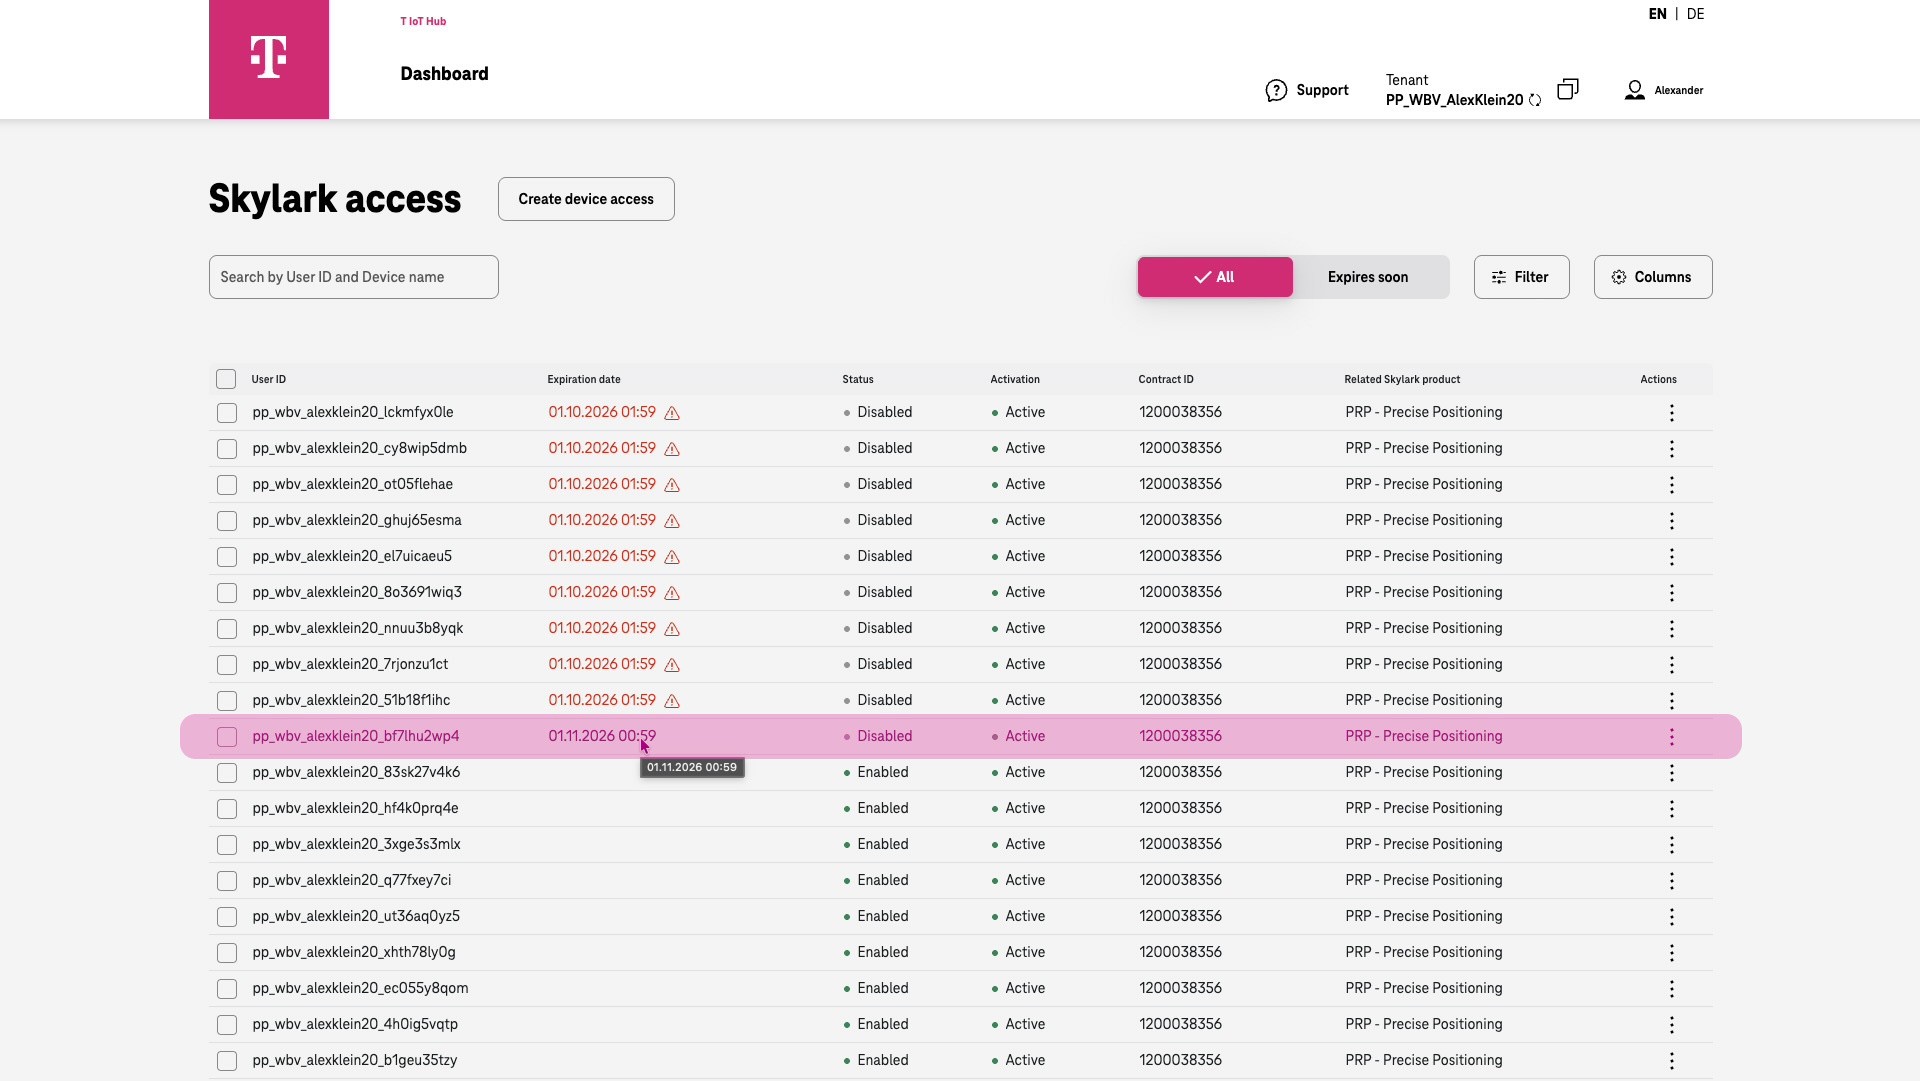
The account is shown as “Disabled” but remains “Active” until the displayed “Expiration date” at the end of the month. Because the expiration time is shown in UTC, it may differ from the local time displayed by your browser.
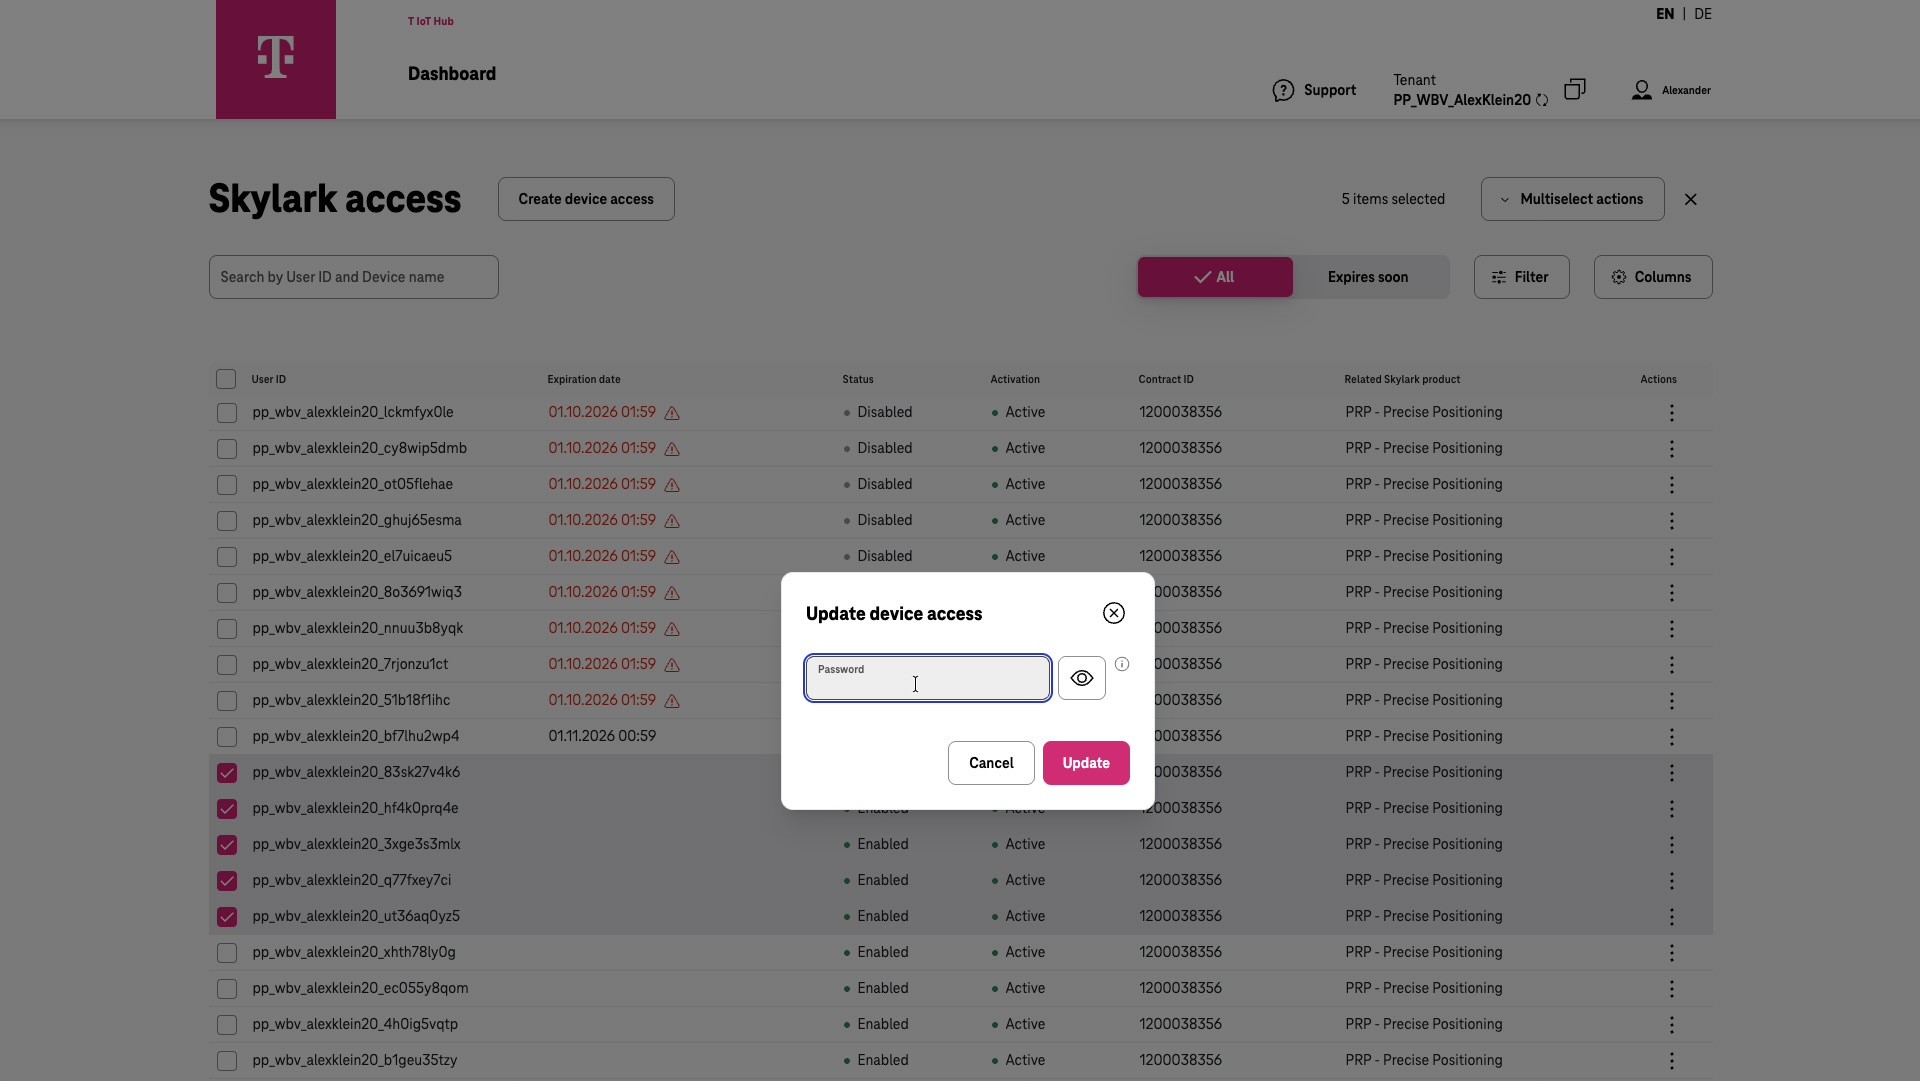
Editing multiple accounts - Update
Select the accounts you want to update.
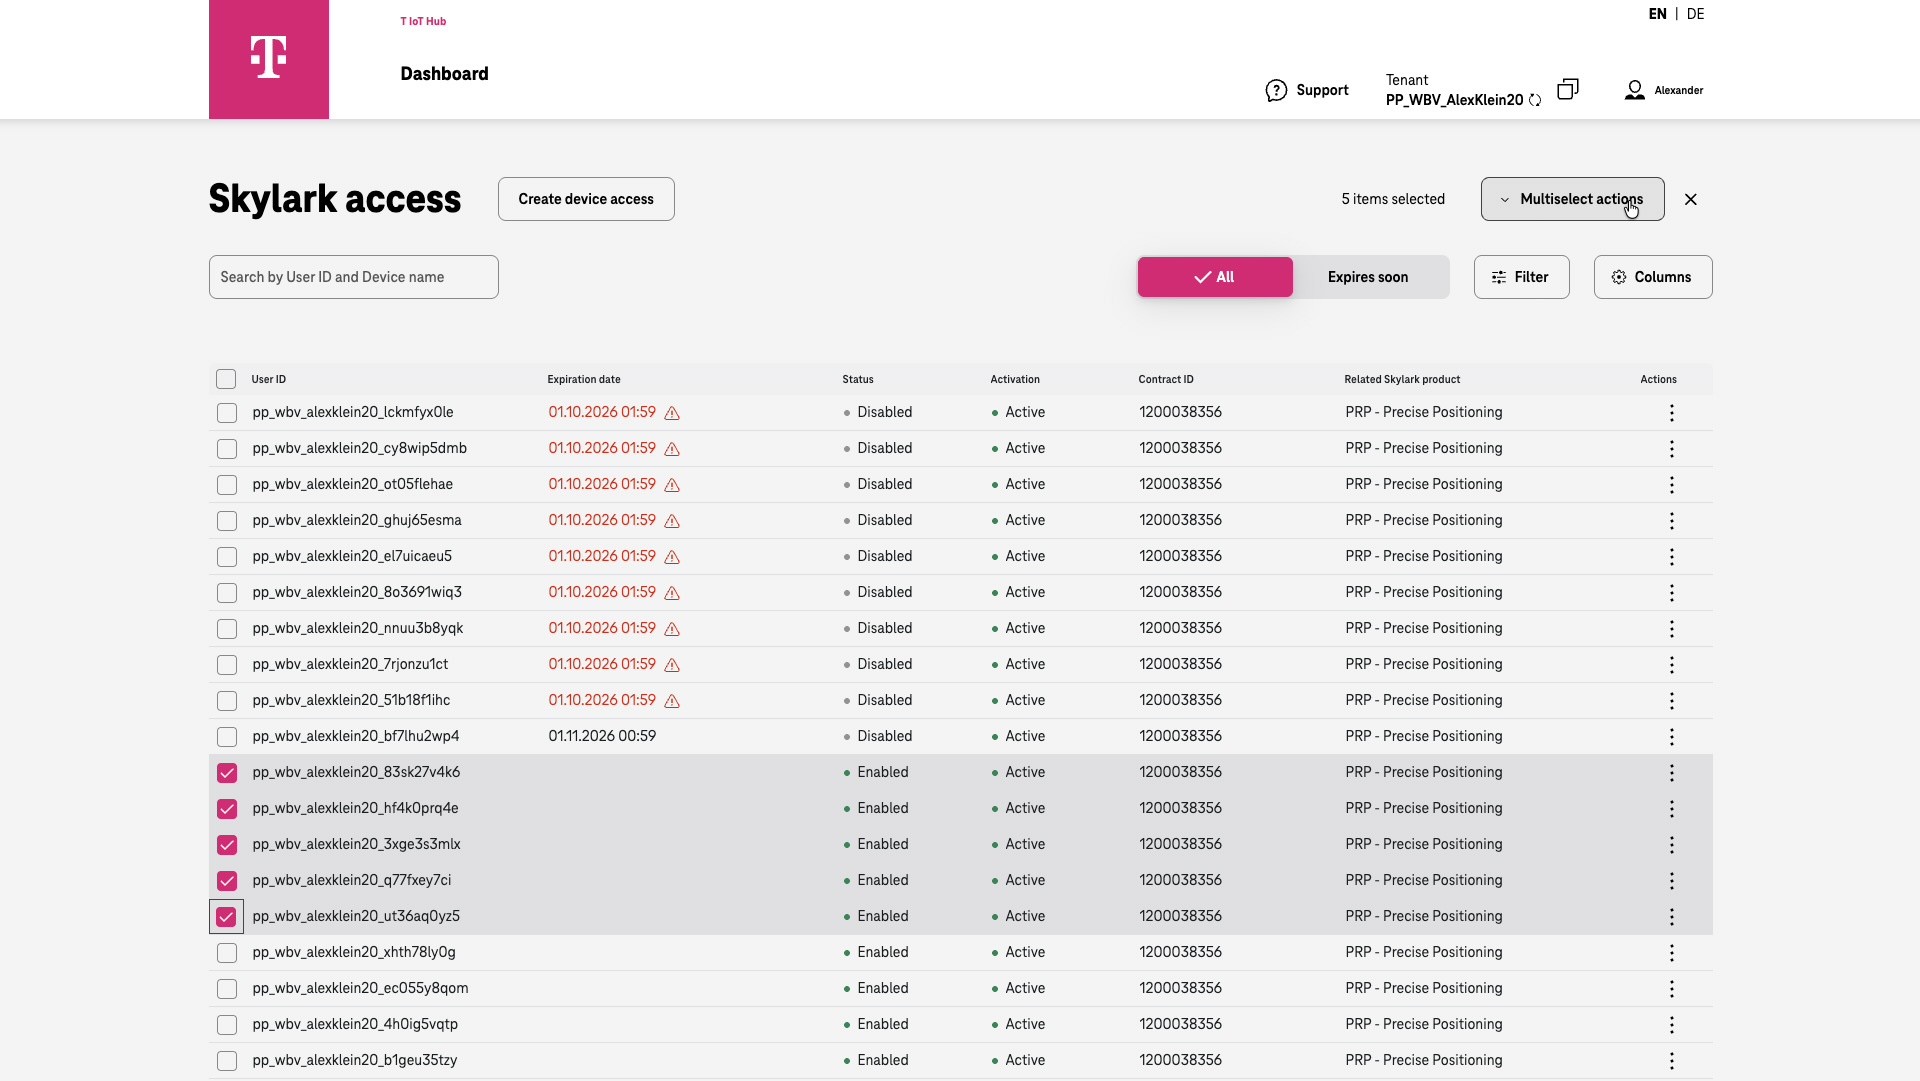
Click “Multiselect actions.”
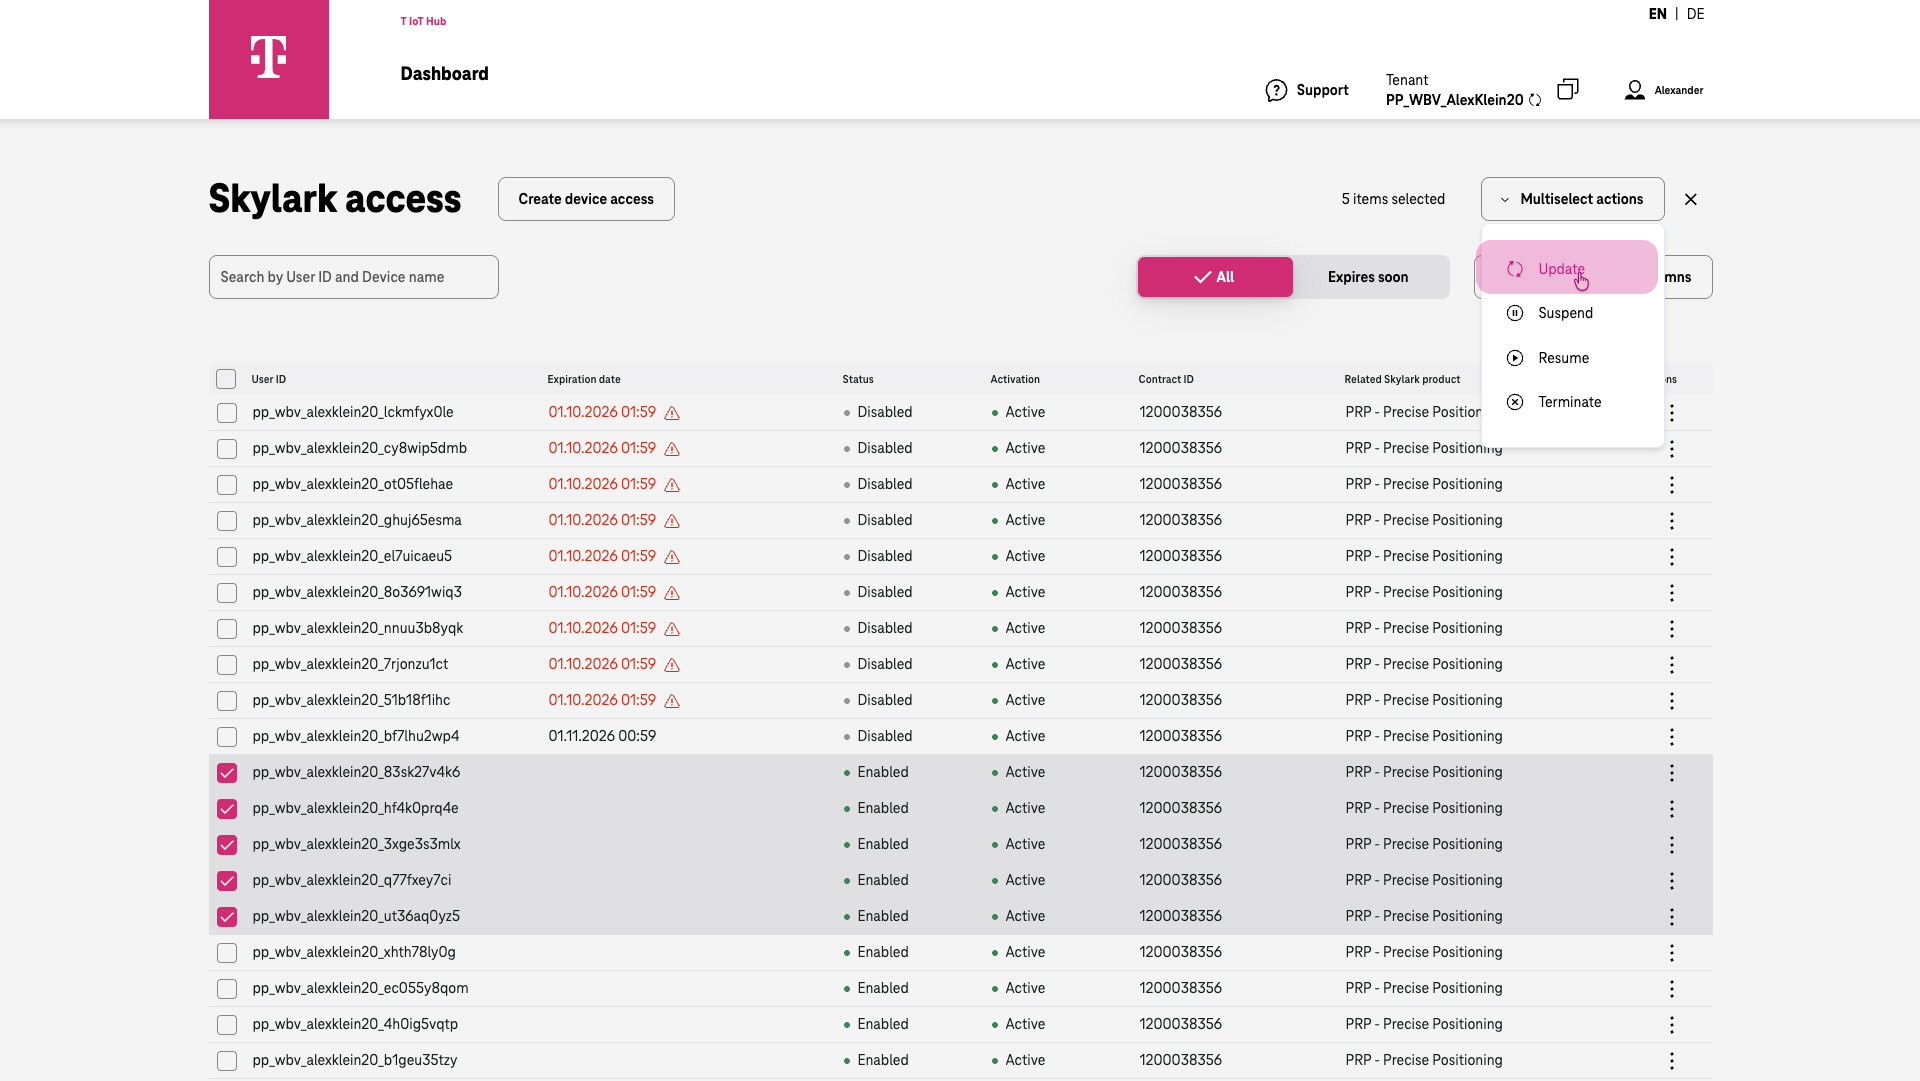
You can either enter your own passwords or leave the field empty to have the system generate new random passwords.
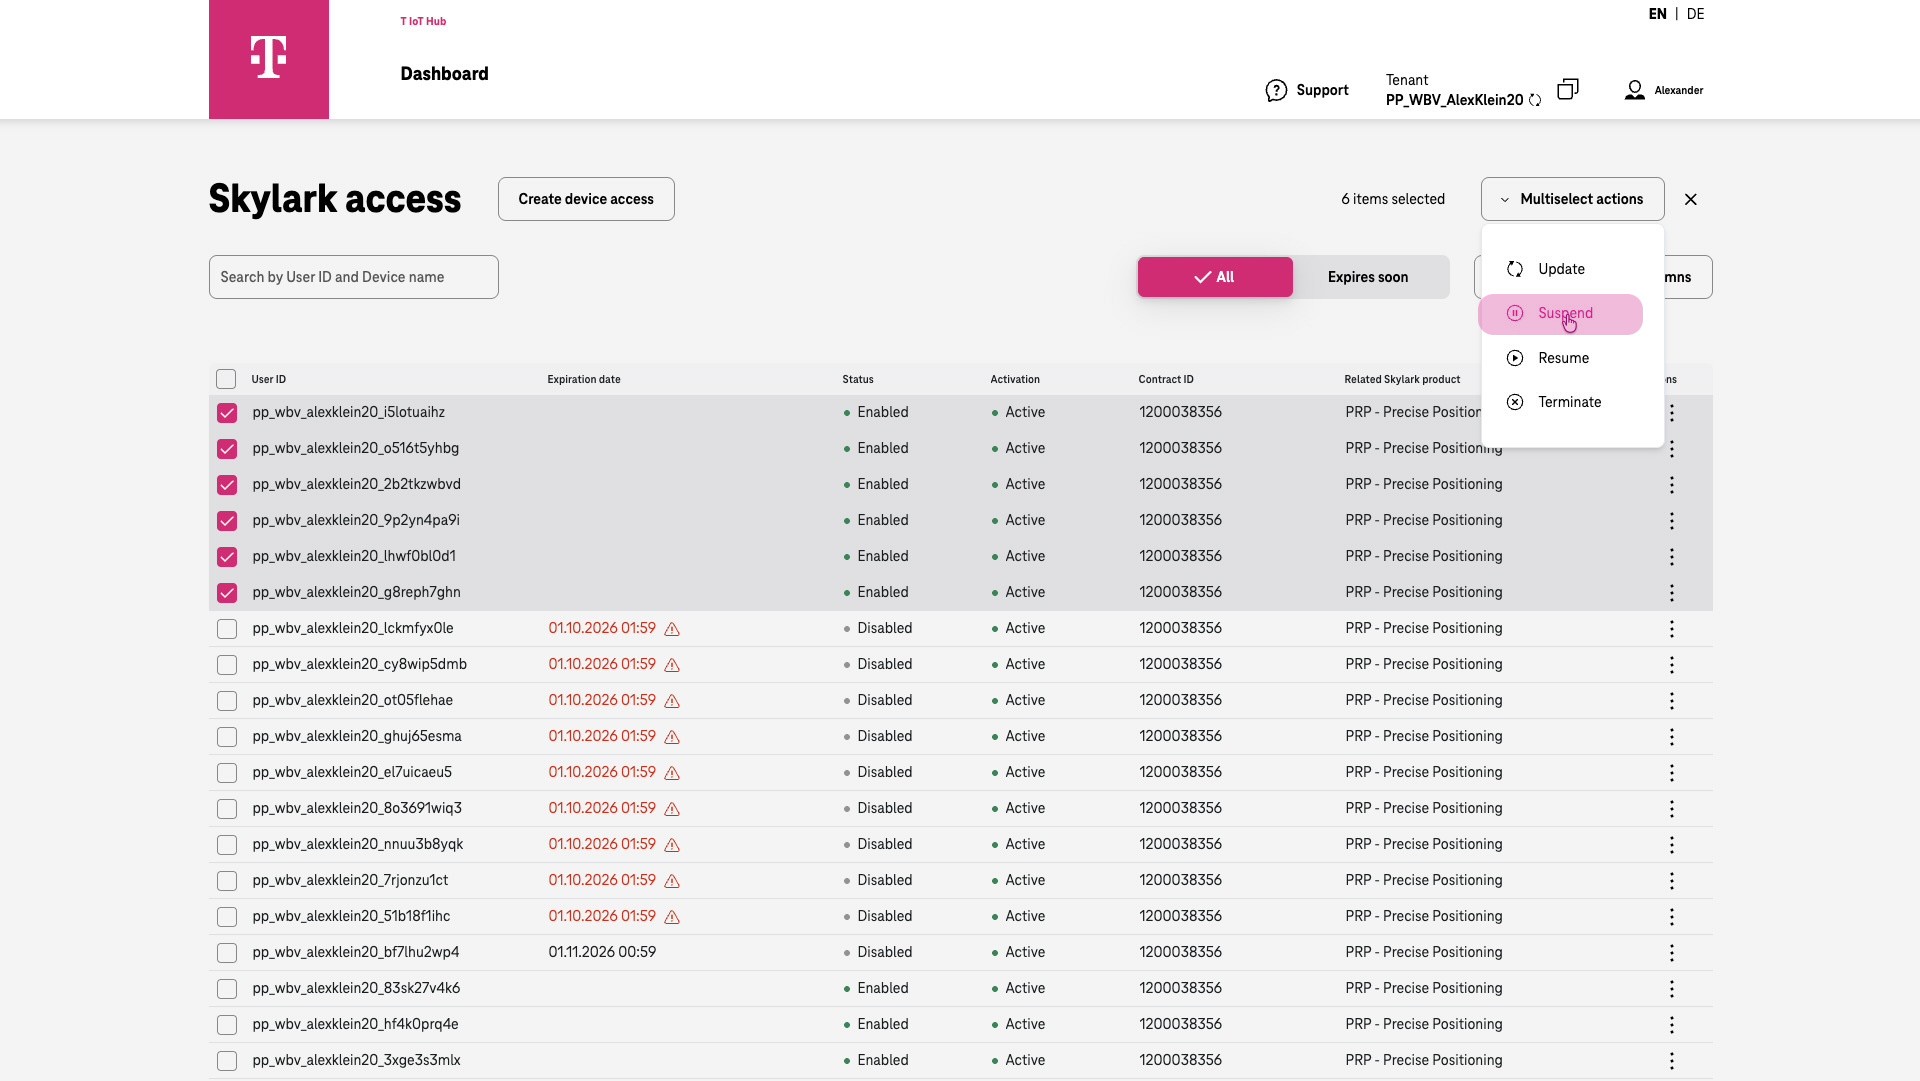
Editing multiple accounts - Suspend
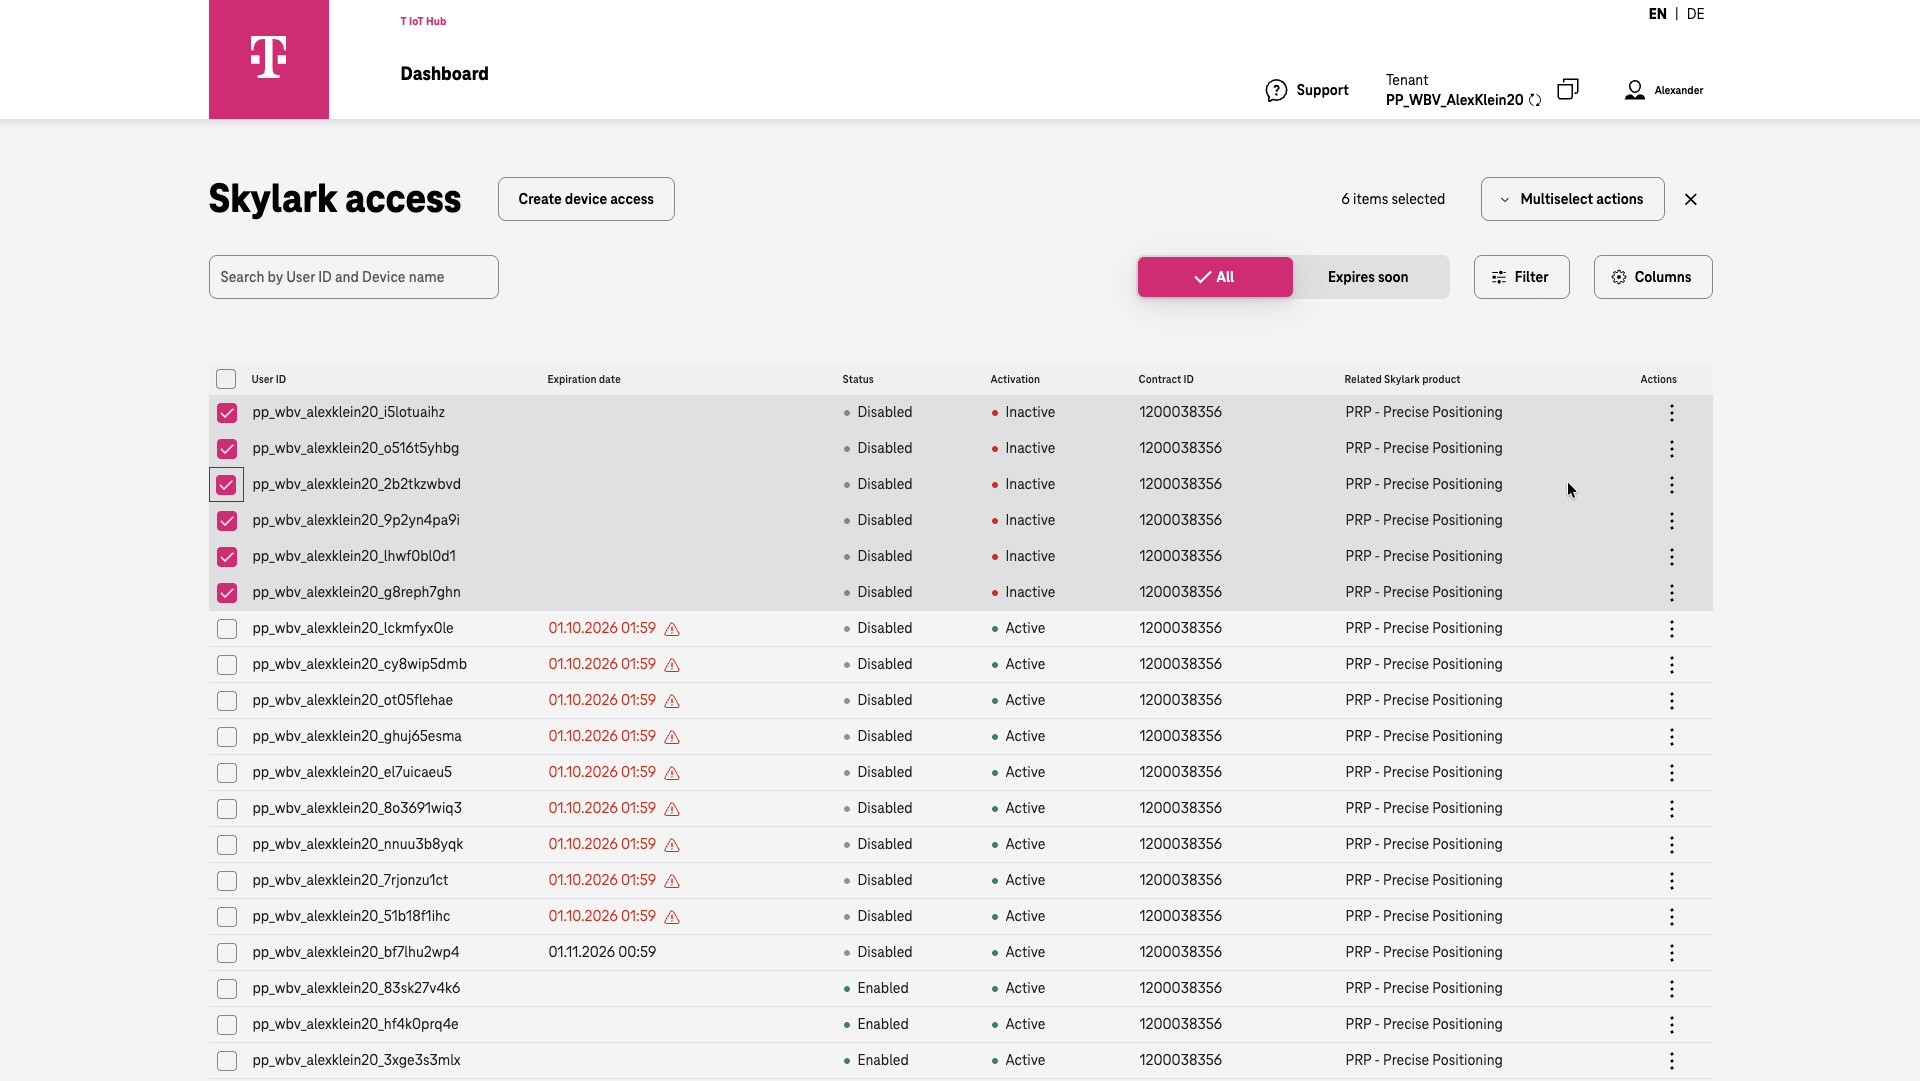
“Suspend” lets you suspend the accounts indefinitely until you choose to re-enable them.
The accounts will then be marked as “Disabled” and “Inactive,” preventing further use.
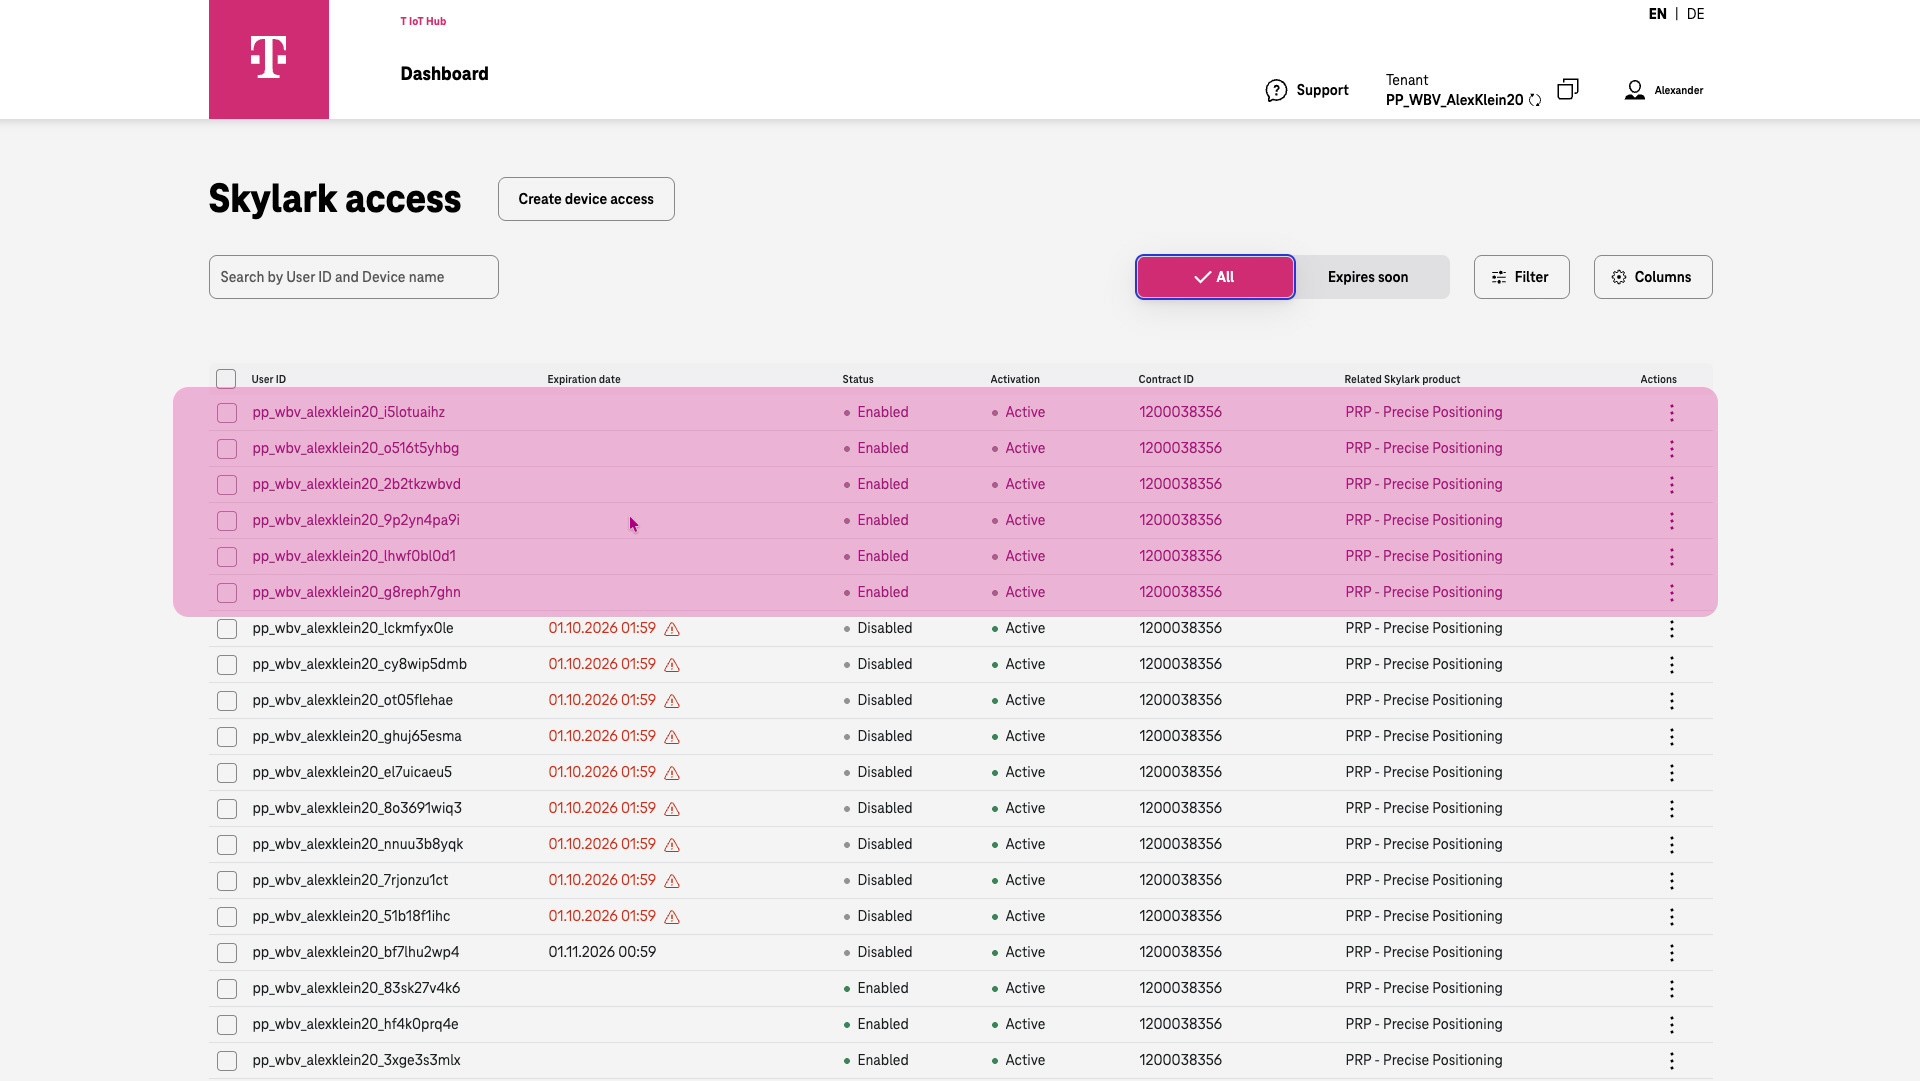
Editing multiple accounts - Resume
To re-enable the accounts, select the “Resume” function from the menu.
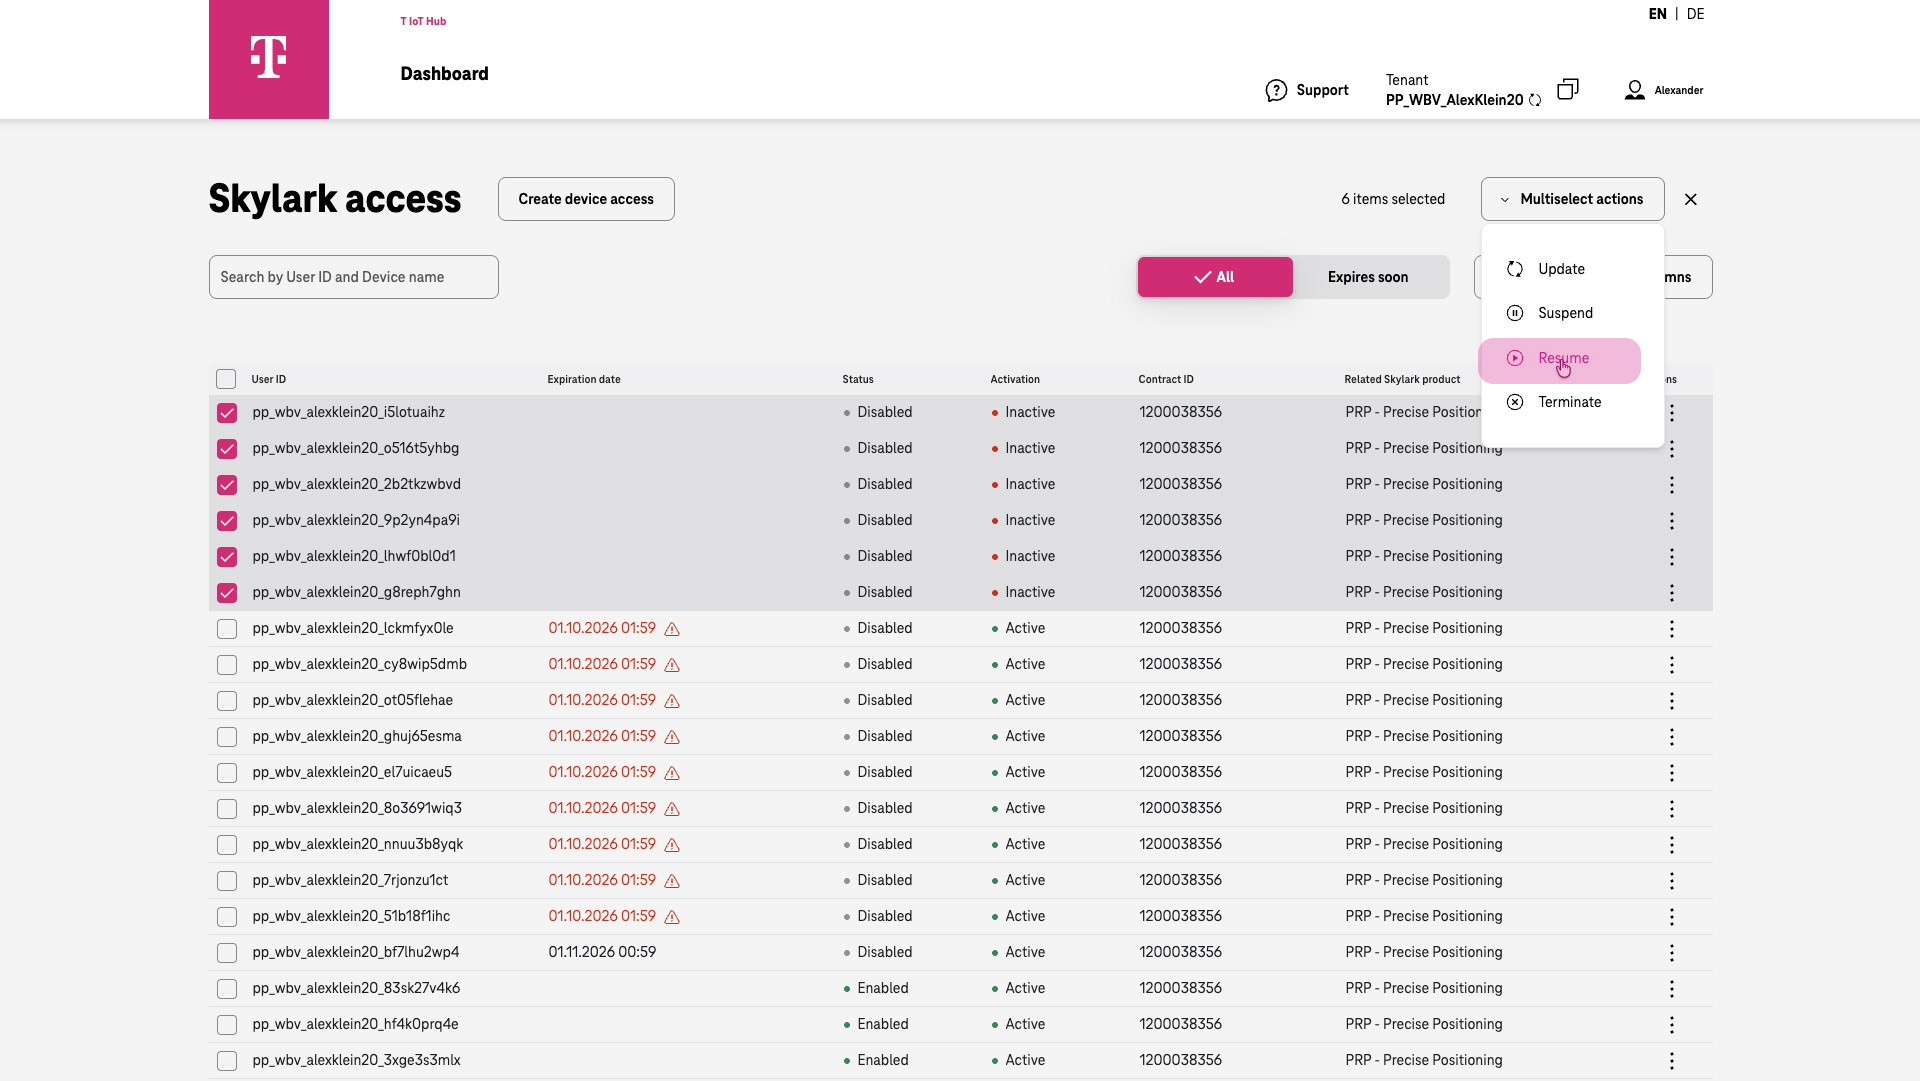
The accounts become active and enabled again.
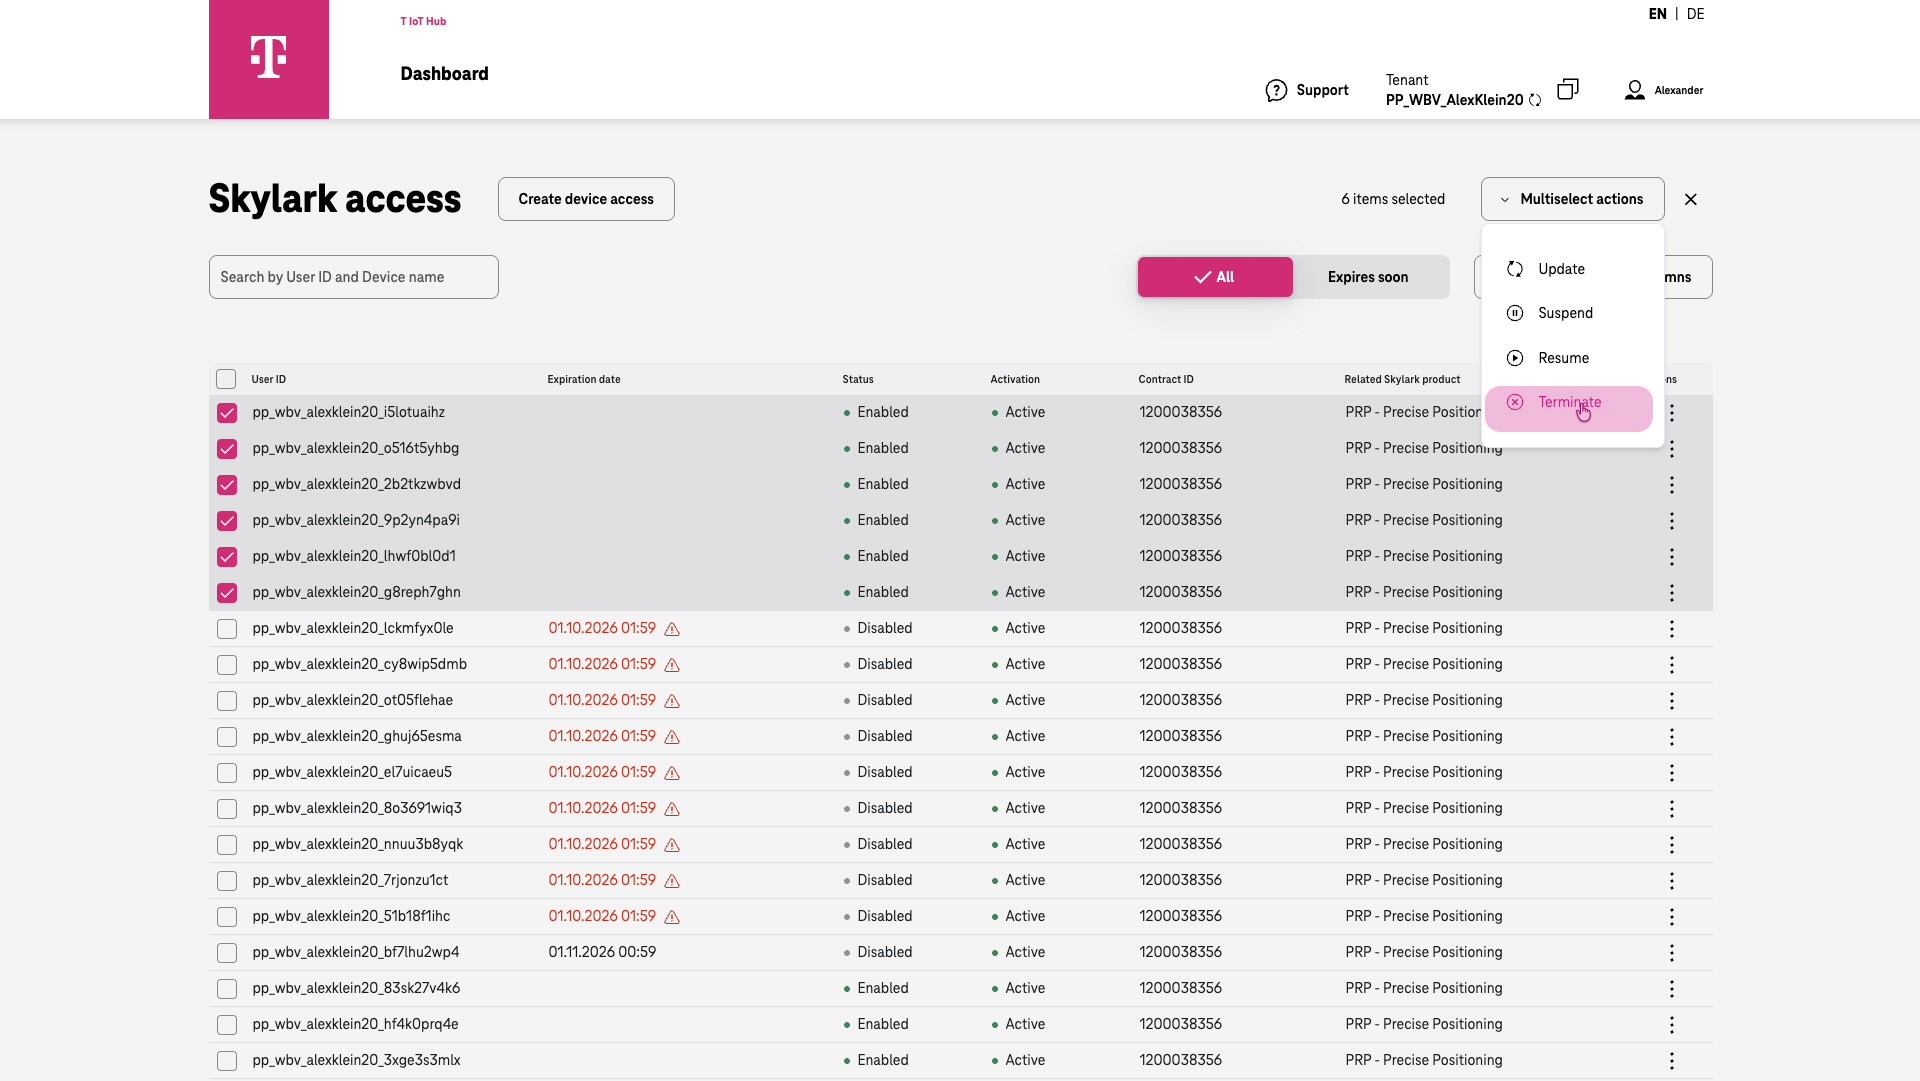
Editing multiple accounts - Terminate
To cancel the accounts completely, select “Terminate.”
“Terminate” cancels the accounts at the end of the current month.
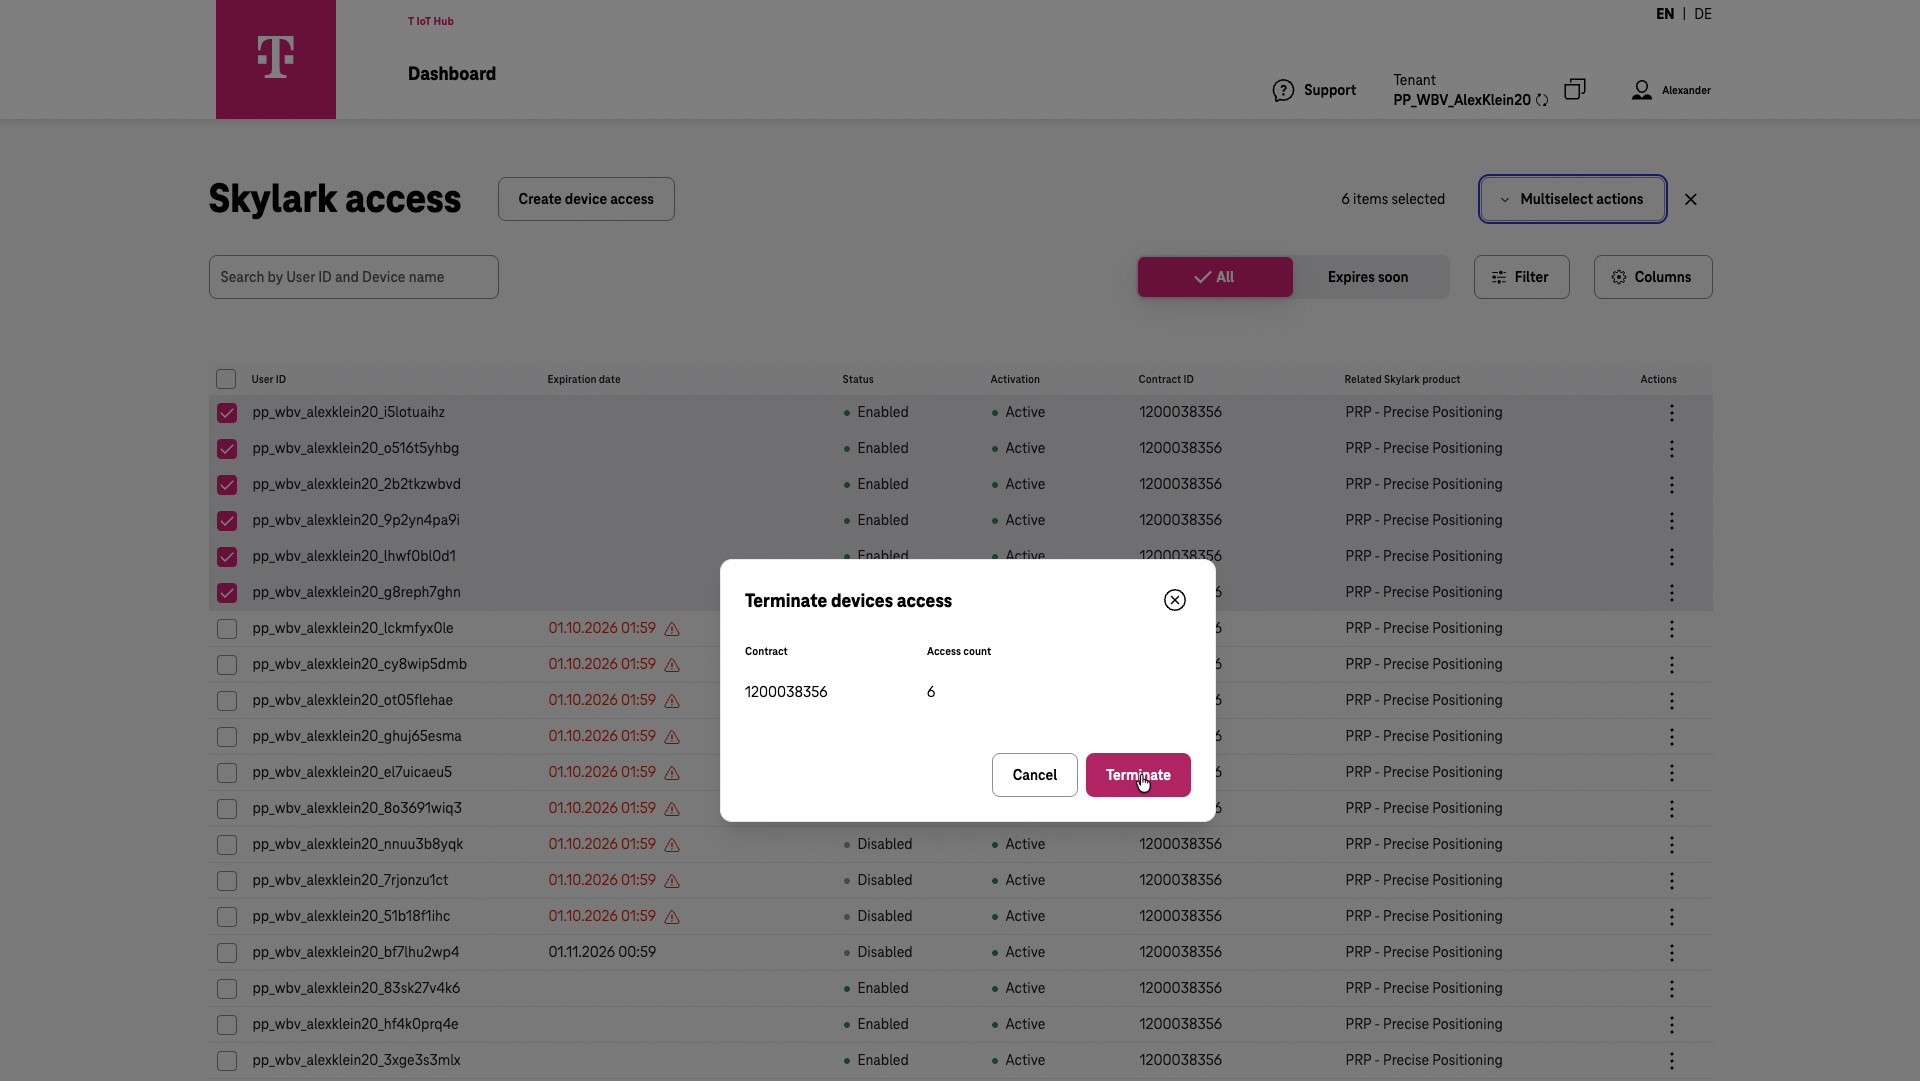
The accounts are shown as “Disabled” but remain “Active” until the displayed “Expiration Date” at the end of the month. Because the expiration time is shown in UTC, it may differ from the local time displayed by your browser.