Device to Cloud Getting Started Onboard Lwm2m Devices Setup adeunis CO2/VOC
Introduction
This chapter describes how to setup the CO2 and VOC LwM2M sensor from adeunis to connect to the LwM2M server of Device to Cloud.
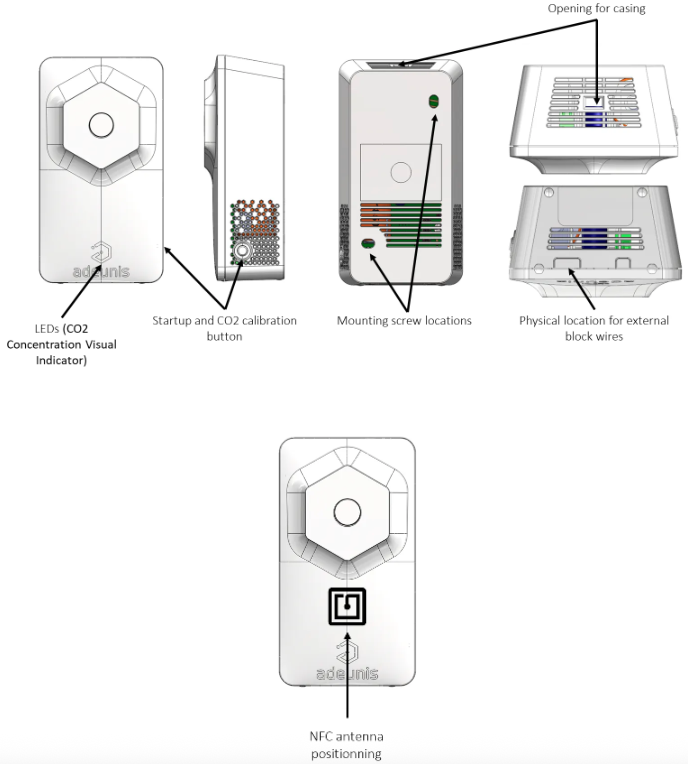
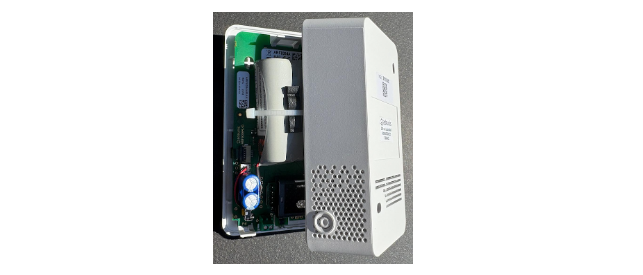
adeunis SERENITY CO2/VOC LwM2M sensor (from adeunis installation guide)
To setup your adeunis device for Device to Cloud you will go through the following steps:
- Get device documentations from adeunis web site
- Install NB-IoT/LTE-M IoT Configuration app from Google Play store or Apple App Store on your smartphone
- Install your SIM card in the device
- Configure the device according the steps in the installation guide
- Write configuration to device
These steps are described below.
Get device documentations from adeunis
Before you start, get the Installation Guide and User Guide for the SERENTIY CO2/VOC device from the adeunis web site.
Install NB-IoT/LTE-M IoT Configuration app
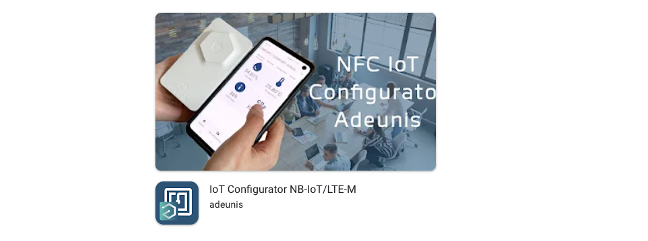
Once you have made sure that you have access to the device documentation, install the adeunis NB-IoT/LTE-M IoT Configurator smartphone app from the Google Play store or Appls App store so that you can configure the device using your smartphone and NFC.
adeunis smartphone App in Google Play store or Apple App Store
Install your SIM card in the device
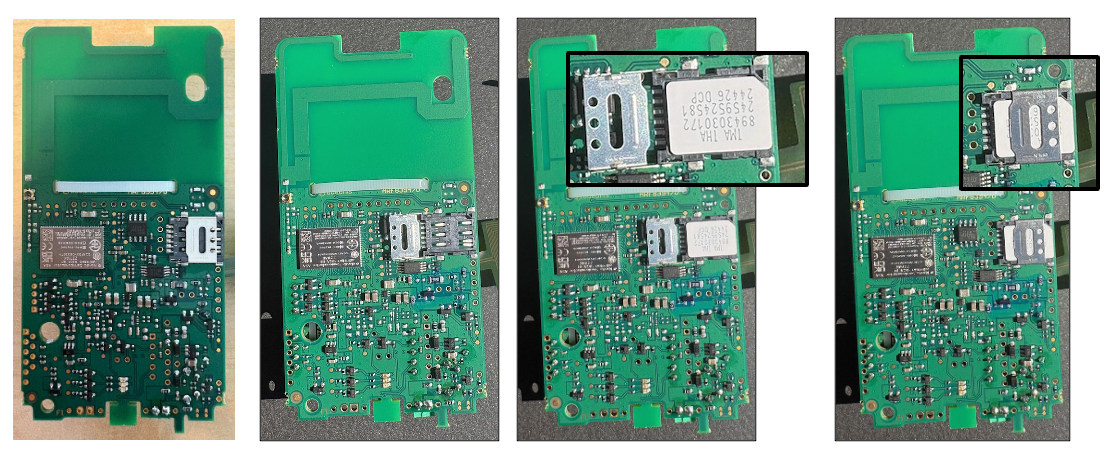
To install your nano SIM card into the device, open the casing. The User Guide describes the installation of the SIM Card in chapter 4.3 SIM Card Installation. To give you a litte help, some images are shown below.
To open the device, use a small screwdriver or similar tool to press the latch inside the small rectangular opening on the top side of the device slightly inward while simultaneously pulling the cover slightly upward at the top edge. This should allow the cover to fully open and be removed.
adeunis device after removing the cap
Slide the cover of the SIM card holder gently inward, parallel to the circuit board, until you feel a small resistance point being overcome, allowing the cover to flip open.
Flip open the cover of the SIM card holder and place the SIM card with the contacts facing downward and the notch facing outward.
Afterward, close the cover of the SIM card and slide it gently outward until you feel the resistance point being overcome again.
Insert SIM card into adeunis device
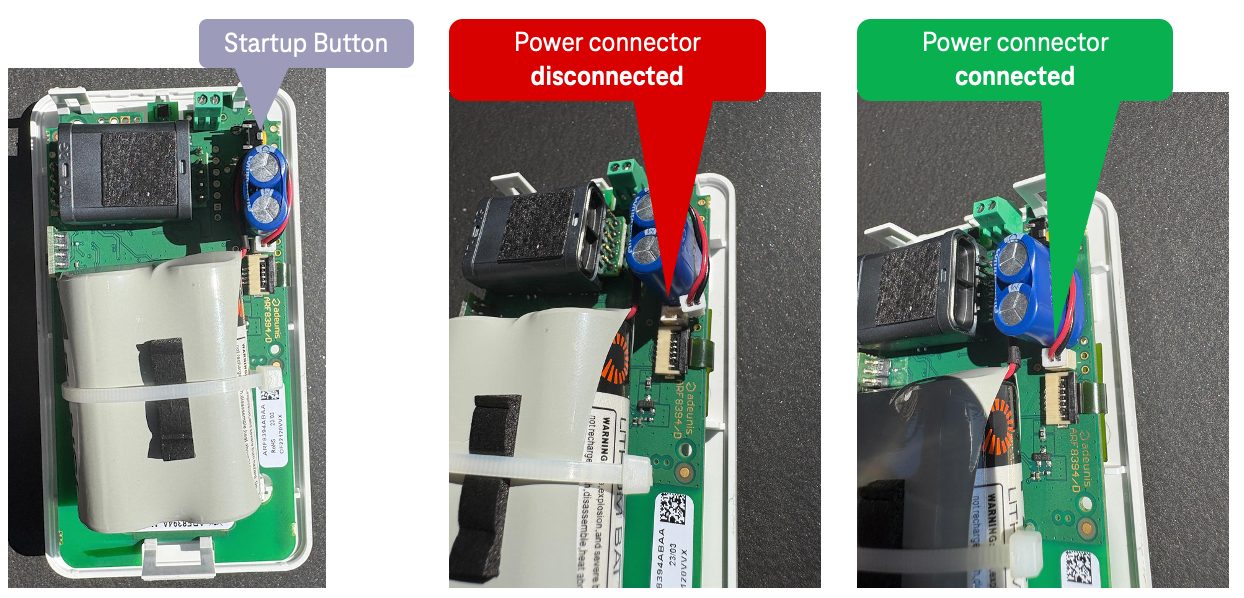
Great, you have now inserted the SIM card and you can reassemble the device. This means you can click the circuit board back onto the cover, and then can click the cover with the circuit board back into the housing.
When reassembling the cover with the housing, make sure that the startup button on the outside of the housing is on the same side as the switch inside the housing near the blue capacitor (see image).
Opened adeunis device
After you have closed the device completely you can go the next step to configure your device via NFC with the smartphone app NB-IoT/LTE-M IoT Configurator installed previously.
Configure the device according to the steps in the installation guide
To initially configure your device for Device to Cloud, start the smartphone app NB-IoT/LTE-M IoT Configurator on your smartphone, and hold your smartphone directly to the lower half of the front side of the device until the app indicates that the device configuration is being read or has been read.
adeunis smartphone app "NB-IoT/LTE-M IoT Configurator" (from adeunis installation guide)
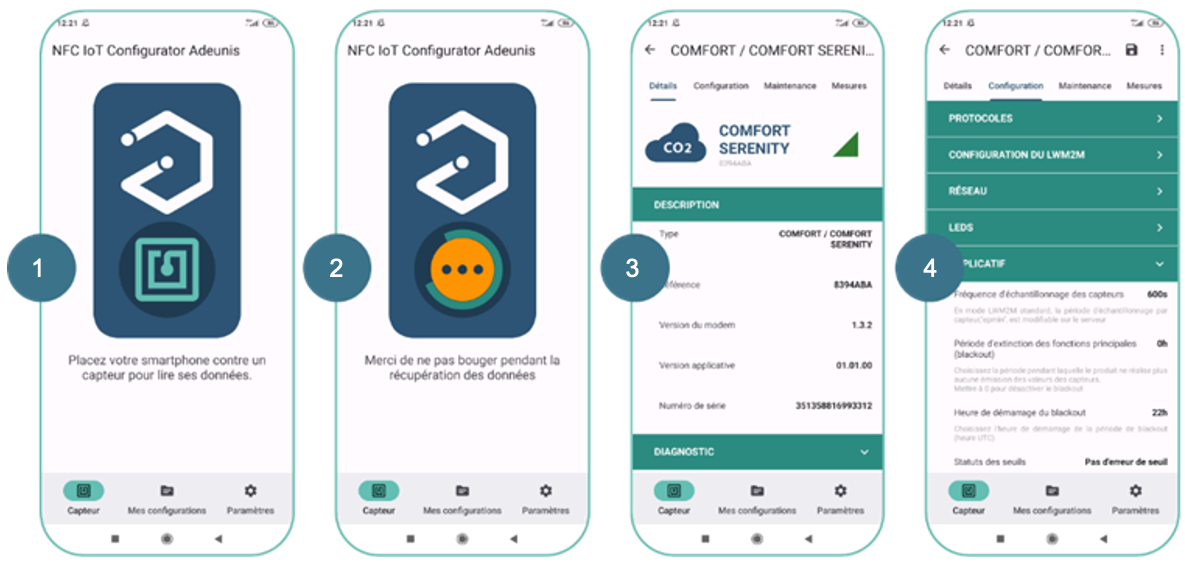
To configure your device, navigate to the Configuration section of the smartphone app. The general approach of the configuration is very intuitive. For a detailed understanding of the device configuration, please consult the Installation Guide and the User Guide from adeunis.
A look into the smartphone app will show you that the device offers many different configuration options. To make it easier for you, below is a complete configuration for:
- a LwM2M server from Device to Cloud without bootstrapping,
- a SIM card from Telekom Deutschland,
- usage of the device in Germany
| Activation/Product activtion Name | Value | Comment |
|---|---|---|
| Product mode | PRODUCTION |
| Connectivity/Protocols Name | Value | Comment |
|---|---|---|
| Data transfer protocol | LwM2M | |
| Product-Server communication | PUSH |
| Connectivity/LwM2M Name | Value | Comment |
|---|---|---|
| PSK identity (LwM2M server) | Use the IMEI which is shown in the Description tab of the app. Make sure that your PSK identity doesn’t contain any prefix such as urn:imei:. This is currently not supported by Device to Cloud. | |
| PSK key (LwM2M server) | Use the key which you got from adeunis or your own key in HEX. | |
| Short identifier of the LwM2M server | 1 | |
| LwM2M server URI | coaps://lwm2m.scs.iot.telekom.com:5684 | |
| LwM2M Lifetime (seconds) | 1800 | Reregister the device every 30 minutes |
| PSK identity (bootstrap server) | ||
| PSK key (bootstrap server) | ||
| Bootstrap server URI | ||
| Unique device name | Use the IMEI which is shown in the Description tab of the app. Make sure that your unique device name doesn’t contain any prefix such as urn:imei:. This is currently not supported by Device to Cloud. | |
| Reliable notifications | Activated | |
| LwM2M context erase | Off |
| Connectivity/Network Name | Value | Comment |
|---|---|---|
| Network selection | Manual | For the beginning we configure the mobile operator manually, and we don’t let the device search for it by itself. |
| Network to use in manual mode | 26201 | Since we assume that you use the device within Germany (262) the network of Deutsche Telekom (01) shall be used (For other networks in other countries please refer to Network Roaming Info ). |
| Connection preference | NB-IoT first, LTE-Cat-M1 next | |
| Frequency bands | 8,20 | Frequency bands for NB-IoT and LTE-M of Deutsche Telekom (For other frequency bands in other countries please refer to Network Roaming Info ). |
| APN | internet.m2mportal.de | M2M APN of Telekom Deutschland SIM cards. |
| Application/General Name | Value | Comment |
|---|---|---|
| Sensors sampling frequency (seconds) | 1800 | |
| Transmission frequency (seconds) | 1800 | We transmit the measurement every 30 minutes |
Write configuration to device
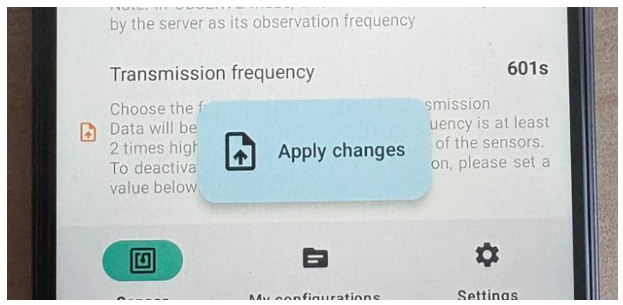
Once you have completed all your changes of the configuration in the NB-IoT/LTE-M IoT Configurator app, you can write back the changes to the device. When you have changed any value of the configuration, the app shows the notification window Apply changes
Apply changes notice in smartphone app
Normally you device should reboot automatically and connect to the mobile network. After this, the device performs a LwM2M registration at the LwM2M server of Device to Cloud. As long as the device led blinks red, it is still not connected and still trying.
Congratulations for your success !!!