Device to Cloud Getting Started Integrate your application via HTTP webhook
Introduction
This chapter describes how you can integrate your application using an HTTP webhook with Device to Cloud, so that it can be used as an endpoint for the uplink message routing.
If your application’s HTTP webhook is not readily available for initial testing with Device to Cloud, this Get Started guide will help you temporarily use a test API endpoint at webhook.site .
The following three steps will guide you through your first integration of an HTTP webhook as a Device to Cloud application:
Create simple webhook at webhook.site
In case you don’t have a webhook URL of your own application available, you can create a test webhook endpoint by simply opening the website https://webhook.site .
https://webhook.site
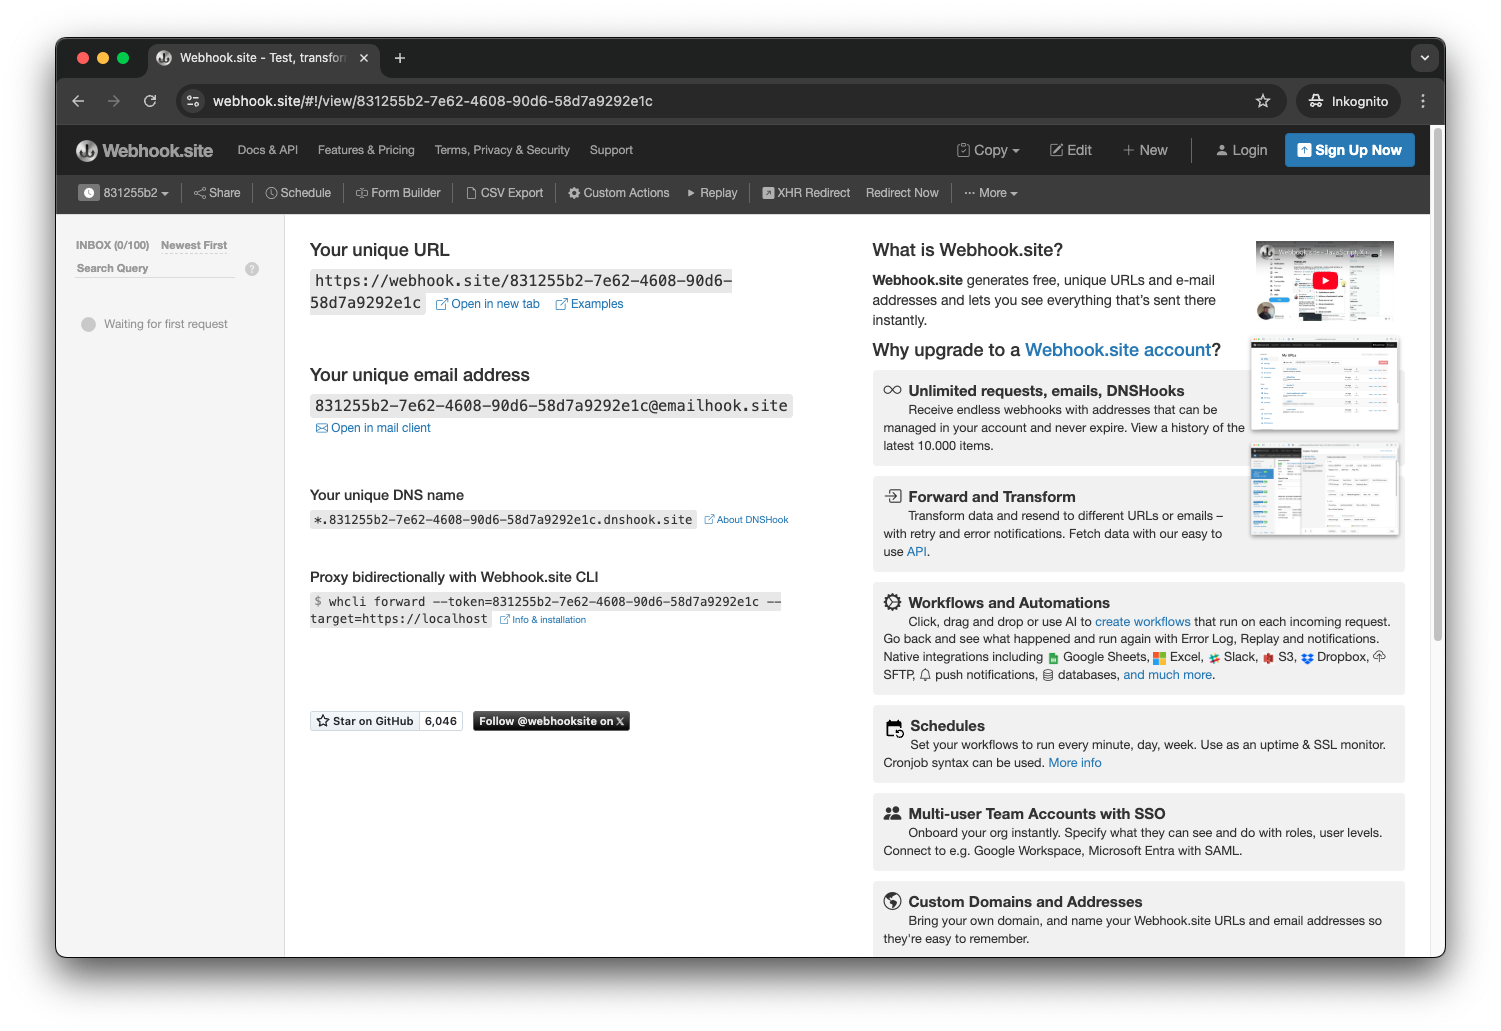
If you open https://webhook.site in your browser, a unique temporary webhook URL is created automatically. Keep the browser window open to see the messages sent from Device to Cloud to this webhook. We will use this webhook to create a Device to Cloud webhook application.
To copy the webhook URL, simply click on it (e.g., https://webhook.site/831255b2-7e62-4608-90d6-58d7a9292e1C in the example above), and it will be copied to your clipboard.
Register your webhook as application in Device to Cloud
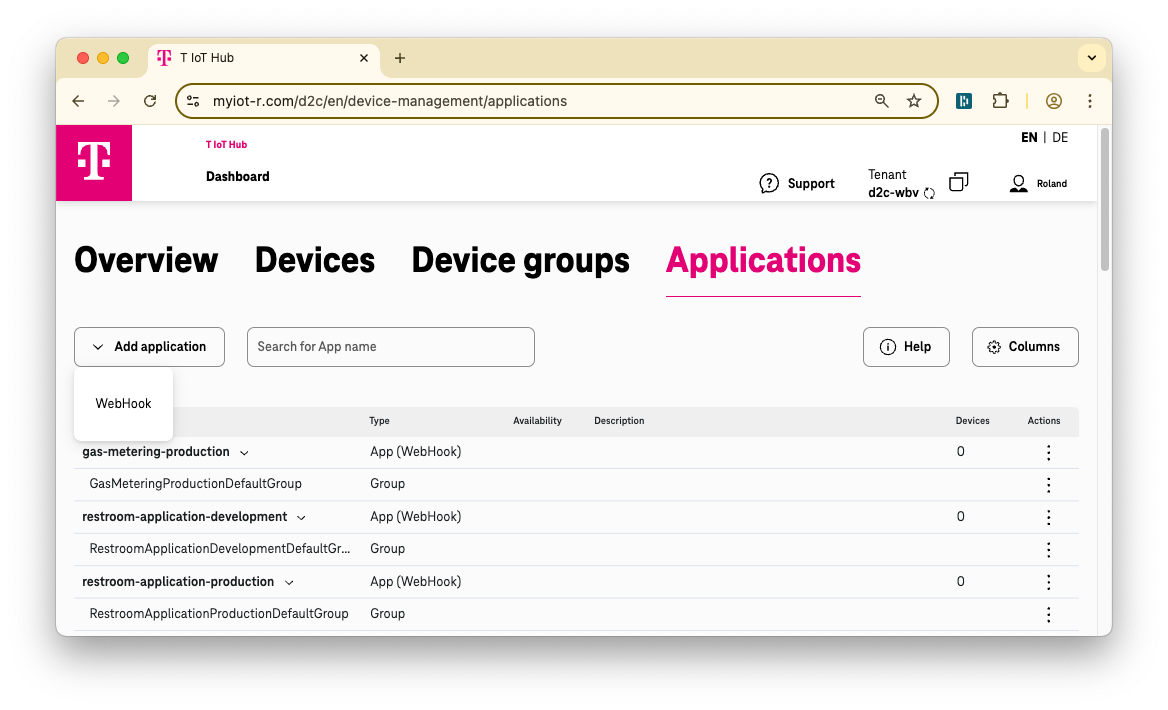
To allow Device to Cloud to send uplink messages from devices to your application using a webhook, you need to create a WebHook Application in Device to Cloud.
Go to the Applications tab in Device to Cloud, click the Add application button, and choose the WebHook option. This will open a dialog where you can set up your WebHook Application.
application tab
Add webhook application dialog
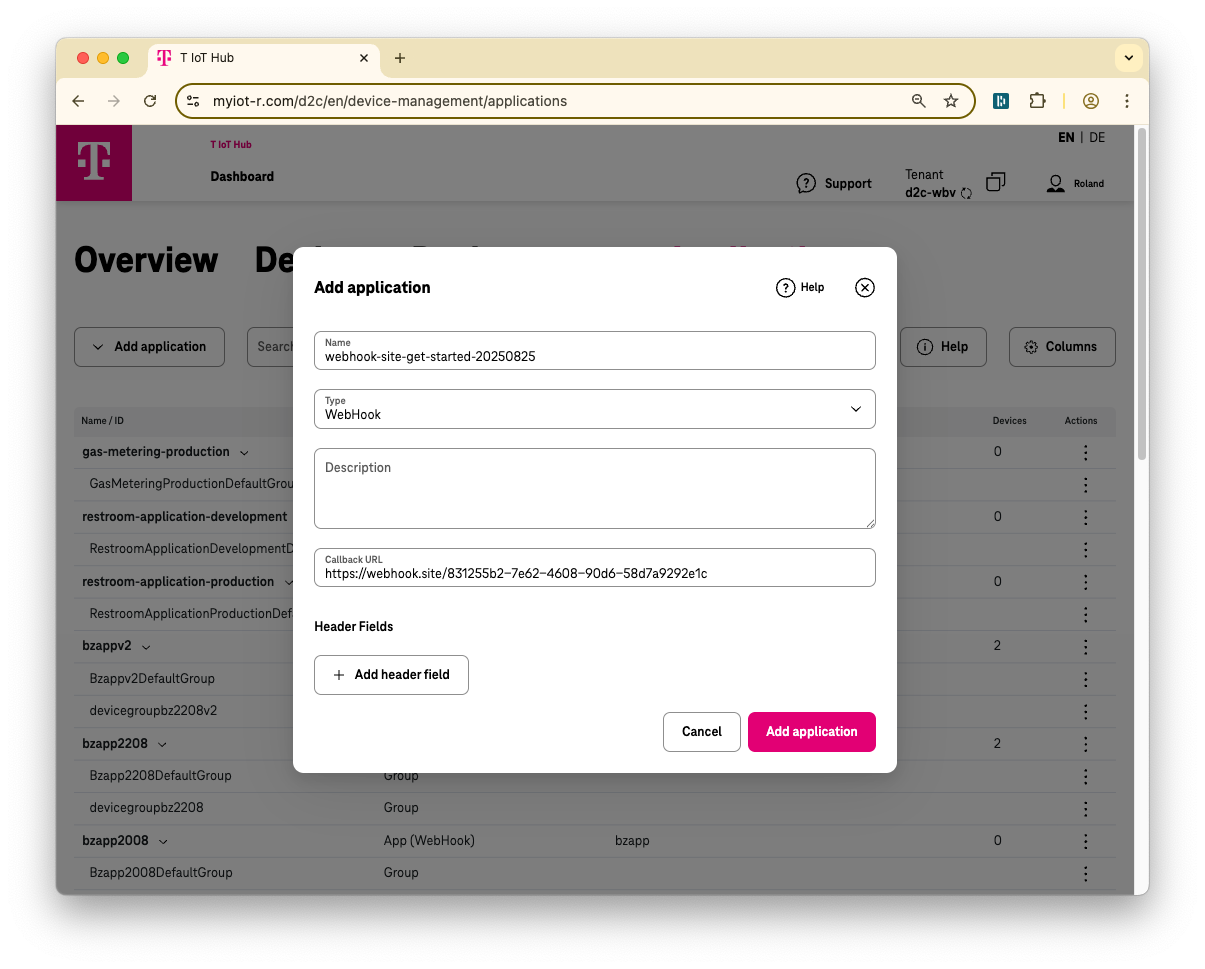
In the Add application dialog, enter a unique Name for your application and the Callback URL of your webhook.
For initial tests using a webhook from webhook.site
, you do not need to add any extra Header Fields.
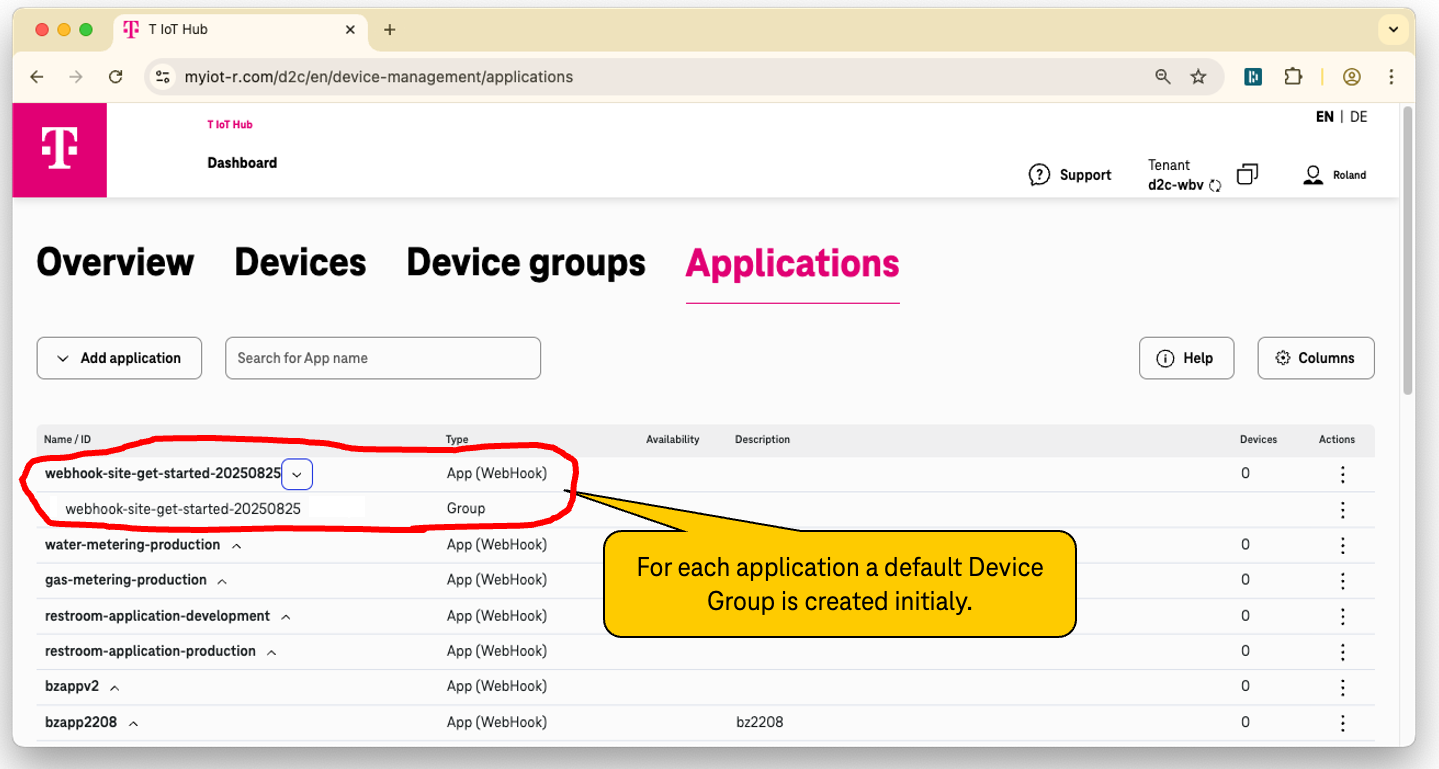
After clicking the Add application button in the dialog, the Application object and a corresponding default Device Group with the same name is created in Device to Cloud. Next, close the confirmation window and refresh the Applications tab in your browser. You will see both at the top of the list of objects in the Applications tab (see figure below).
Newly created application with its default Device Group
Verify your webhook
To check if Device to Cloud can send messages to your previously created Webhook Application, you need a Device object. Simply assign this Device object to the default Device Group which has been automatically created for the Application before.
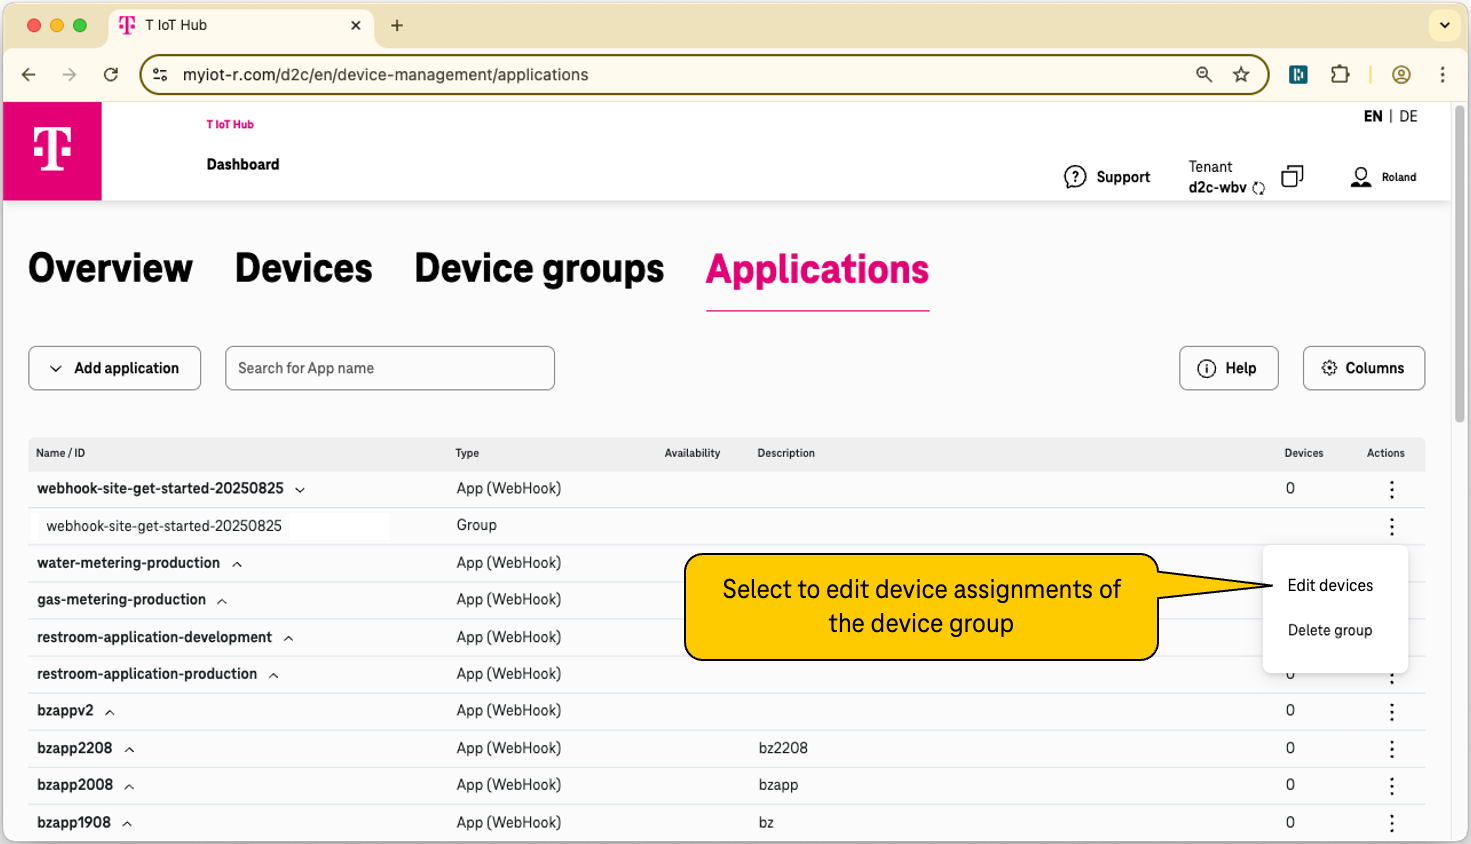
To assign the Device to the Device Group go to the Applications tab and select the Edit devices function in the context menu of the Application’s’ Device Group (see figure below).
Device group context menu
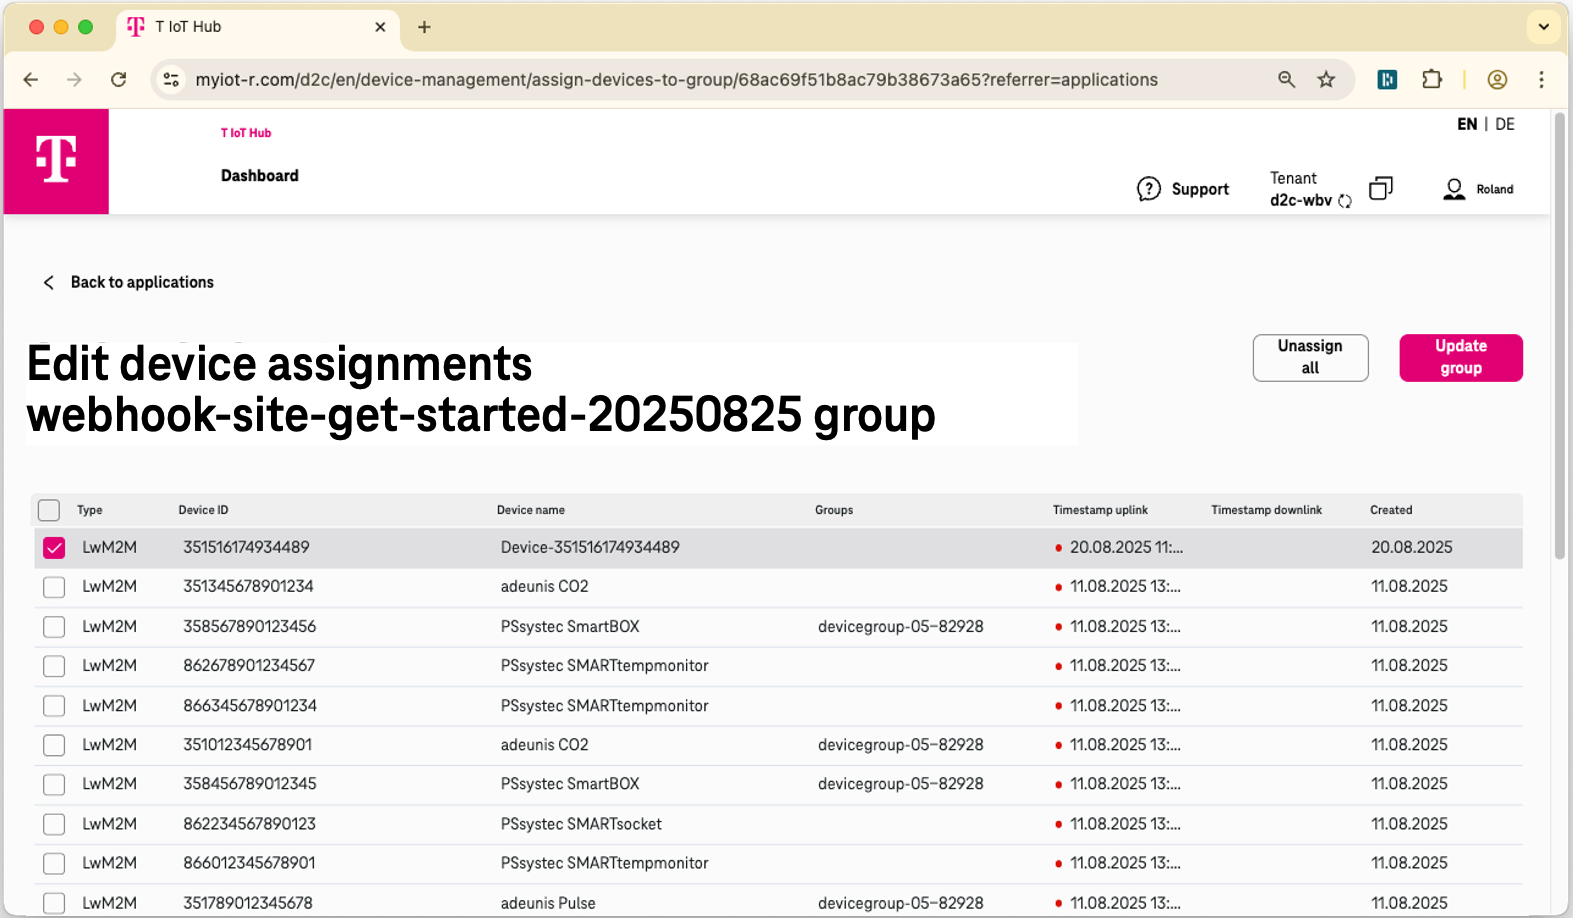
On the Edit device assignments page, select your device using the checkbox on the left side, and click the Update group button at the top right corner (see figure below.)
Edit device assignment of a device group
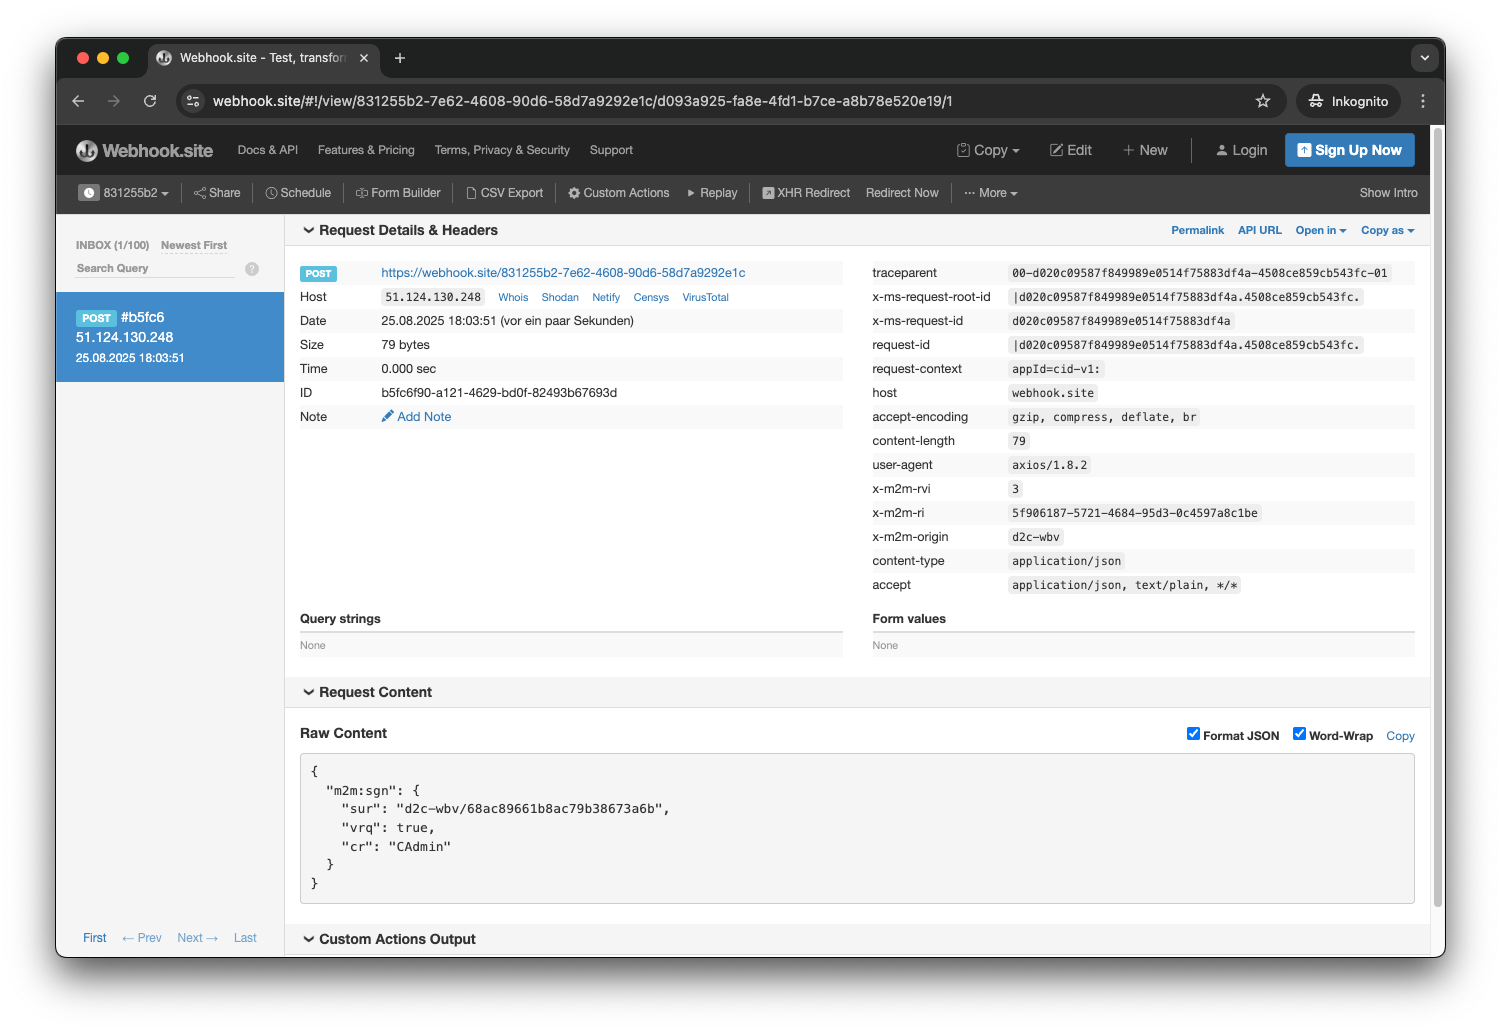
For every Device you assign to a Device Group, Device to Cloud sends a oneM2M Signal* to inform the Application linked to the Device Group about a device subscription.
{
    "m2m:sgn": {
        "sur": "d2c-wbv/68ac89661b8ac79b38673a6b",
        "vrq": true,
        "cr": "CAdmin"
    }
}
| Element name | Type | Description |
|---|---|---|
| m2m:sgn | oneM2M type | Signal or subscription notification |
| sur | string | Subscription resource name |
| vrq | boolean | Verification request. If set to true it shall be checked if the application is still reachable. If the application URL is not reachable, times out or returns a HTTP response code other than OK (2xx), and the subscription is NOT created. |
| cr | string. | oneM2M id of the signal originator |
If everything is set up correctly, you should see the oneM2M Signal in the webhook.site page that you have kept open during this tutorial (see figure below).
Webhook site after receiving the oneM2M subscription notification